Sometimes, when you upload files to WordPress, you get the title wrong. Or your image…
One of the first plugins I ever reviewed for this site was WP Smush.It. That plugin optimizes images by uploading them to a server. It serves and then pulling down the results back to your WordPress Install. EWWWW Image Optimizer offers similar functionality but performs those optimizations on your local server.
What’s It Do?
EWWW Image Optimizer runs lossless compression on images automatically that are uploaded to WordPress. It uses several free server tools (jpegtran, optipng, pngout, and gifsicle) to perform these optimizations and can either replace or keep a copy of the original uploaded file. If these libraries are not automatically installed on your server, which is the case in most shared hosting environments, the plugin comes bundled with a way to automatically install them. The plugin also features a way to convert files to a different extension, JPG to PNG, PNG to JPG or GIF to PNG, which can yield smaller file sizes. You can also optimize or bulk optimize previously uploaded images within the WordPress media library.
How’s It Work?
The first thing to do when installing the plugin is to make sure that you have all the necessary server tools installed. To do so install and activate the plugin, then go to Settings -> EWWW Image Optimizer. At the top of the screen, you will see a list of tools that you need (jpegtran, optipng, etc.) and their status. If you are on a shared hosting environment like Media Temple or Dreamhost, then these will probably already installed. But these extensions have also been bundled with the plugin, so there shouldn’t be a problem if they are not. If you are having trouble make sure that your wp-content folder is writeable, and then follow the plugin’s installation instructions, but it will basically require you to copy some files from the plugin’s directory to your wp-content folder and then try the installation again. If all else fails, then you can try installing these services using root access.

EWWW Image Optimizer will let you know the status of optimization tools
The one exception to the above instructions is pngout, which helps to optimize PNG images, but can be very CPU intensive and is a closed source software. If you wish to use pngout, then uncheck the “disable pngout” button in settings, then scroll to the top of the page and click the “Install automatically” link next to pngout. This will install the software on your server.
The rest of the settings page controls the compression of the plugin. The first section Cloud Settings can be ignored unless you are using EWWW’s paid cloud optimization service, which I don’t have any experience with.
The next section, General Settings controls some global options. Check the “Debugging” box if you are trying to troubleshoot problems with the plugin. The next couple of options have to do with Scheduled Optimization. If you check the box, then the plugin will run a cron job every hour which will scan folders for images, and then optimize them. This applies to images that exist outside of your WordPress media library. Just enter the relative path from the root to the directory you want to scan, and the plugin will check back every hour for new images to optimize.
Next up, you can disable any of the optimizations by service. So, if you want to stop optimizing JPG’s, just check the box next to “disable jpegtran,” etc. The only service disabled by default is pngout because it is so resourced intensive. It is best to leave this disabled unless you have a reason to switch it on.
The next section is Optimization Settings where you can “Remove JPG Metadata” which I recommend, and tweak the optimization levels of PNG compressions. Keeping these at their default should work just fine, but the higher you increase compression, the more server load will be required and you may end up losing some quality.
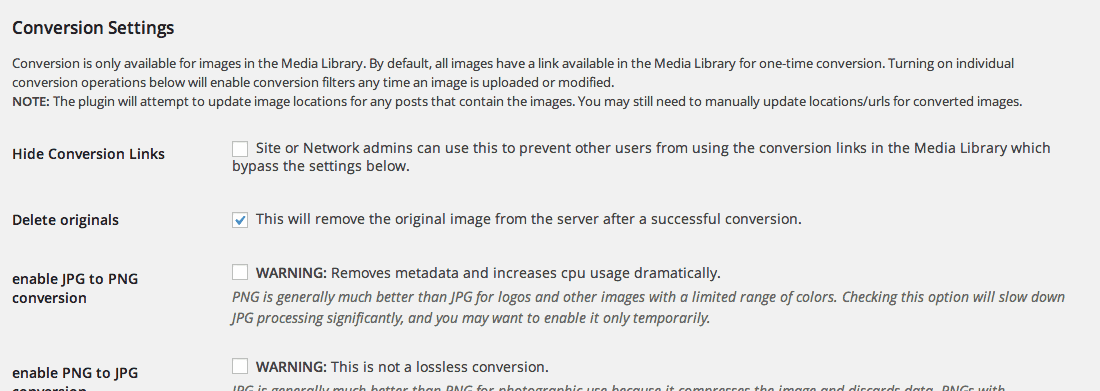
The last section is Conversion Settings. This is for more advanced optimizations, where you will convert one file to another filetype to decrease file size. You can check the box, next to “Delete Originals” if you want to remove the original files after they are converted. Then you can choose which type of conversion you want to perform by default. You’ll be able to make these conversions on an image to image basis from your Media Library, but if you enable JPG to PNG, PNG to JPG or GIF to PNG conversion then these will occur automatically on file upload. GIF to PNG is the safest of the three, though this will remove animations from GIF files so only enable this if that is not a problem.

A few conversion settings
Once everything is set-up, compression will occur each time a new image is uploaded to WordPress automatically. If you go to Media -> Library you will see a new column next to your images labeled “Image Optimizer” which will show you the amount each image has been reduced. If you would like to optimize an image that has been uploaded previously, you can either click the “Optimize Now!” link in this column, or check the boxes next to each image you want to compress, and then select “Bulk Optimize” from the Actions drop-down.

Each files savings will be listed in the Media Library
You can also optimize all of the images in your Media Library all at once, by going to Media -> Bulk Optimize. It will tell you how many images there are to optimize. After you click the “Start optimizing” button a progress bar will load to show you the status as each image is optimized. The time that it takes will depend on how many images you have.
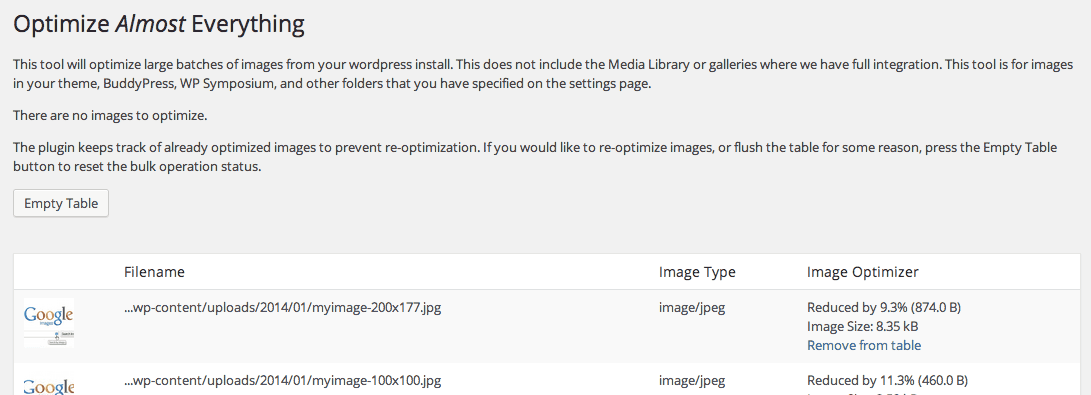
You can also go to Tools -> Optimize More. This will scan your WordPress install (themes, plugins, BuddyPress, etc.) for images that exist outside of your Media Library. You can then click the “Start Optimizing” button to automatically compress these images as well. I recommend this process to catch images that you might otherwise miss. While tampering with the folder already, you should also scan your folders with a free security plugin for WordPress. Better be safe than sorry.

Optimize files outside of the Media Library
The plugin also includes special menus and options for BuddyPress, NextGEN, and the WP Image Editor class so it can be integrated with most, if not all, media plugins out there.
Costs, Caveats, Etc.
EWWW Image Optimizer is completely free and updated fairly often with new features and functionality. If you are having problems with the plugin or would like to request a new feature, you can visit the support forums.


