If you're a WordPress developer, chances are from time to time; you just want a…
You may have noticed in some of the posts that I put up the code in an easy to digest, and easy to copy format. This is called syntax highlighting, and it involves breaking up the posted code into tokens and assigning different CSS classes to different code types. It can be a real pain to set up on your own, which is why I use SyntaxHighlighter Evolved.
What’s It Do?
SyntaxHighlighter Evolved enables you to use different shortcodes to post syntax highlighted code right in your post editor. It uses Alex Gorbatchev’s SyntaxHighlighter Javascript library to accomplish the highlighting and integrates it right into your WordPress install.
The plugin gives you access to about 30 languages, including PHP, HTML, CSS, Ruby, Perl and more. It also allows you to customize the look of your highlighted code, with different themes, line number options, and shortcode parameters that let you change the look from post to post.
How’s It Work?
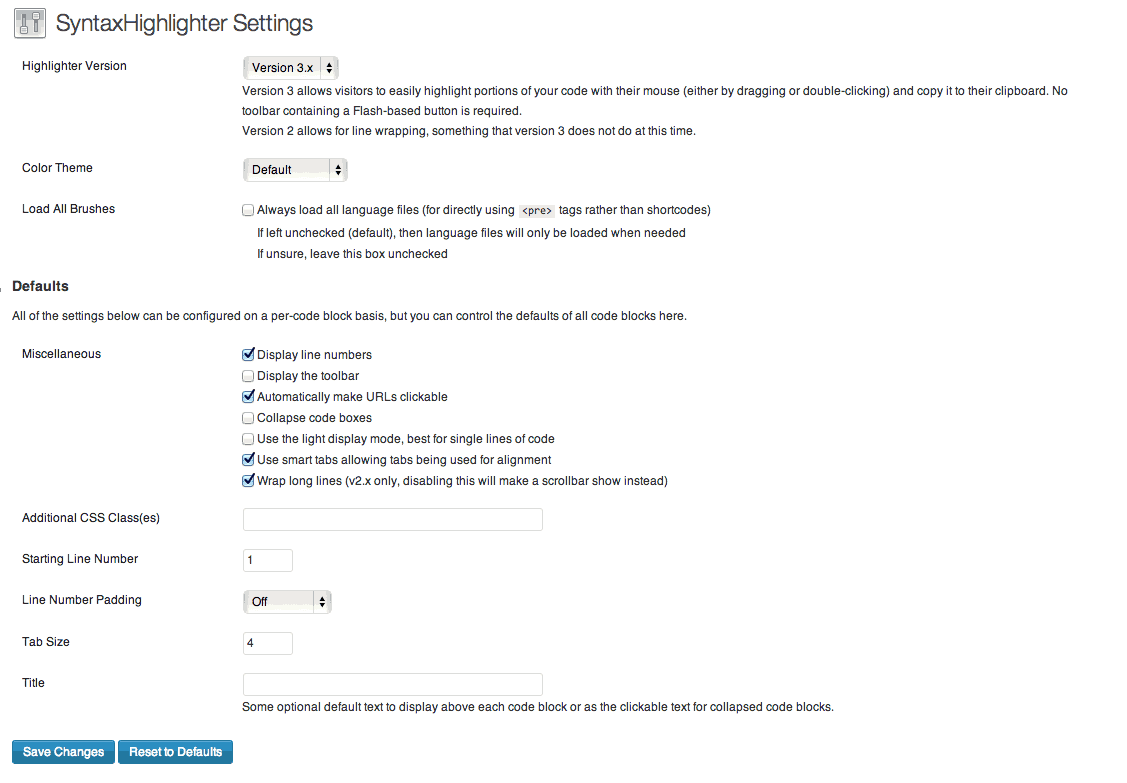
After you install the plugin, you will have access to a Settings page called SyntaxHighlighter. Use this to customize the look of your highlighted code. First select from a few different themes (Midnight, Django, etc.). If you are unsure which to use, stick with the Default for now.

General Settings
There are also a couple of Miscellaneous options. Turn on or offline numbers, or whether your code should show a number for each line of code. You can choose to display a toolbar which has options like Raw code or print and select from a few options which will change the overall look of your code box. Most are pretty straightforward, so select the options that match your personal preferences.
Under this, you will see a few more options to customize the look of your code box. You can add additional CSS classes, define Tab size, change your line number options and add a title. These options are more or less optional, so you can leave them on default and everything will work just fine.
In order to actually use the code, you need to make use of the SyntaxHighlighter shortcodes. Basically, you place your code inside of a shortcode that defines what language that code is. So for PHP, you use the [
] shortcode and for HTML you use the [
] shortcode, etc. At it’s most basic, your code may look like this:
[
<html>
<head></head>
  <body>
    <div class="first-div">
        This is a box of content!
    </div>
  </body>
</html>
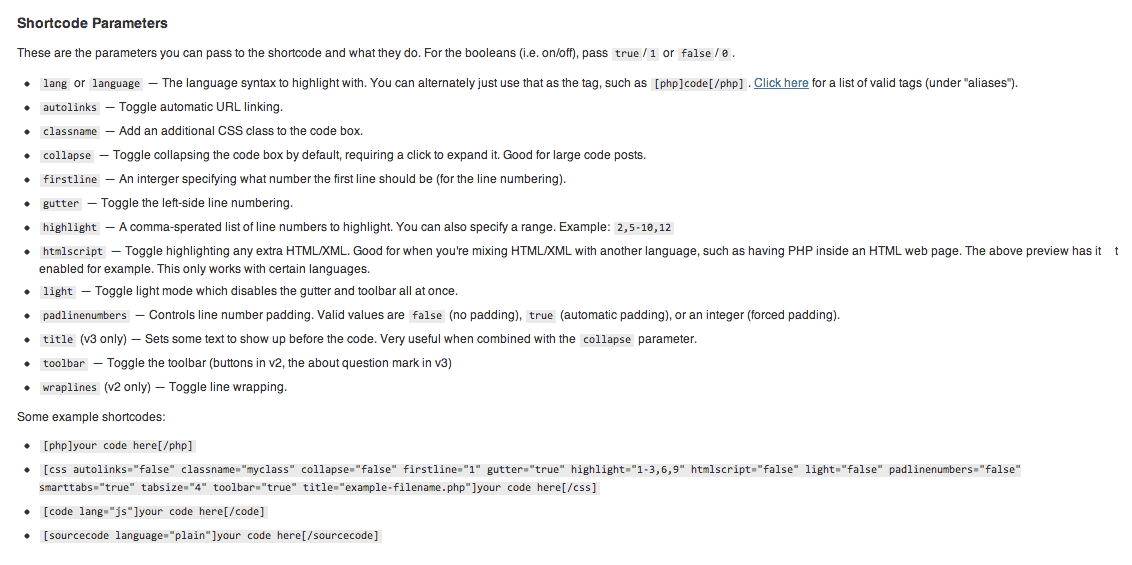
There are also a number of shortcode parameters you can use to customize highlighting on a post by post basis. These are all detailed on the settings page. Let’s say you have some Ruby code where you want the HTML within the PHP to also be highlighted, starting at line 8, with a line number gutter, automatic URL linking and a special title. Your code would look like this.
[php autolinks="true" firstline="8" htmlscript="true" gutter="true" title="MyCodeBox"]
    echo 'Middle of my code'; // Starting from the middle here
    echo '<div class="samplehtml>Some HTML</div>
  return;
[/php]

A complete list of shortcode parameters
There is also a way to add your own custom brush if you want to use a language that is not supported, but this will require some development work. If you want a little bit more control over how your code will look, it’s best to just add a CSS class in your settings, and use that to add styles that change colors, typography, etc.
At its most basic, there is not much to do beyond using the shortcode and its parameters. Everything else will be taken care of automatically.
Costs, Caveats, Etc.
SyntaxHighlighter is a free plugin, and I definitely recommend it. Usually I don’t advocate plugins with shortcodes, but in this case, it is the best answer to the problem. Alex Mills is active in the WordPress community, and his site has plenty of information about the plugin and how to use it if you are looking for more information.
He also does a good job of supporting the plugin at the repository’s forums, and the plugin is updated to keep up with WordPress updates and patch bugs.


