You may have had someone tell you before that making money online is easy. Maybe…
Trying to make your website look great on all devices is no easy task, but it is undoubtedly necessary. If you go ahead and look at your monthly traffic report, you will notice that many people who are visiting your website are using mobile devices.
That is why you have to use elements that can change and adapt depending on the device used to view your website. For example, when it comes to images, you need to have some sort of way of scaling the images for different devices.
With that being said, your best bet is to simply use SVG (Scalable Vector Graphics) files because they scale very quickly and work without any issues (if you set them up correctly)!
For that reason, we will now talk about a plugin that can give you many features and options for using SVG files.
So, what is SVG Support anyway?

It is a WordPress plugin that simplifies the entire process of using and restricting SVG. The best thing about it is that it enables you to simply upload your SVG file to your media library as if it were any other media file. With it, you can also, very easily, embed your full SVG file code using a simple IMG tag.
A list of main features:
- SVG support for your media library (Very handy if you don’t want to be uploading the same image in different sizes over and over again).
- You can inline your SVG code.
- You can use this plugin with the new Image Widget (WordPress 4.8+).
- You will be able to style your SVG elements directly using CSS.
- You can also animate your SVG elements using CSS and JS.
- There is a lovely settings page where you can find all of the necessary instructions that will help you use the plugin more effectively.
- You can restrict the SVG upload ability to administrators only. (This is very handy because you do not want everybody on your team to be able to play around with this).
- You can set a custom CSS target class.
How to install SVG Support
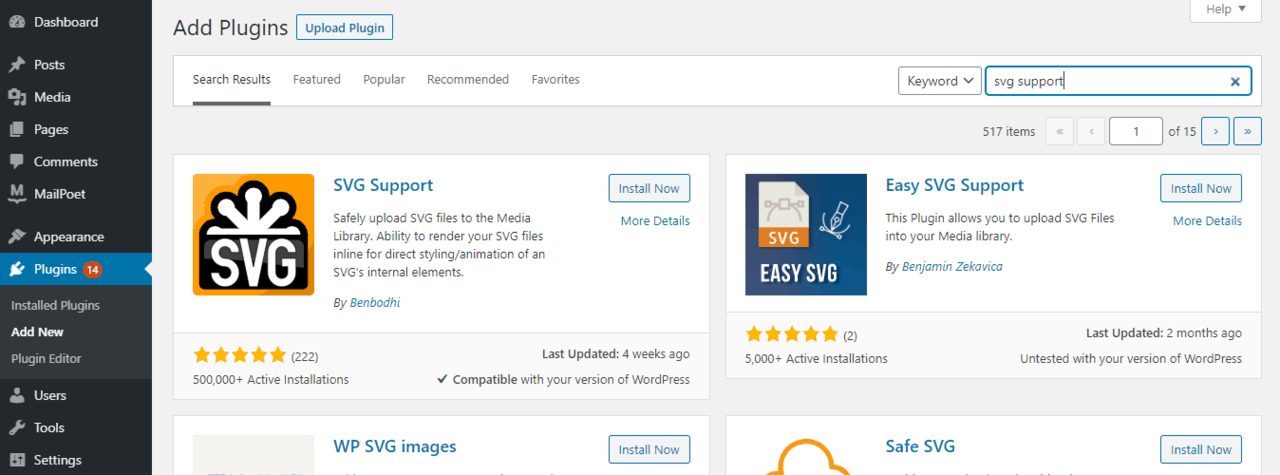
First of all, you have to download and install the plugin before you can use it. So simply download and install it as you would any other WordPress plugin.

By this, I mean that you have to download it and then unzip the file into your “plugins” folder, which is located in “/wp-content/plugins/”. Alternately, you could go and use the “Automatic Installation” feature.
How to use SVG Support
Once you have successfully installed and enabled the plugin, you can use it. In other words, you can now upload SVG files to your media library as you would any other media file.
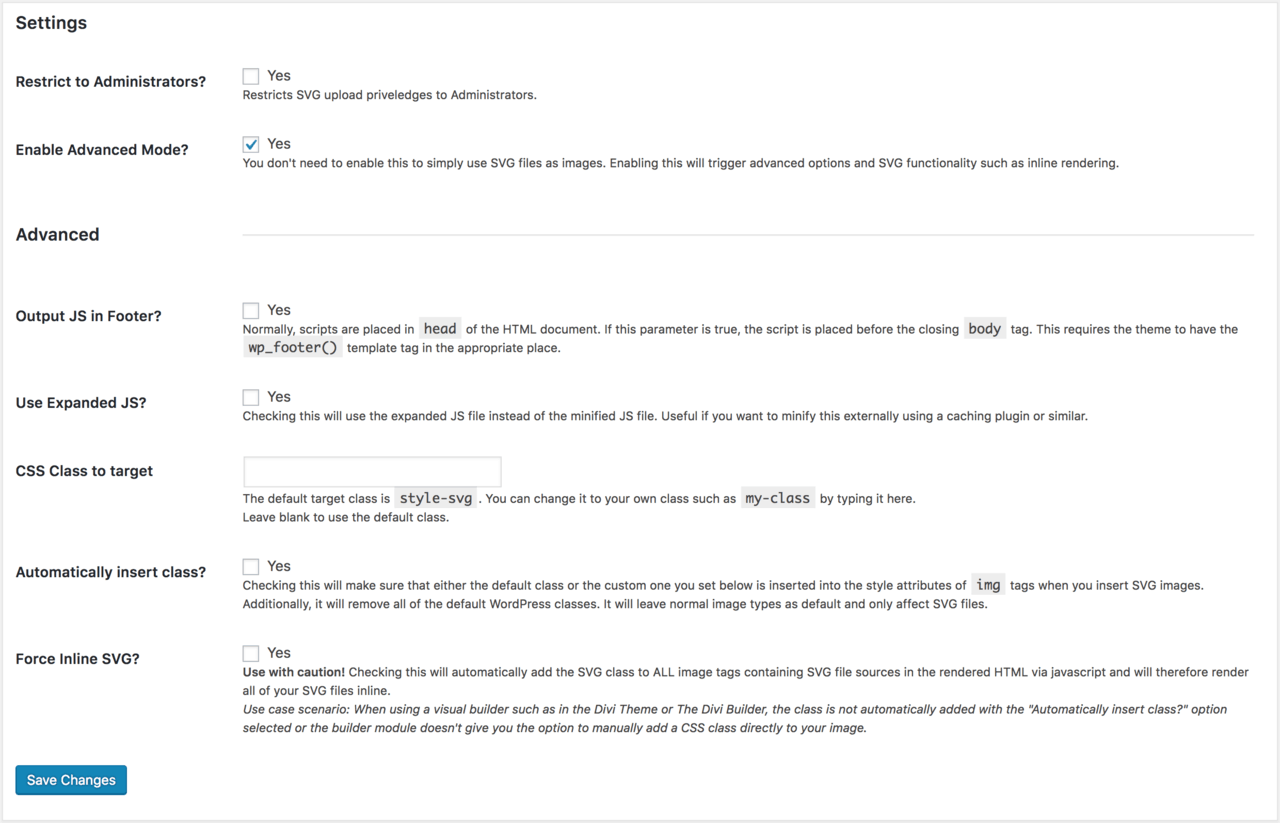
As the administrator, you can go to the admin settings page (Settings > SVG Support) and restrict all SVG file uploads to the administrator only. You can also define a custom CSS class that you can target if you so wish.

You can then enable the “Advanced Mode”, also under Settings > SVG Support.
If you have enabled “Advanced Mode”, you can now embed your SVG files just like you would a standard image.
Also, by adding the class “style-svg” to your IMG elements, this plugin will swap them out with your complete SVG code.

Next, you can go into “Settings” to change up all of the settings associated with the plugin. Here, you can decide if you want to output JS in the footer.

You can also choose if you’re going to use expanded JS, specify the CSS class you want to target, decide if you want the plugin to automatically insert the default or custom class and if you’re going to force inline SVG.
Cost, caveats, etc.
This plugin is open source and is free for you to use. It works great, and there haven’t been any issues reported regarding it.
So just make sure that you don’t use other similar plugins that might conflict with this one and break your site; otherwise, you’re good to go.


