WordPress has had image gallery functionality for a little while, but it basically only allows…
MaxGalleria markets itself as the alternative to NextGEN. In that sense, their functionality is very similar, allowing you to create great looking galleries on the fly and put them anywhere on your site. And for creating basic, but customizable galleries, MaxGalleria Lite is perfect.
What’s It Do?
The Lite version of MaxGalleria allows you to create image galleries, with a customizable layout, captions, theme and out of the box Lightbox functionality. This is done by using a custom post type where you can create and edit new galleries, importing images from your computer and editing the metadata of each image. Galleries can then be included anywhere on your site using a shortcode. It’s also responsive and mobile friendly so you don’t have to worry about image resizing.
How’s It Work?
When you install and activate MaxGalleria Lite, you will see a new section in your admin panel labeled “Galleries.” Click on Galleries -> Add New to create your first gallery.
The first thing you will want to do is give the Gallery a title. This title won’t be output, but it is useful for organization purposes. Below this, you will see a meta box with an “Add Images” button. When you click this you will see two options, “My Computer” or “Media Library.” The latter option is only available to Pro users, so click on “My Computer.” Select the image you want to include in your gallery. Repeat this until you have included all of the images you want. Any image you upload to your galleries will also be imported into your Media Library for use elsewhere on your site.
Once you’ve imported your images, you will see a few different views at the top, “List,” “Rows” or “Grid.” Pick whichever you prefer, though I usually just keep it on List. To change the order the images will appear in the output gallery simply drag and drop them around until you have the order you want. Click the “Edit” button below each image in order to edit the metadata associated with each image. You will want to pay special attention to the “Caption” text field, as you have the option of outputting this alongside images on your site. Hit the “Save Changes” button to save your data. Click “Remove” to permanently remove any image from your gallery, and “Exclude” to hide the image. If you click the latter, you will have the option to “Include” later if you wish.
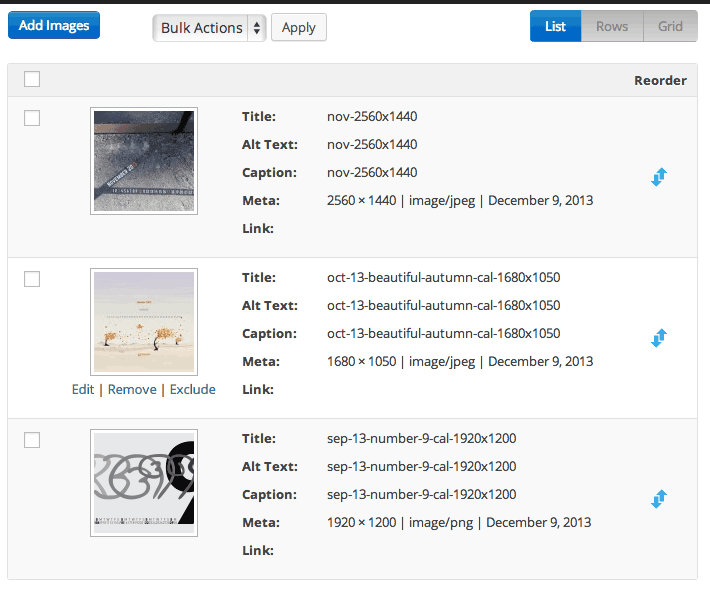
View and arrange images in different formats
On the right side of the gallery editor, you will see a list of options for gallery output. The first section is “Layout.” The Template option only includes one theme, Image Tiles, in the free version, which will lay out the images in an even grid. Under Skin, you will have several different options, such as “Picture Frame,” “Portal” (round images), “Standard” (square images) and dark versions of each. Pick the Skin that fits your theme the best.
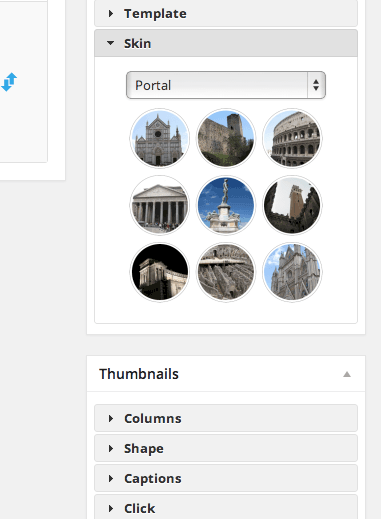
Choose a template that fits your site
Next up is “Thumbnails” which allows you to customize how the Gallery will look. Choose how many columns your grid should have and the shape of your thumbnails, square, portrait or landscape. Under “Caption” you can choose whether or not to include Caption text with your image, and select from a drop-down whether it should go above or below them. Lastly, the “Click” section defines what each thumbnail links to. You can select “Lightbox,” “Image Link,” “Image Page,” or “Original Image.” Lightbox functionality is included with MaxGalleria so there’s no need to install another plugin to get this going.
If you did choose “Lightbox” as your click option, the “Lightbox” section lets you customize how those look. Once again, you can choose whether or not to include captions with the lightbox, and choose exactly what the “Image Size” of the Lightbox images should be. Remember, MaxGalleria is responsive friendly, and that includes its Lightbox, so if you choose a custom size, think of the width and height as more of a max size then an absolute one.
The next section is “Description.” This gives you a textbox where you can enter a small description of the gallery itself, then choose whether or not to include this above or below your gallery. Lastly, you can “Reset” the gallery and start over if you wish. Just remember this is permanent.
When you are all done making changes to your gallery, click on “Publish” to push the gallery live. To include the gallery in your posts and pages you can use a shortcode with two different syntaxes. Either:
[maxgallery id="1111"]
or
[maxgallery name="my-gallery-name"]
Either one will work, so pick which one works better. If you need to view your shortcodes, you can go to Galleries -> Galleries, which has a list of all the galleries you have created, and a column that includes shortcodes you can easily copy and paste.
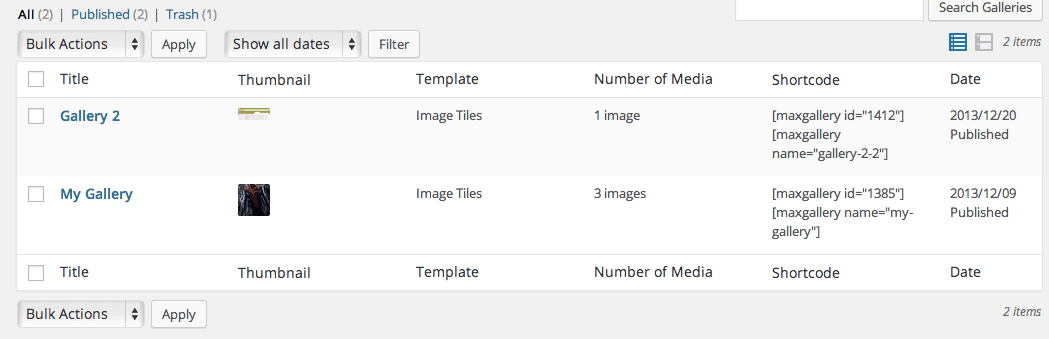
Easily view shortcodes in the Galleries list.
If any point you want to change the look of your gallery or add images, you can choose to edit it and click “Update” to save your changes.
Costs, Caveats, Etc.
MaxGalleria Lite is free, but there is also a pro version available, which includes Video galleries, carousels, sliders, more themes, and a few more features. If you are having trouble with the plugin, you can visit the support forums, or you can try the forums on the official MaxGalleria page for more support.