Toolbar Quick View, very very simply, adds a new view menu to your admin panel…
There are many, many different ways to use WordPress. As probably the most versatile CMS, WordPress offers countless possibilities, so having a few handy tools like Agiled to easily manage your business, or Spott for ultimate content creation experience. But some of you may wish to use it as a place for clients or users to quickly upload files, view them, and download them. To that end, File Away gives you an easy to use, and super customizable, front-end form that can be used to upload files to a directory of your choosing, and quickly view and download these files, all with a few shortcodes.
What’s it Do?
File Away, in its simplest form, is a plugin that allows you to add a file uploader to the front-end of your site which can upload files straight to a directory (any directory) on your server. This uploader uses AJAX to make sure that files can be uploaded smoothly, and comes standard with a progress bar, directory selection, and the ability to rename files on the fly. In addition, you can use a shortcode to display a list of files from your directories to users, to give them the ability to download a file straight from the front-end. You can also easily control who can view the upload form and directory listing, and add previews for these items in a built-in lightbox.
File Away has a ton of options, meaning you can customize just about every aspect of the uploading process, from who can access each form, to the styling of every detail. This is both a strength and a weakness because it can be a little hard to get into the plugin, but extremely useful for the many edge cases that can arise. In general, I’ve found that it is fine to trust defaults for the most part and only set things that you find necessary. To help with this process, the plugin has built-in tutorials, as well as a powerful shortcode generator which you absolutely should use to make your life easier.
For the most simple of uploading tasks, this plugin might be a bit overkill. But if you want to turn a section of your WordPress site into a complete file storage and management solution, File Away is the way to go.
How’s it Work?
After you install and activate the plugin, the most important thing to set up is where your files should be uploaded to. I’d recommend creating these on your server using FTP, or using an existing directory (uploads for instance) for this purpose. This will help keep things organized. To begin setting this up, go to the File Away menu. In the first tab, “Basic Configuration” you will see drop-down menus for setting your root and base directories. But the most important section is the “Base Directory” text fields. You can specify up to five different directories, where users will be able to upload files to on the front-end.
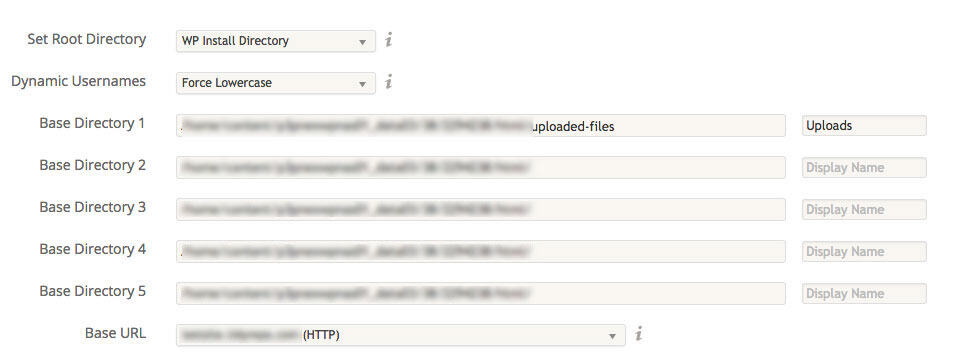
Setting up your directories
These have to be directories that are already set up, but File Away helps you out a bit by pre-filling in the direct path to your WordPress install. Simply enter in the path to the directories you want to be able to upload files to, enter a display name for each, and then click “Save Changes”. In this section, there are also other options that let you handle where and how files will be uploaded.
There are a few more tabs up at the top to configure some more granular details of the plugin. They are worth checking out, but with your directories set up, you can just as easily get started adding the upload forms and directory listing to the front-end of your site using the plugin’s built-in shortcode generator.
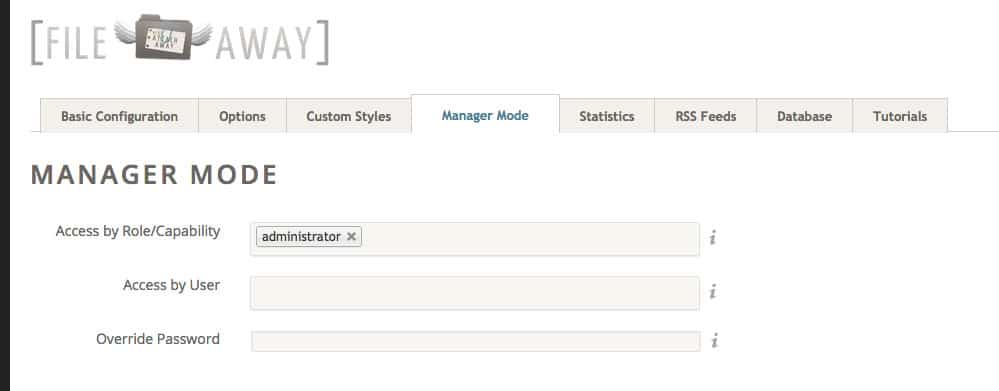
Configuring Manager Mode
Navigate to any post or page, and click the new File Away button in the TinyMCE Toolbar. This will bring up a dialog box where you can choose what exactly you want to add. You will see a drop-down for “Select Shortcode”. There are several to chose from, but I find the most important to be “Directory Files” and “File Uploads”.
“File Uploads” is how you can add a file upload form to your site’s front-end. When you chose this option, you will have a whole set of parameters for you to chose from. You can choose which directory you want to upload files to with the “Base Directory” and “Sub Directory” options. You can choose whether or not multiple uploads should be allowed at the same time, and how big files can be.
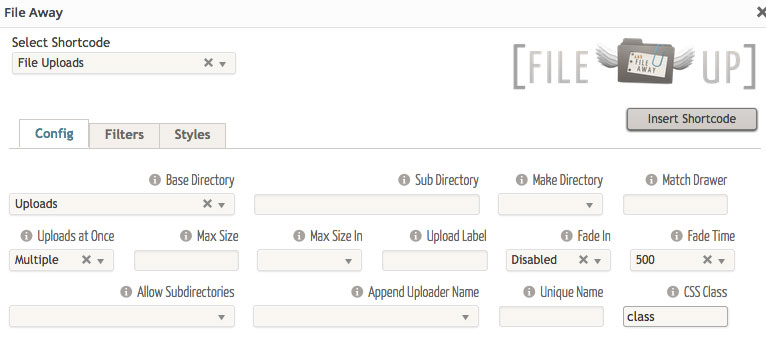
Working with the file uploads shortcode
Use the “Filters” tab to chose which devices the upload form should be shown to, and which file types to allow, and use the “Styles” tab to add your own CSS classes. Once again, there are a lot of options here, but the plugin uses fairly smart defaults. So selecting only the base directory should work just fine. Once you’ve inserted this shortcode and published your page, you can navigate to it and see the file upload form in action. If you’ve selected so, users can upload multiple files at once, change the name of files on the fly, and watch their progress as files are uploaded, all without a page refresh. This part of the plugin works very well.
The “Directory Files” shortcode, on the other hand, is used to list files that have been uploaded to one of your base directories. Selecting this will give you another set of parameters to customize, the most important again being the “Base Directory” from which these files should be pulled. However, first, you can either choose “Sorted List” or “Sorted Data Table”. The former will arrange directory items in a column list, and generally keeps things a bit simpler in terms of options. The latter will output a full table and has a few more parameters that it can show.
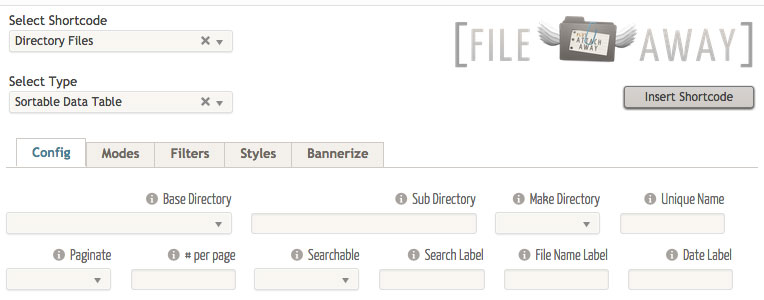
Adding a directory of files
On either one, select your Base Directory to pull files from, and choose what kind of files should be displayed and how. The “Modes” tab has two interesting features. The first is “Flightbox” which allows you to select a type of media (PDF, Images, Video, or all), and will enable in-site previews in a lightbox for these types of files. By default, files will be downloaded. But with “Flightbox” enabled, files will open in a responsive lightbox. The other is “Manager Mode”. If you turn Manager Mode on, the file listing will have a few more options available to administrators. For instance, if you are logged in as an admin (or any user role or capability you specify), you can delete, edit and rename files, right from the front-end.
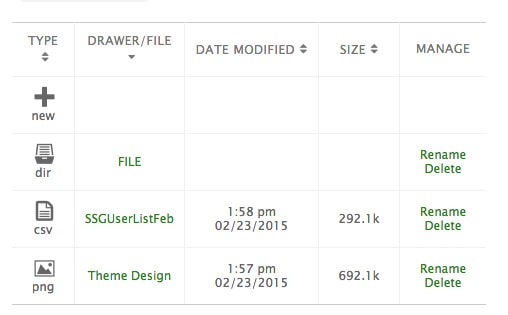
A directory listing
So you can see, with just a little configuration and a few shortcodes, you can allow visitors to your site to upload files straight to a directory of your choosing, and then show a list of them to anybody on your site. And as an admin, you can customize these files without ever having to go to the WordPress back-end. It’s a hop, skip, and a jump to making this work for, say, members only, or in a special clients page on your site. And there is lots more that can be done with File Away, from listing files from posts and pages, to included video tutorials about the plugin with a simple shortcode, if you’d like to educate your visitors on how to use the plugin. I’ve just gone over the basics here, so you get a sense of what the plugin can do.
Costs, Caveats, Etc.
File Away is well maintained, and well supported, and in terms of performance and security, it is stellar. My only qualm with the plugin is that it is a bit difficult to get into, as I mentioned, because there are so many options, shortcodes and shortcode parameters. It is really a plugin meant for people that work with front-end file uploading and file management on their WordPress every day, and need a lot of customization and extendability. I know there are quite a few site owners out there that fit that bill.
If you’re looking for support, your best bet is the support forums on WordPress.org, or by referring to the video tutorials built right into the plugin’s settings.

