If you find yourself switching between post statuses (draft, published, scheduled, etc.) often, you may…
Sometimes, you don’t need a full back-end system to manage clients and users of your sites. You just want to set up a small page where you can share private pages and files with your users. That’s what Customer Area allows you to do, and a good amount more.
What’s It Do?
Customer Area allows you to set up a specific page on your site that contains private files and pages for users to view. Only users of a certain user role will be able to access the Customer Area, and they will only be able to see content that is assigned to them. The basic customer area page allows users to see a Dashboard of their content, and view their pages and files on separate tabs. On the back-end, you can easily create new files and pages, group them into categories, and assign them to any user on your site. You can, however, customize which features are used and how it will be shown on your site.
There are also several add-ons available which extend the functionality of the plugin. For instance, you can add a login and registration form on the front-end so you don’t have to rely on the WordPress back-end system, and you can group users together to share with multiple users at the same time.
How’s It Work?
When you install and activate the plugin, you will see a few prompts at the top of your screen that tells you the steps you need to take to set up the plugin initially. At any point, you can go to Customer Area -> Status to see what still needs to be done. You can also go to Customer Area -> Settings to get started. The Status page will show you that you need to set up your pages, manage permissions and set up your menu. Let’s take these ones by one.
In order to actually display the Customer Area, you need to set up a few pages to display the content on. If you want to create all new pages for these, you simply have to click the “Create Pages” button and the plugin will automatically create new pages and add the proper shortcodes to them, which you can see in the Pages menu. If you would like to use existing pages, however, you can go to Customer -> Area and click on the “Site Pages” tab. You will see a listing and drop-down menu for Home, Dashboard, 3 Private Files pages, 3 Account pages, and a Logout page. For each, you can select an existing page from the drop-down menu or automatically create a new one for each. You can also click on the “Edit It” link on any page to go straight to the post editor. Just make sure you keep the shortcode intact.
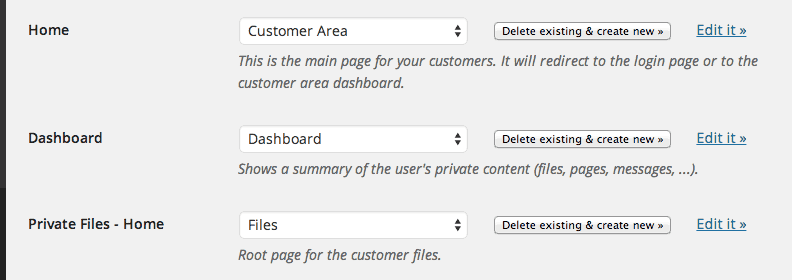
Select something for each page, or create it automatically
The next step is to manage permissions. You can either click the link in the Status menu or go to Customer Area -> Settings and click on the “Capabilities” tab. Here, you will see a list of user roles (Editor, Author, Administrator, etc.) that can actually view the customer area. Check off all the user roles you want to have access and save your changes.
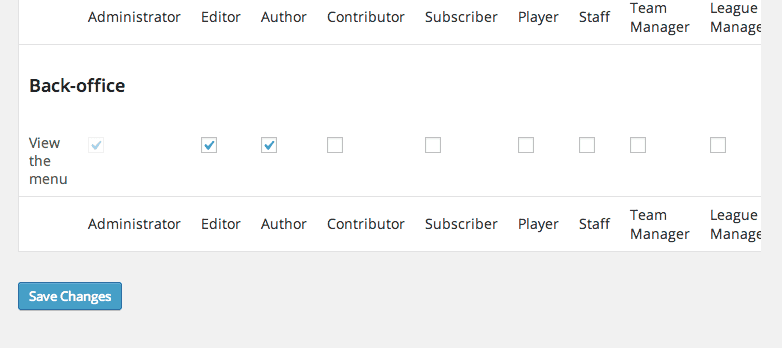
Easily manage capabilities
The last step is the custom menu. Again, you can follow the link on the Status page, or go to Appearance -> Menus to set it up using the WordPress menu editor. It will be listed as the “Customer Area Menu” in the top drop-down. If you choose to automatically create the menu from the Status page, then it will create a menu with a drop-down of all the individual pages users can access, and append it to your main menu. If at any point you choose the pages that the Customer Area lives on, you will see a notification to “Synchronize” your menu which will automatically link up the right pages.
After that, your Customer Area will be set up. If you visit the “Dashboard” page you will see a blank page with tabs for “Files”, “Pages” and “My Account”. Each of these will sync up to the pages you set up. Any user with the proper user role will also be able to access this page and will see Files and Pages that have been assigned to them specifically. So, the next step is to actually set up that content.
There are two kinds of content you can assign to users, “Files” and “Pages”. A page is a simple page of information, while a file will actually have a download link assigned to it. To get started adding a new page go to Customer Area -> New Private Page. You will see something that looks very much like the normal post editor. Enter the content of the private page you want to be set up here. You can create a special category for it in the “Page Categories” sidebar menu, or by visiting Customer Area -> Private Page Categories. Add whatever you would like to the page, then scroll down to the “Owner” meta box. This is how you actually assign the content to a specific user. You will see a drop-down menu with all of the users on your site. Simply select the user from the drop-down and publish the page. If you are logged in as the user, you can visit the Customer Area dashboard again, and see the newly created page listed, or visit the “My Pages” tab of the Customer Area to see it. Clicking on that page will show it’s actual content to logged in users that have been assigned to it.
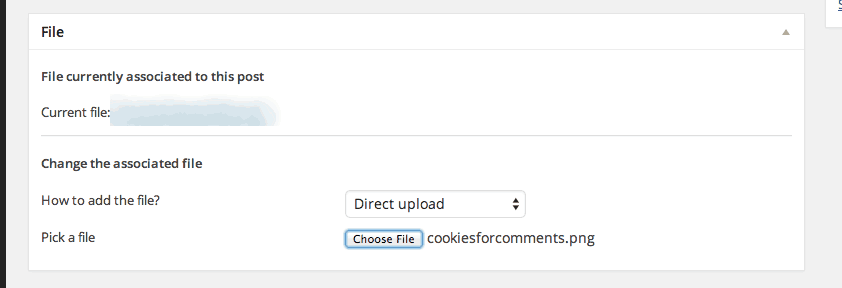
Files allow you to select any file
The process for Files is similar. Go to Customer Area -> New Private File. Again you can enter a title for the file and a description in the post editor content box. You will see a new meta box below the post editor labeled “File.” From the “How to add the file?” there are two options, “Direct Upload” and “Copy from FTP Folder.” With the former, all you have to do is use the media uploader like you would any other file. If you would like to copy from FTP, you have to go to Customer Area -> Settings and click on the “Private Files” tab. There is a text field in there for “FTP uploads folder.” Either enter in your custom FTP path here or create the folder on your server of the FTP path specified. Back on the File editor page, you can once again assign the file to a specific user, add it to a category, and publish it.
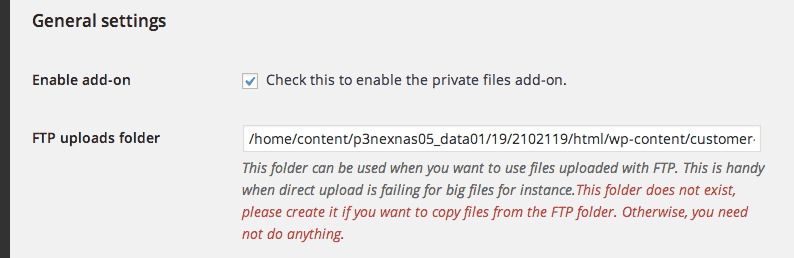
You can choose any FTP folder on the Settings Page
There are lots of other settings for the plugin, where you can customize the design (in the Front-end) tab, and tweak the settings for each page. The plugin is pretty good at pointing you in the right direction, so just follow the on-screen instructions. This is just a basic introduction to its functionality.
Costs, Caveats, Etc.
The base Customer Area plugin is free, but there are also several premium add-ons which let you extend its functionality by adding user groups, integrating with Advanced Custom Fields, add custom login and registration form, and a couple of others. These can be purchased a la carte or in bundles. If you are looking for help with the plugin, you can visit the support forums on the plugin’s website to get help straight from the developers, or read the documentation for more information.