If you are a theme developer, there may be a base theme you are probably…
When you are using a theme and a few plugins, most of them will come along with either a CSS file, a Javascript file, or both. Each of these is sent to the server and to a user’s browser as a separate HTTP request, slowing down page load and blocking content from rendering until this process is complete. Autoptimize steps in to solve this problem.
What’s it Do?
Autoptimize takes all of the CSS and JS files that are loaded in from themes and plugins and combines them into a single stylesheet and script file, compresses them to their very smallest, and then loads them in properly to optimize for performance. You can really boost your site’s speed just by combining all of your files into a single request, but Autoptimize takes this even a step further and really makes sure that everything loads quickly. There’s also a couple of handy features meant for developers looking for a bit more customization.
How’s it Work?
After you install and activate the plugin, you simply have to switch it on. Head over to Settings -> Autoptimize to get started. You’ll see a few basic options.
The first is a checkbox to “Optimize HTML Code?”. This will minify the actual HTML of each one of your pages, which can lighten the page weight of your site. In truth, browsers tend to handle this pretty well already, but there’s really no harm in checking the option. If you find that parts of your site are rendering improperly, feel free to uncheck this. Below this, you can also choose to keep HTML comments. Only check this if you are actively using them.
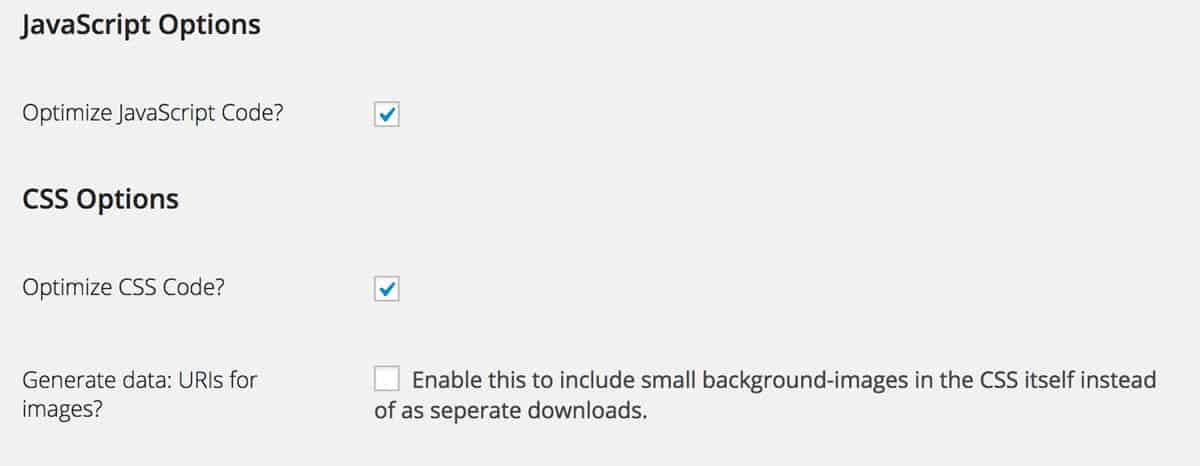
Next, you can “Optimize JavaScript Code?”. Checking this will do a few things. First, it will take any Javascript file being loaded in by a theme or plugins, and combine them together into one file. It will then minify them, to shrink that file to the smallest size possible. Finally, it will add this script to the footer of your page with a “defer” tag. This means that JS will not load until everything on the page has been rendered, meaning users will be able to get to your content quicker. In almost all cases, this is preferred, as JS is meant to add extra features. But if your site is reliant on JS, especially something like jQuery, there are advanced options to customize this further. More on that in a bit.

Basic Javascript and CSS Options
Next up is “Optimize CSS Code?”, which will take all CSS files loaded with a theme and plugins, and combine them into one file, then compress that file down. Checking this will go a long way towards speeding up your site. You can also check the “Generate data: URIs for images?” if you are only using a few background images in your CSS, which may speed things up a bit. But in general, this is a micro-optimization that is not entirely necessary. The last option is a text field where you can enter the URL of your CDN (like Amazon AWS or MaxCDN). If you’re not using one, just ignore this.
Just checking these three boxes will speed up your page quite a bit. You can go ahead and visit your site to see it in action and make sure you are not running into problems.
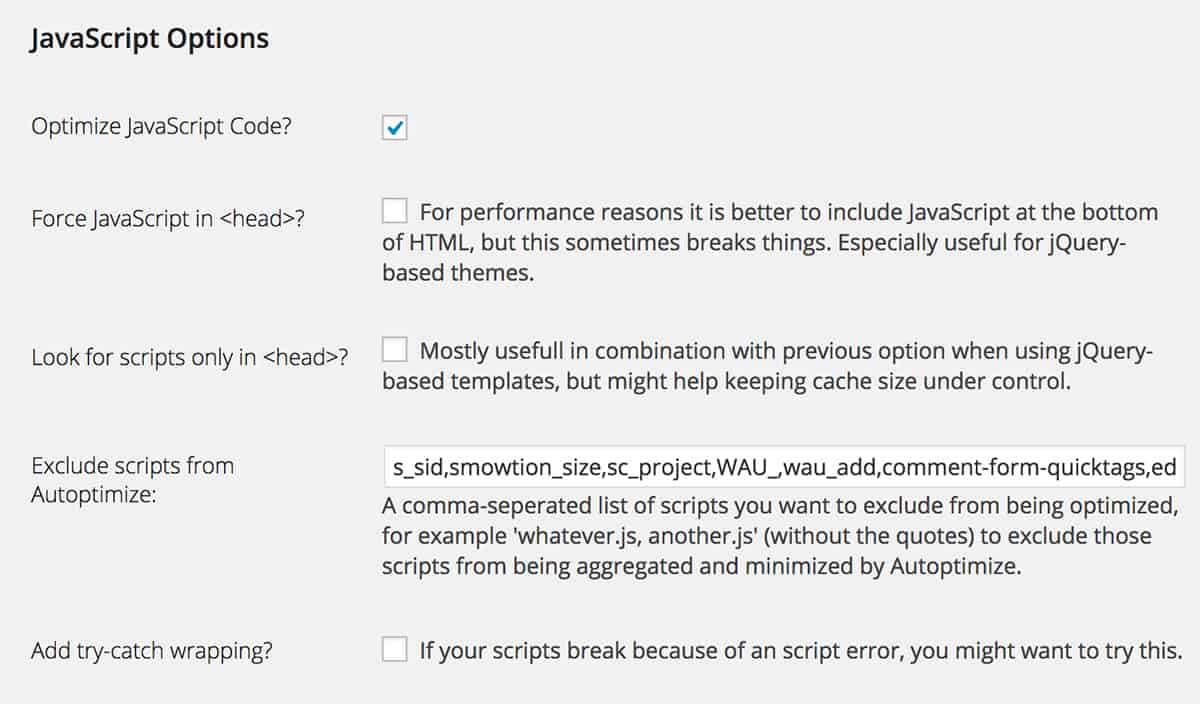
If you are a developer, or if you’re looking for a bit more control, you can click the “Show Advanced Settings” button at the top of the page to give you a few more options. In the Javascript section, you can force Javascript to load everything in the header instead of the footer. This is useful if your page requires Javascript to load properly. If you’re unsure, try loading your page and see if you see any jumps in layout or major changes to the page as it is loading. If it is, you may want to check this option. You can also choose where to look for JS files, and add to a comma-separated list of scripts to ignore. This list will include admin files, but you can add your own if you are loading a JS file your own way.

Some advanced options
The CSS section has similar options, allowing you to specify where to look for CSS files and add to a list of files to ignore. It also has two options to inline your CSS. This is for advanced front-end developers that want to inline critical CSS and move the rest to the footer of the page so that the CSS is not “render-blocking”. If you have a chunk of this CSS you can click the “Inline and Defer CSS” checkbox, and then copy and paste it in the provided text area. Or you can “Inline all CSS” which will take your entire stylesheet and inline it in the header section of your site. This is really not recommended.
At the bottom, you’ll also see some info about your cache, and how it is set up. By default, the plugin will cache your CSS and JS file so that it can serve them quicker, but you can disable this behavior if it is not working for you. It’s worth noting that Autoptimize should work with most caching plugins out there. Some plugins, like W3 Total Cache, already offer the functionality that you would find in this plugin, so you may run into a problem there. Just make sure to flush your cache after you’ve set up the plugin, and check your site’s front-end for any inconsistencies.
Costs, Caveats, Etc.
Autoptimize is a complex plugin, but it can do a lot to speed up your site without too much work. If you run into a problem, you should visit the support forums to get help from the developer. You can also try browsing through blog posts by the developer for some additional setup information. All in all, it is a well documented and well-maintained plugin.


