If you are a theme developer, there may be a base theme you are probably…
Aesop Story Engine is actually more than just a plugin. It’s a way of structuring, styling, and editing long-form, interactive content in WordPress. It was inspired by stories like Snow Fall by the New York Times, which combines rich media components with in-depth content to tell a story.
What’s it Do?
The Aesop Story Engine plugin adds thirteen components to the WordPress editor, which can be used to create interactive narratives. This includes full-screen images, quote blocks, chapter titles, parallax images, interactive maps, post collections, PDF documents, and more. These components can be combined within the WordPress post editor to stitch together a story. Aesop takes care of the CSS, JavaScript, and external code that is required for stories like this to work, and it’s components are structured through shortcodes.
Aesop will work with just about any theme, I tested it with a few, but it really works best when combined with a theme that is structured to accommodate Aesop content. This typically means it allows full-width posts and has some CSS set-up already that hook into classes added by the plugin. Aesop has a few premium themes available on their site, but I also found a great starter theme which, with a few customizations, can be adapted to just about any style. It supports animations, utility classes, typography, and a bunch more. If you want to get the most out of Aesop though, you’ll want to grab a compatible theme to work with. Otherwise, you will miss some of its functionality. I know that this is prohibitive for some people, but if the long-form content is the focus of your blog, it can make the process a lot easier in the end.
How’s it Work?
After you install and activate the plugin, you can start drafting Aesop posts right in the post editor. Simply go to Posts -> Add New to create your first one.
The first thing you might notice is that a new section has been added to the bottom of your post editor. This is where you can define general settings for the post. The first section features a color picker for the background color, text color and cover (background of large blocks or images), so you can customize each. Below that you can select from a drop-down either “Minimal” or “Block” layout. The former keeps things fairly simple, while the latter will add larger text, and section things off into bigger blocks. If you did choose the Block layout, then you can also customize the “Cover Lines”, or the various titles that will be used throughout the post. “Cover Line 1” defines the title. Finally, you can choose a maximum font size and width for titles.

Your components in the post editor
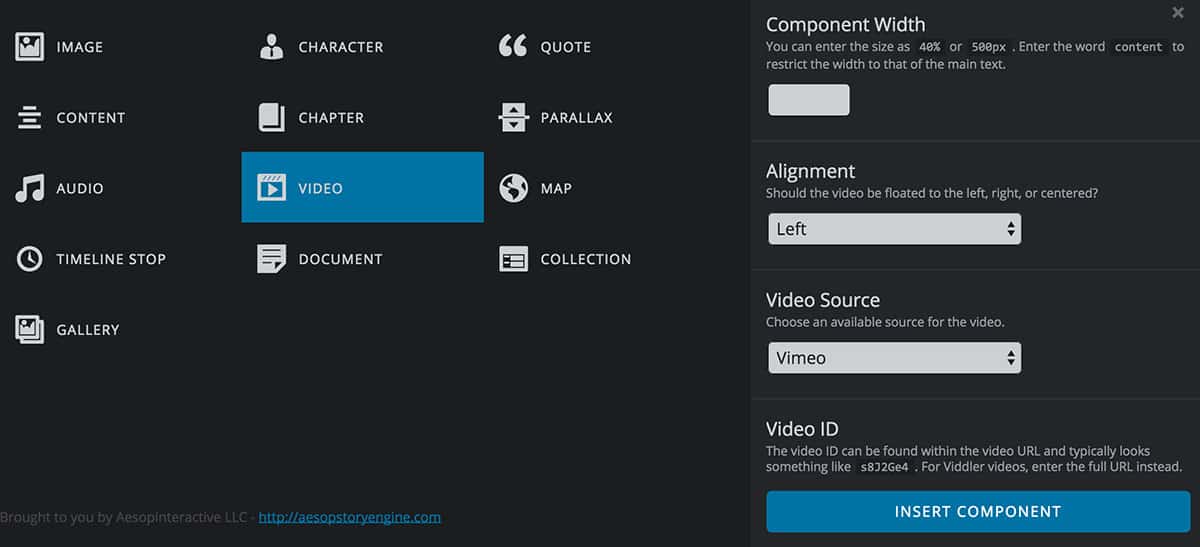
The next step is to start adding components. At the top of the post editor, you will see a new button, “Add Component”, right next to the “Add Media” button. If you click on this, an overlay will pop-up with thirteen different components for you to chose from. They are relatively straightforward and include Image, Character, Quote, Content, Chapter, Parallax, Audio, Video, Map, Timeline Stop, Document, Collection, and Gallery. Selecting a component will bring up a list of options in the sidebar for you to customize the look, feel and content of each one. For instance, clicking on the “Chapter” component will let you choose whether or not you want the chapter title’s background to be a video or image, a media select button for selecting this rich media, and a text field for your Chapter Title and optional subtitle. The “Collection” component, on the other hand, lets you select which category to pull a post-collection from, and how many posts and columns you want. Each components options is tailored to its content type, and some are significantly more advanced than others.

Editing a component
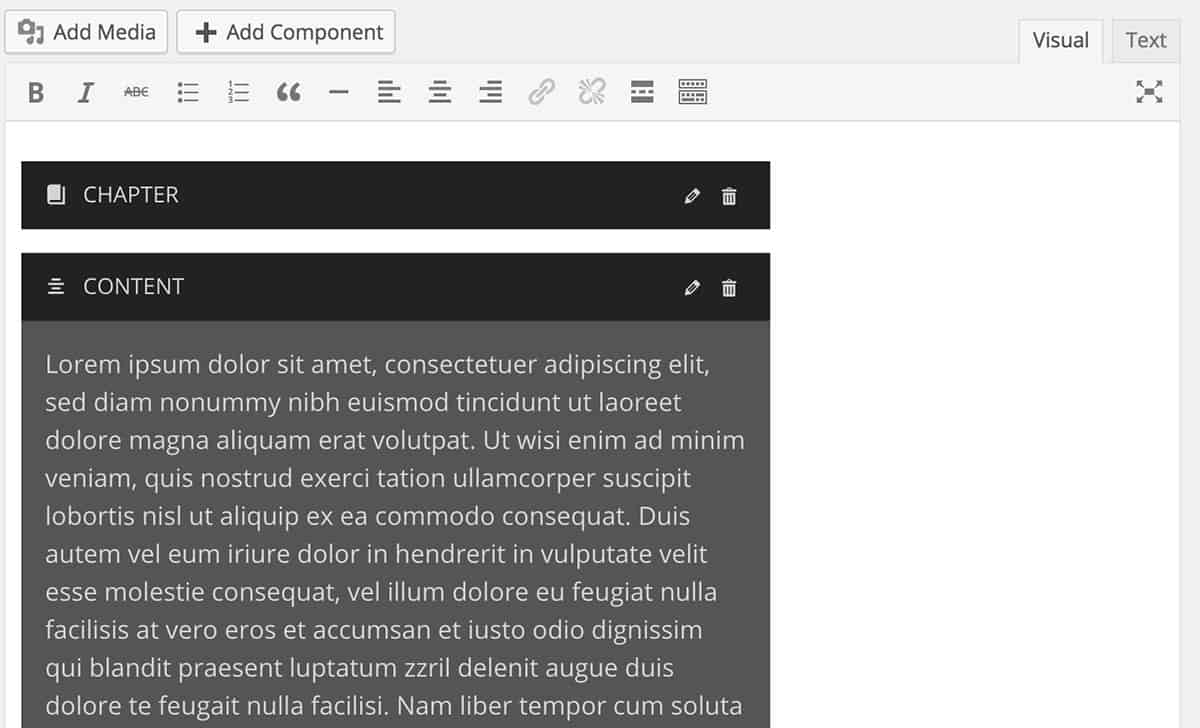
When you are all finished setting up a component, click on the “Insert Component” link to add it to the post editor. In the Visual editor, these will be laid out as large black blocks. Each one of these has an “Edit” and “Delete” link, which you can use to either revise a component or remove it altogether. You can also edit content in these blocks if it includes text content (like the content component). On the back-end, these are all structured with shortcodes, but it’s best to edit these visually.
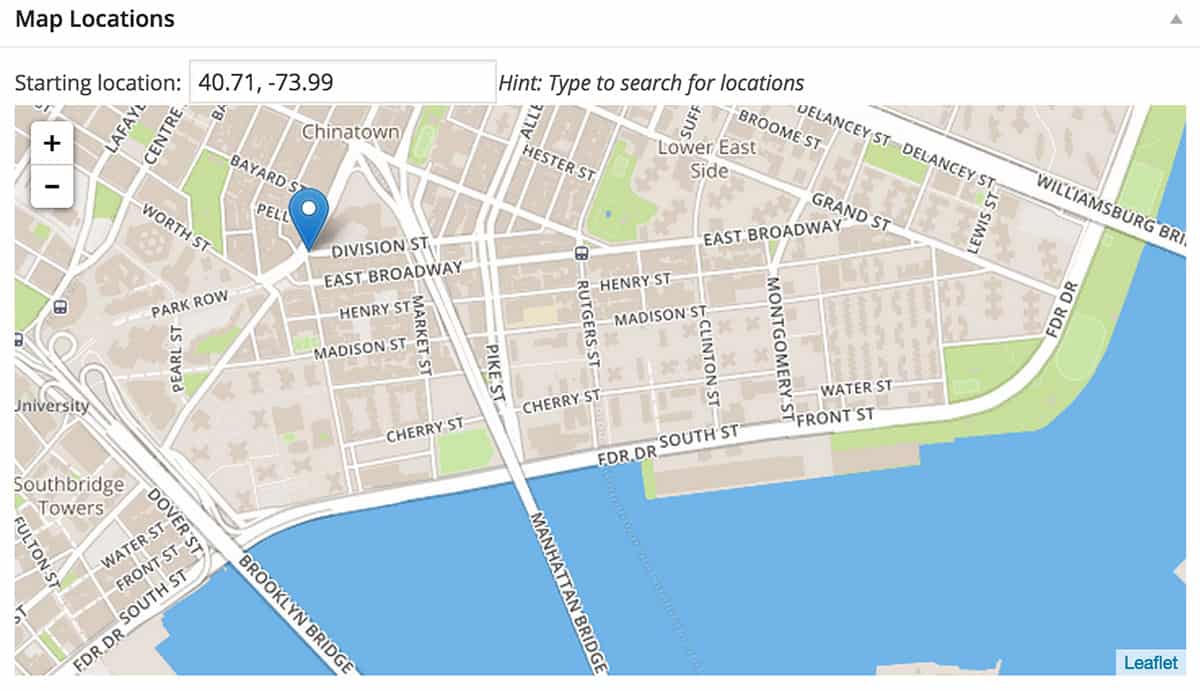
Some components also require a bit more legwork. For instance, on the right sidebar, you will see a meta box for “Map Component Locations”. This is used to set up the map component, which uses Google Maps. You can define your starting coordinates, and zoom level of the map, then use add multiple map markers, one at a time. This can then be inserted using the map component. Similarly, there will be a new section added to the WordPress admin called Galleries. Clicking on Galleries -> New Gallery will bring you to a post editor where you can create a new WordPress gallery, and then customize how it will look. These can then be added to the Gallery component, with all of your settings intact.

Setting up maps
Other than that, using Aesop is a matter of stitching together components to create long and interactive posts. It’s certainly not perfect, and it will take a little legwork initially to create a theme and style that properly takes advantage of Aesop’s features. I’ve run into small problems here and there, but nothing that has stopped me from using it altogether. And fixes are being patched through all the time. But the plugin takes a lot of the complexity out of adding things like full-width or parallax images, interactive maps, videos, and a lot of functionality you might find yourself running into from time to time. It’s an investment, but one that I think can ultimately pay off for you.
Costs, Caveats, Etc.
The Aesop plugin is free, and very well maintained. But the team also has a list of themes and add-ons available for purchase which allow you to get a little more out of the plugins. The themes will ensure that all of your components are structured properly, and the add-ons extend their functionality with features like lazy loading and pop-out galleries.
Keep in mind, Aesop loads in a good amount of CSS and a little bit of jQuery code to make all of its components work. But if it is something you were planning on doing anyway, it is probably done more efficiently in the Aesop plugin. The plugin has it’s own dedicated forums if you are looking for help, and a playground of posts if you are looking for examples of what it can do.


