Backing up your WordPress website is important and having the added security of storing backups…
In today’s world of content hyperproduction, it’s very important to find some way to stand out from the masses. There are many ways to go about this and one of those is to employ custom post types. Every post type serves a purpose, but having custom ones means you can customize your frontend much further than just using the default ones.
Learn how easy to set-up and useful #CustomPostTypes can be using ACPT.io for #WordPressClick to tweet
Naturally, you’ll get the most out of it if you use raw code, which is true for most things you do on a site, but that approach is only applicable to a small percentage of users. That’s why, if you’re using WordPress, you can use plugins instead – in this case, the ACPT plugin, which lets you create custom post types, taxonomies, and meta boxes, among other things.
Before we delve into everything you can use ACPT for, let’s go over some of the basic ins and outs of custom post types (or CPTs).
What are custom post types?
To fully know what custom post types are, we need to first highlight what the default post types are. There are five of them – page, post, revision, attachment, and navigation menu.
All of these are classified as default, and you might find some very commonly used types omitted from the list. Take product, for example, it might not seem like it, but that too is a custom post type, only it’s been around so much we don’t perceive it as such. Forms are another good example of frequently used CPTs which can be seen on many sites.
CPTs are primarily designed to help you organize your site on the backend so it’s much easier to browse for your visitors on the frontend. Just imagine how hard it would be to run a webshop by using regular posts for products instead of specialized product CPS. Everything from display to tracking and ordering would be infinitely more difficult.
Now what ACPT does is remove the need to code your new posts into your site, and instead replace it with a simple three-step process that requires you to just click off some options and fill a few boxes – after that, you’re ready to go. That being said, it’s time to get down to business and show you how all of this is done.
First steps
The first thing you’ll see once you’ve activated the plugin is the post-type table. ACPT automatically collects all your post types and features them for you to see in a handy table.
These are labeled as “native” because they were already there before you started using the plugin. Generally speaking, sites will have two types – page and post. Adding to that is the product type if you’re using WooCommerce. Even though it isn’t one of the default post types it will be classified as native if it’s in use.
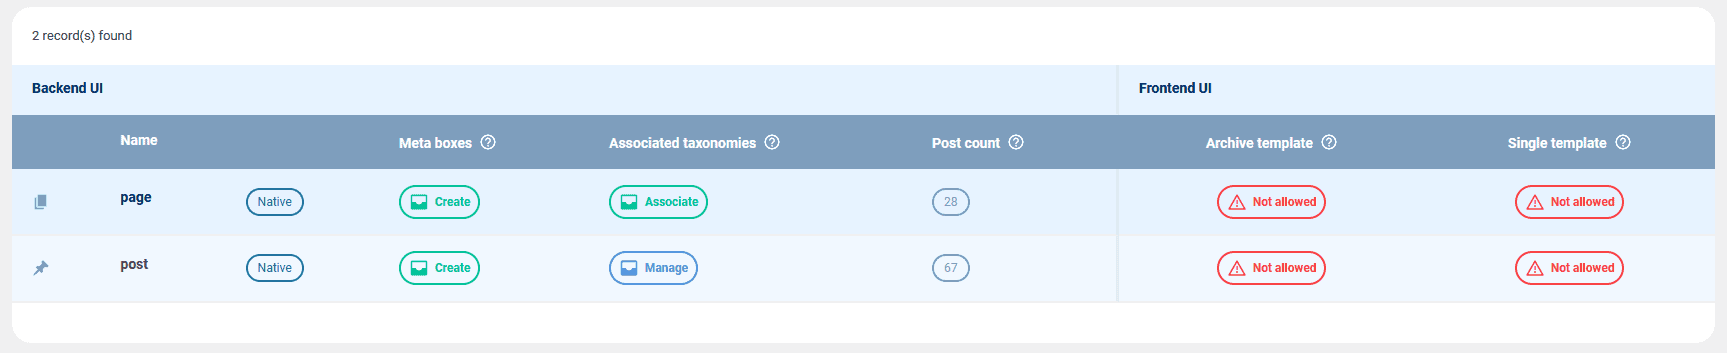
At first glance the table functions as a simple overview where you can get some basic info like the types and the number of published posts per type. Look a little closer, however, and you can see some crucial actions that can be completed here, right on the spot. You can create meta boxes and assign them to a specific post type.
Similarly, you can do the same with taxonomies which can be associated with a specific type. We’ll go much more in-depth for both of these features, but we find it relevant to point out that the devs thought about the quality of life for the users, making navigation easier for them.
Register a post with ACPT
The crux of what ACPT is all about comes down to CPTs. More specifically, the easy way you’ll get to create them using the plugin. It’s a three-step process.
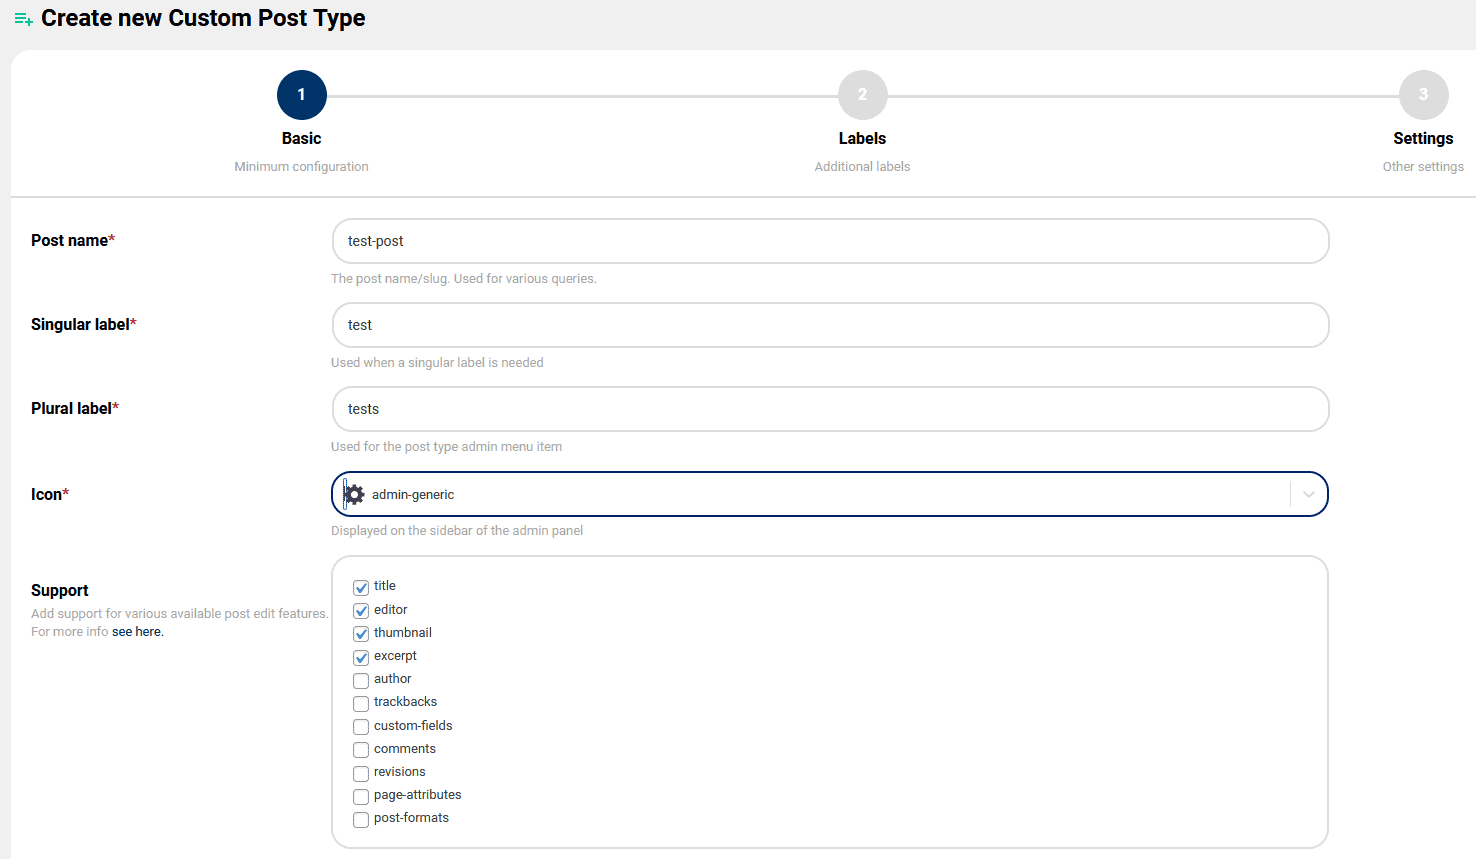
In the first step, you’ll need to input some basic info about your custom post such as the name, singular and plural labels, and icon. Additionally, you can even enable, or “support” various post-editing features, like adding thumbnails. By default, some of these are pre-chosen, but you can tick off more if you need to.
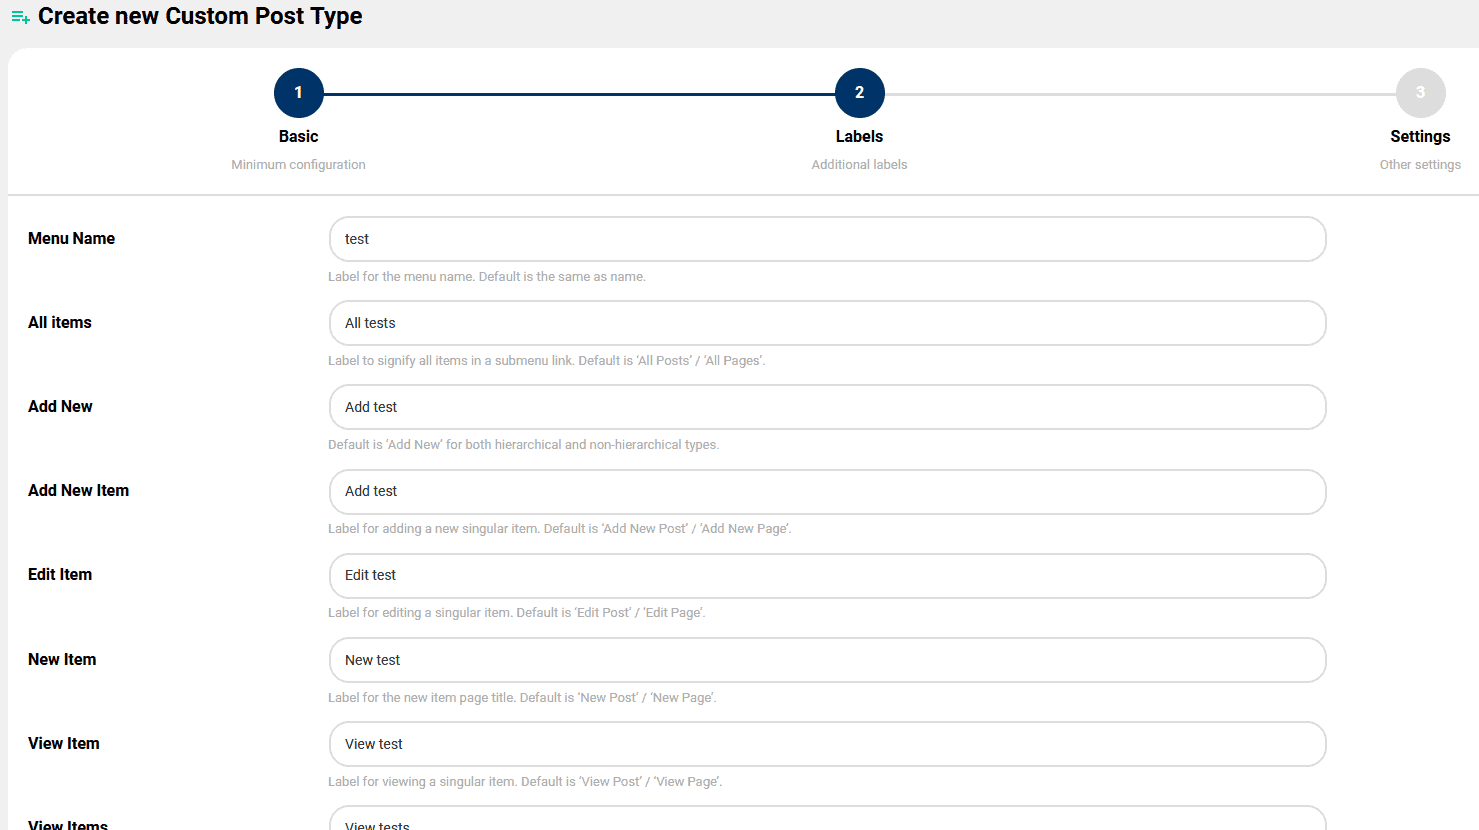
The next step allows you to set up labels. While it might seem daunting to be presented with over two dozen various labels, there really isn’t too much to it all. Basically, every action that’s made can be assigned a label – the formula is “the action + the chosen label (singular or plural)”. For example, adding a new post would be “add test” if we’re going by our values.
If there’s any question about how each action works, there’s an explanation right below the label field that covers all you need to know. It’s worth noting that all the labels are already filled when you reach the second step, so if you don’t want to, you don’t need to change a thing and can simply move forward to the next and final step.
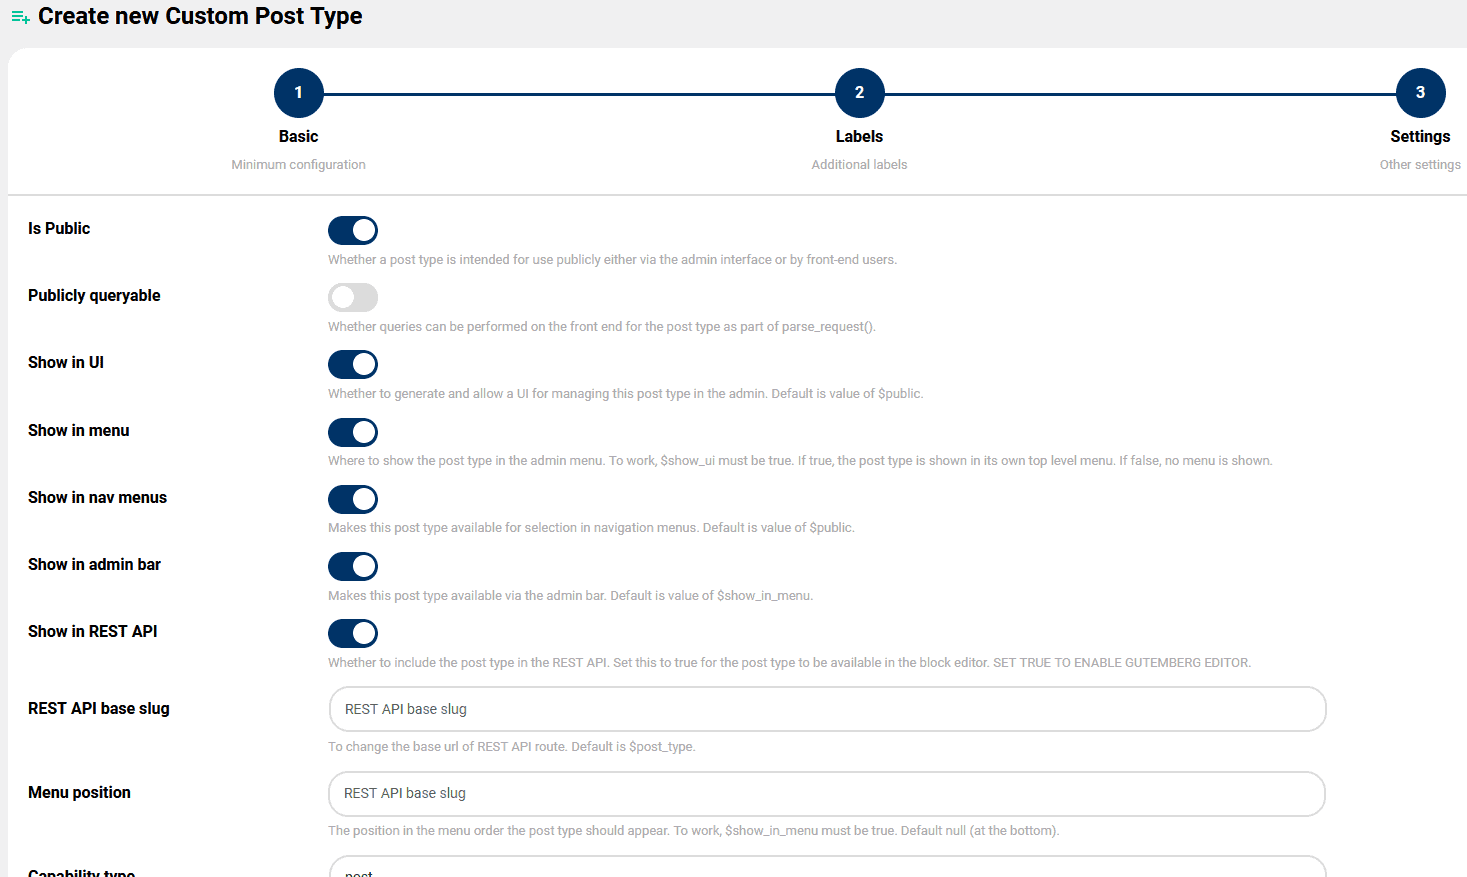
The third step revolves around the CPT’s settings which covers things like where it’s shown, does it overwrite something, etc. Similar to the previous step, it might seem out of your league to mess with anything, but there are explanations for each setting and once you get the hang of it, there shouldn’t be any problems.
Again, there is no real need to even change anything because the default values are already set up perfectly for most cases.
Registering taxonomies
Taxonomies are tools used on the backend to organize post groups and CPTs. As you would guess, the more CPTs you have, the more detailed your taxonomy needs to be.
The taxonomies you already have on your backend will automatically be synced by the time you get to this section, so you can easily just implement any of those. If you don’t have them or are looking to use new ones, you can do it through the 3-step wizard.
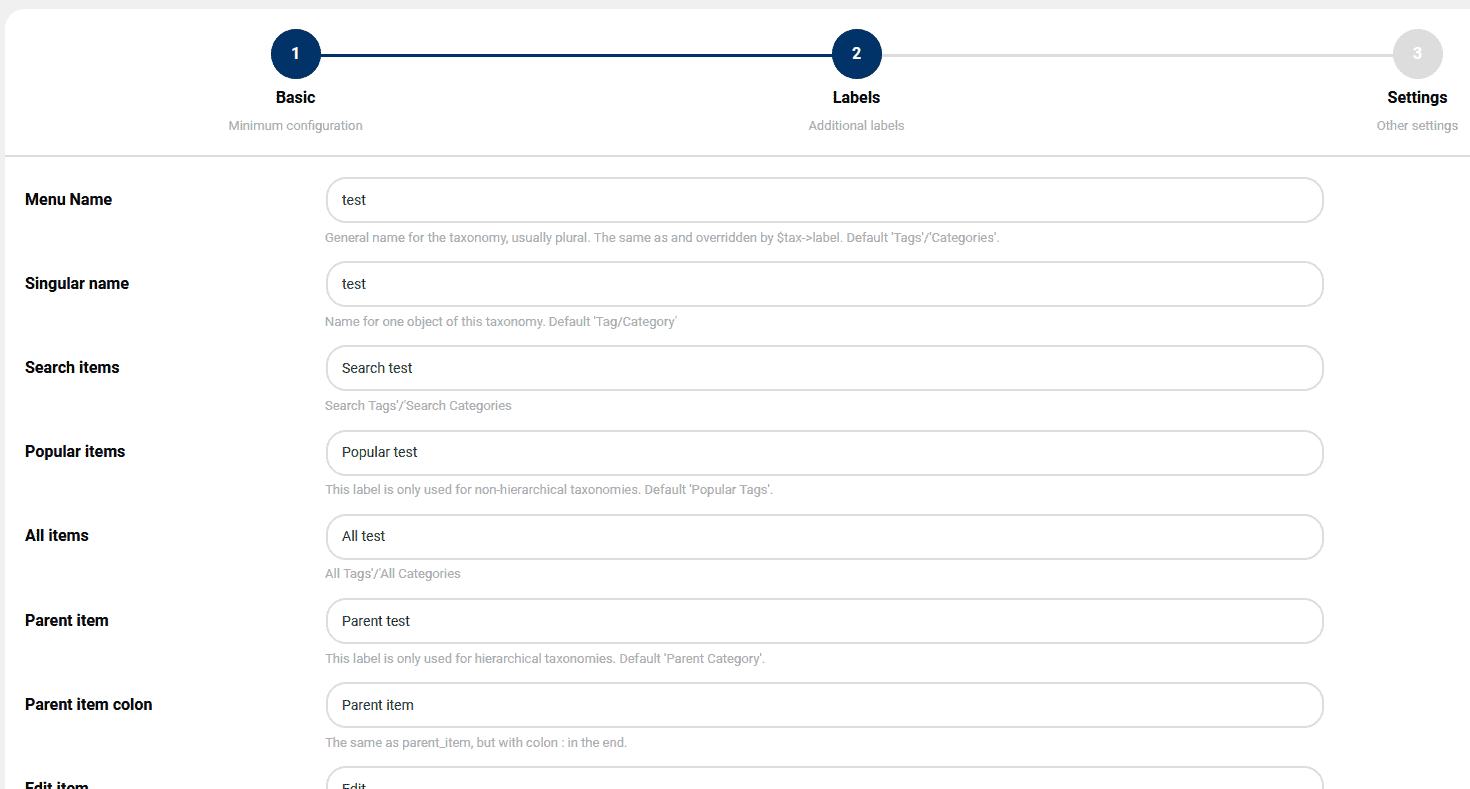
The process is the same as registering a new custom post type. In the first step, you’ll fill out the basic data – slug, singular label, and plural label.
After that, in the second step, you can define your own labels for actions, or leave everything by its default values. Finally, in the third step, you can configure all the details within the settings.
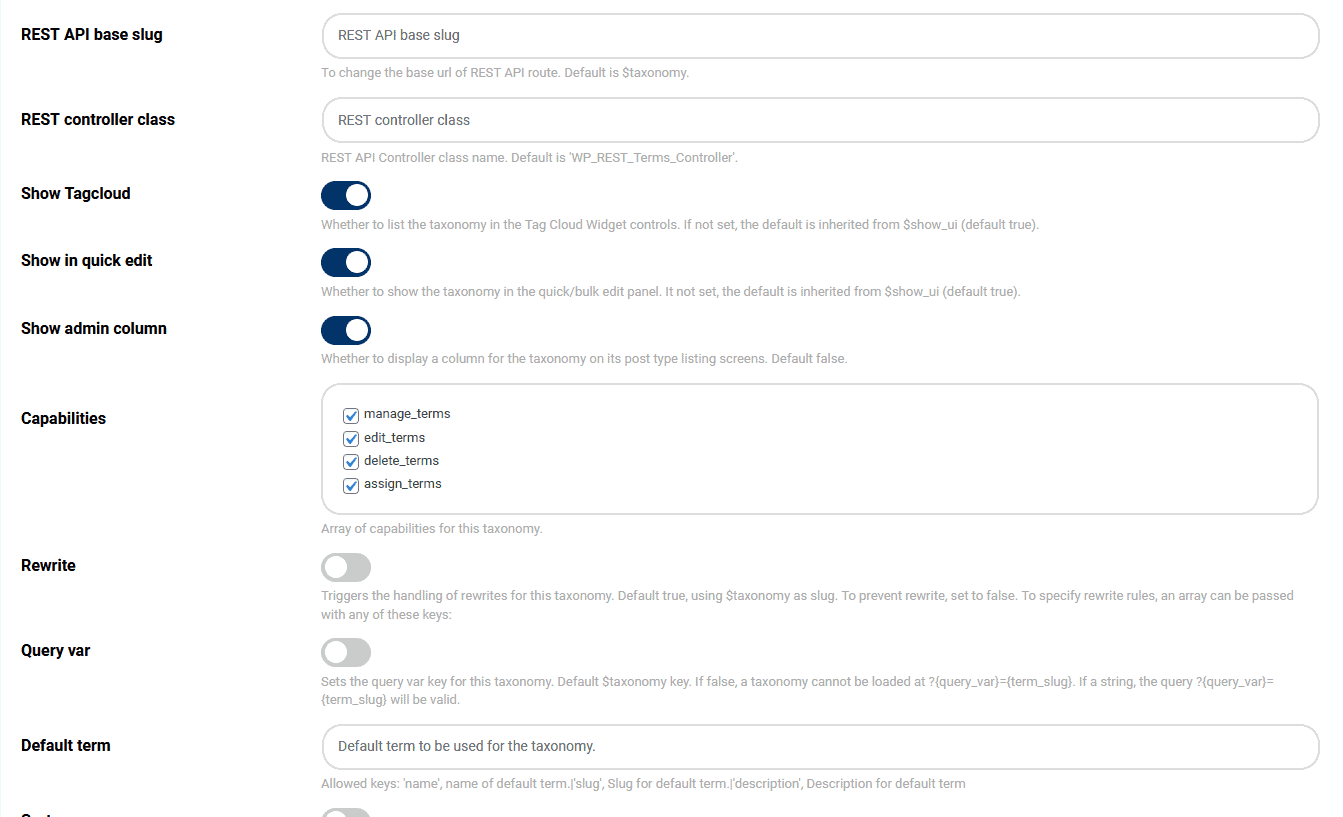
The settings are a bit different than those you’ve used for your posts, but the general gist is the same and just like in that instance, there’s nothing wrong with not changing a single thing.
Default settings are the default for a reason – the devs have made sure that the initial setup is applicable in all but the most outlying cases, so you don’t have to dwell on it.
Creating meta boxes
Meta boxes are implemented in your posts to enable users to input additional data that are relevant to the content of the post in question.
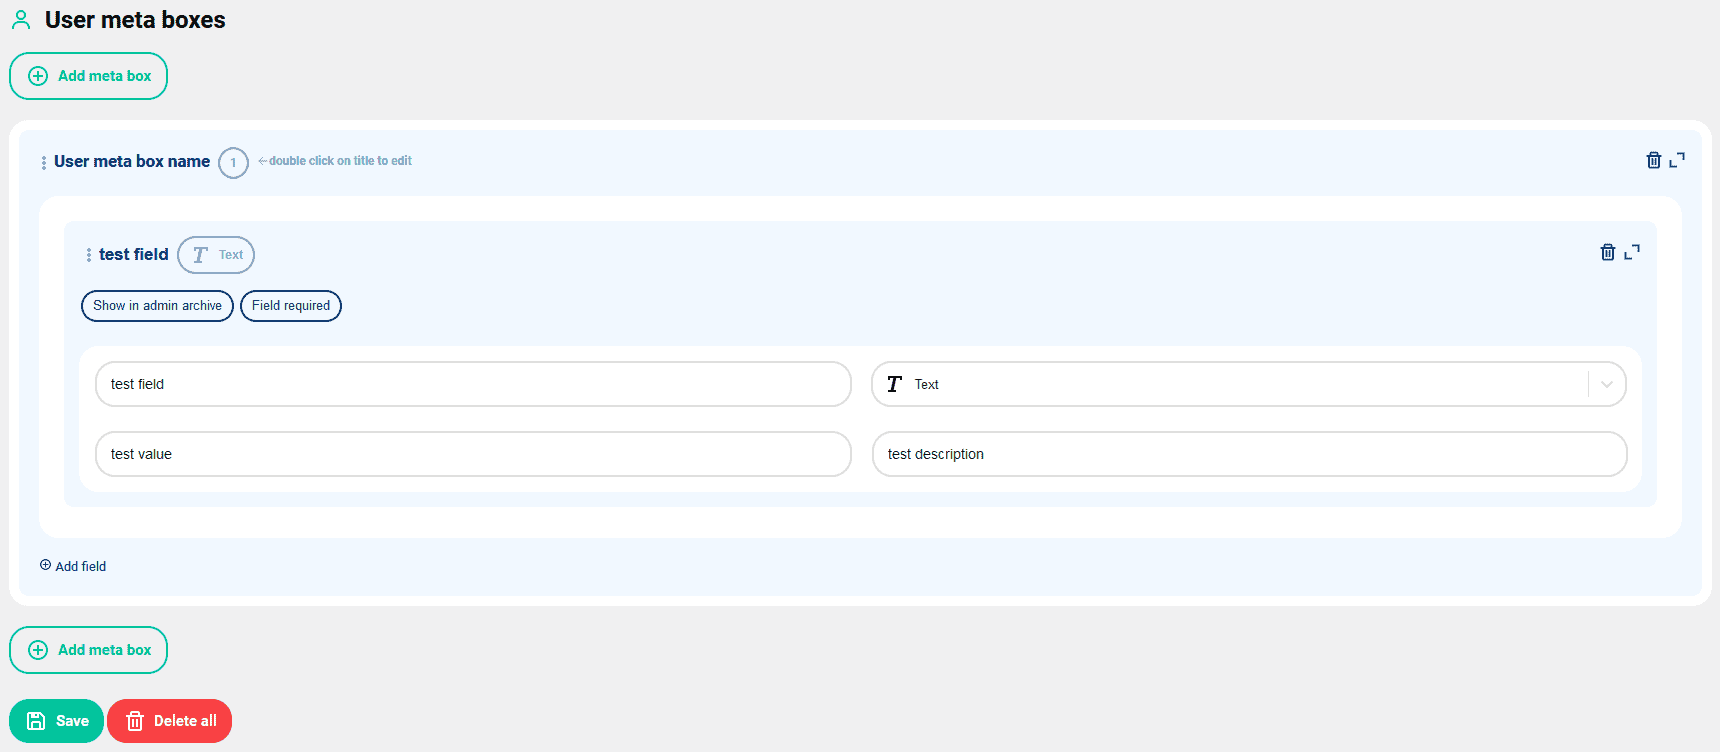
The meat box is displayed only on the backend, of course, so you can make it as long or short as you wish. Upon clicking the “Add meta box” button you’ll get to enter the fields that’ll be featured.
You’ll get to choose from over 20 different types of input like text, numbers, etc. Accompanying the input field is the value and description which are pretty self-explanatory. Fields you add can be required if you choose to tick the appropriate box, or they could be left optional.
Working with Gutenberg
We all know by now that using the Gutenberg editor is the way WordPress is meant to be used. Granted, there are workarounds to revert to the classic editor, but it’s been around for so long, that there really is no reason to fight it at this point. Luckily ACPT came prepared.
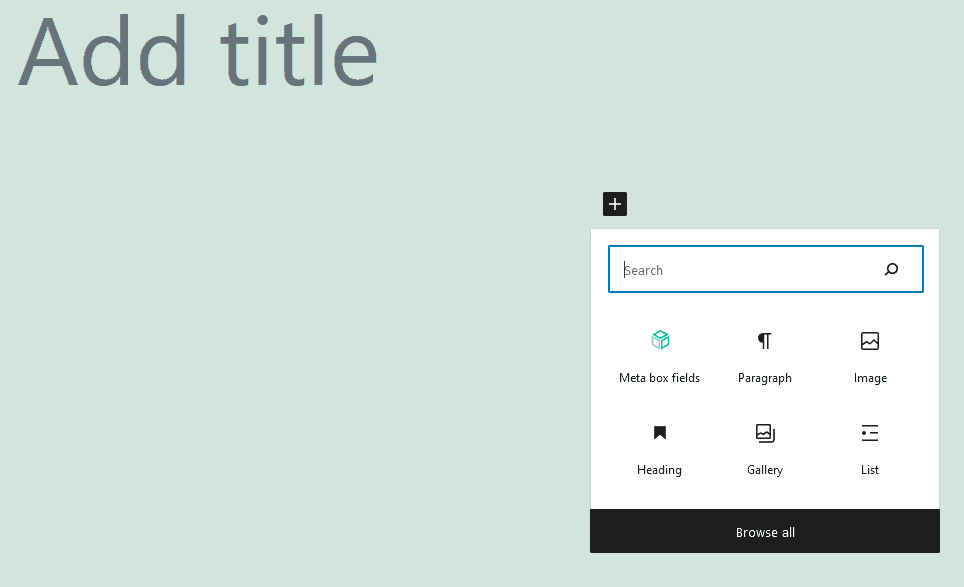
Adding the meta box fields can be done through shortcode, but more importantly, it’s one of the blocks that can be searched and added in an instant.
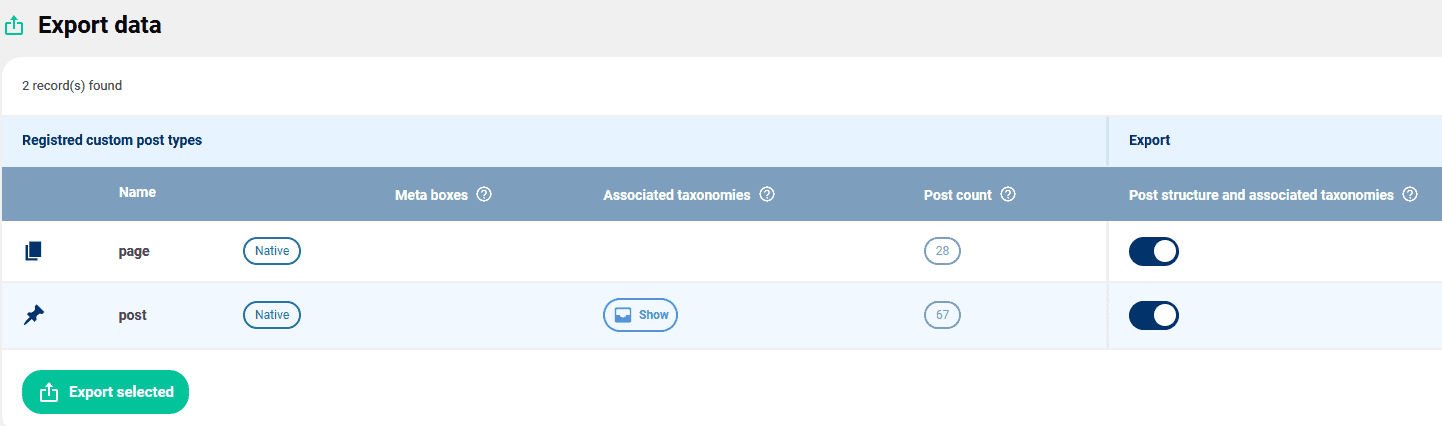
Import/export data
Importing or exporting data gains in significance the more site you’re managing. This isn’t just the case with ACPT, but any other plugin as well. Having to set everything up over and over again would be more than a hassle.
That’s why having an import/export function is crucial to saving you both nerves and time. Alternatively, if you have only one backend to maintain, you can always export data for backups, the importance of which cannot be overstated. Everything you can create within the plugin, you can also export – CPTs, taxonomies, and meta boxes.
Summary
Looking at it from a newcomer’s perspective, encountering something like custom post types could be intimidating, especially if you have to go through raw code to get things done.
A plugin like ACPT makes these fundamental building blocks of successful sites accessible to everybody. Not only will your frontend feature unique posts, but with the added taxonomies and meta boxes your backend will be much more organized and efficient. We can wholeheartedly recommend the ACPT plugin both in the free and paid versions, so give it a try.