")

A pretty simple and useful plugin, Page Template Dashboard lets see you what templates your…
I’ve been asked a few times if there are any good chat plugins out there. I’ve tested out quite a few and will be sharing some of them, but I’d like to start with Zopim Live Chat, a third party online chat service.
What’s it Do?
Zopim Live Chat is actually a complete SaaS application, which lets you connect chat agents to customers on your site using a full third-party dashboard. Essentially, Zopim is to live chat what Disqus is to comments. Though your data is stored elsewhere, Zopim has also developed a plugin for WordPress which automatically adds a chat window to the bottom of every page which is completely customizable, both in style and in format. So users can simply open a window and start chatting with any agent who is online. Support staff, on the other hand, can log into Zopim and start responding to these chats from the dashboard.
Zopim is a good chat solution if you’re looking for something that’s full-featured, and if you have multiple people you believe will be responding to chats. They track analytics, make it easy to add new agents and let you customize just about every bit of it.
How’s it Work?
Zopim the application is actually quite complex and offers quite a few features. I won’t go into details of the full service, but you can check out their product page if you want more information. If you decide that Zopim is right for your site, this is a guide to how to get the plugin set up on your site.
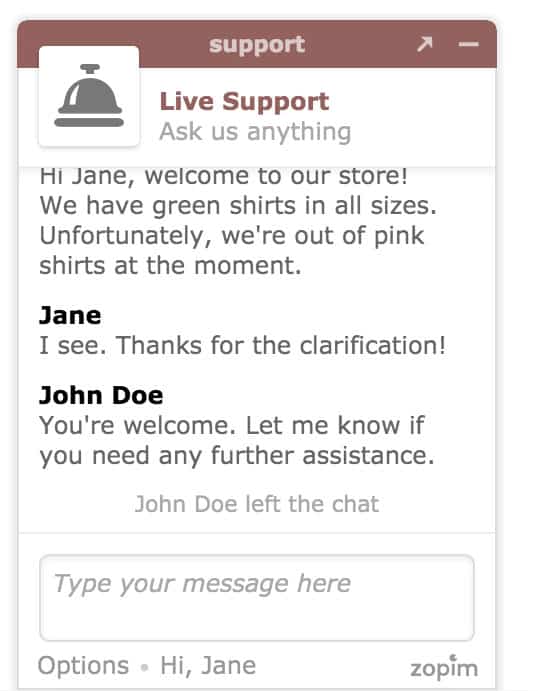
An example chat window
The first step is to actually sign up for an account on Zopim. They have a free version, and a free trial if you want to just test it out and see if it works. After you have an account, you can install and activate the Zopim Live Chat plugin. This will add a new menu item to the admin, which will ask you to enter your Zopim credentials. When you do, a chat window will automatically be added to the bottom right of every page on your site with default settings, so users can start asking questions right away.
Zopim chat has two modes for users. If an agent is logged into the Zopim dashboard and marked themselves as “Online” (by changing their status in the top right) then users have the option to chat live. They simply have to open the chat window and type in their question to get started. If there are no agents that are currently online in Zopim, then users can leave a message instead of chatting live, which will prompt them for their name, email, and message. The chat window itself will be located in the bottom right of your site, with a little bubble prompting users to ask questions.
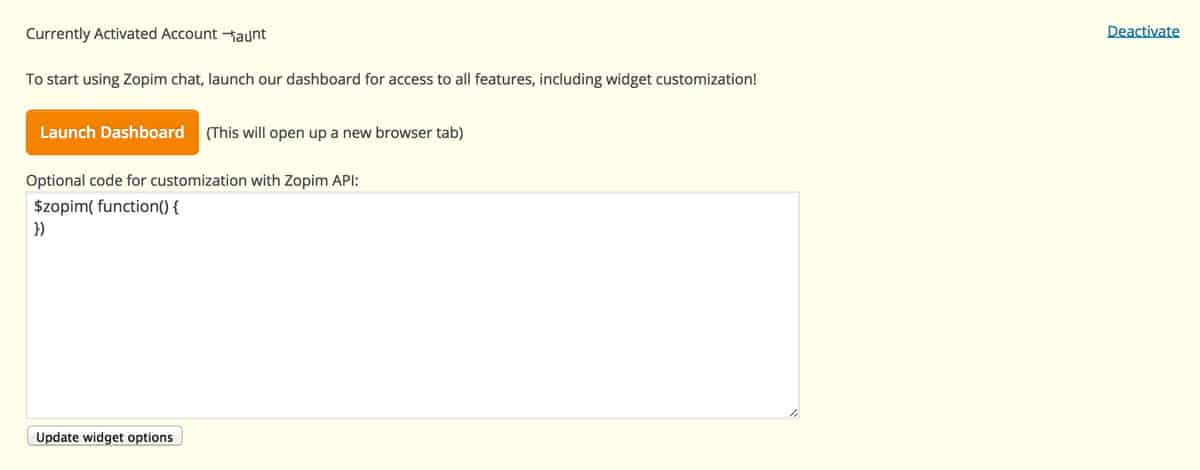
All of this is customizable from within Zopim. If you visit Settings -> Zopim in the WordPress admin you will see a button labeled “Launch Dashboard”. Clicking on this will launch the Zopim app so you can start customizing your chat window. There is also a text area you can use to hook into the Zopim API and add further customizations. I won’t go into this, but you can check out the API documentation for more ways to customize the widget.
The Zopim dashboard has all sorts of information about your chats. It will keep historical records of all your chats, give you analytics about messages and views, let you manage agents, and ban visitors, among other things. The part that we are really concerned about is the Widget section, located on the left sidebar of the Zopim app. This has all of the customizations for the chat window added to your site.
If you click on the “Appearance” tab at the top of the page, you will see that you can change how your chat window looks. You can choose between two templates, “Simple” or “Classic”. When switching between the two options, you will see a preview of your chat window to the right so you can see what the difference is. Below this, you can choose a title for your chat window (support is the default) and a color for the bar that appears at the bottom of each page. This should be changed to match your theme’s style. You can also choose a window size, if you want to make the window a bit smaller, and choose whether or not you want the window to appear on the left or right side of your page.

Choose your chat window style
The next section depends on which style you chose. If you went with “Simple” then you can add a custom “Chat Badge”, which is a block of text or custom image that displays at the bottom of your page, prompting users to click on the chat window and ask their questions. You can customize the text or image for this badge to fit with the style of your site. You can remove the badge entirely by switching the section to “Off”. There is also the “Concierge” section, which allows you to customize what users will see when they are interacting with your support staff. You can give the staff member a default name and image to act as their avatar here. Lastly, you can choose how you want messages to appear, either as speech bubbles, or just simple lines of text.
If you chose “Classic” then you will have access to the “Chat Bubble” section, which is a little message that appears above your support prompt indicating that users can click to ask a question. You can turn this off completely, or customize its message and background color.
The last step is the “Minimized Chat Button” section, which is what users will see at the bottom of the page before they open up your chat window. There is one message for online, meaning that an agent is logged into Zopim and ready to live chat, and for offline, which is for when users have to leave a message. Customize this message however you want.
The “Forms” tab at the top has a few options for when users open up a chat window. You can let users log in with Facebook or Google+ as an easy way of gathering their information. However, if users are logged in to your WordPress site, then this information will automatically be used as their profile, so you will have access to their name and email. If you are expecting a lot of guest visitors to use the chat window, you can turn the “Pre Chat Form” on. This allows you to add a small greeting before the chat begins.
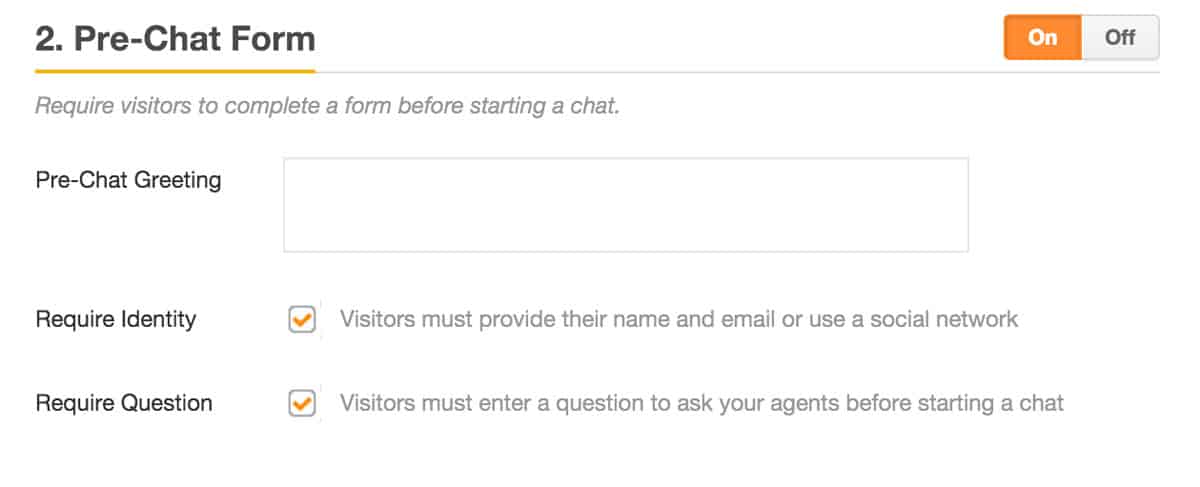
Setting up a Pre Chat form
You can also “Require Question” to have users enter a question before the chat starts and “Require Identity” to ask for a users name and email before they can begin. Without this option, users can start chats anonymously. You can also add a special “Offline Form” if you want to add a special greeting for when no agents are logged in.
Lastly, in the “Settings” tab you can tweak some global settings. You can change the language of your chat window, and turn on and off sounds. And if you’d like to remove the Widget altogether, simply check the “Turn Off Chat Widget” box.
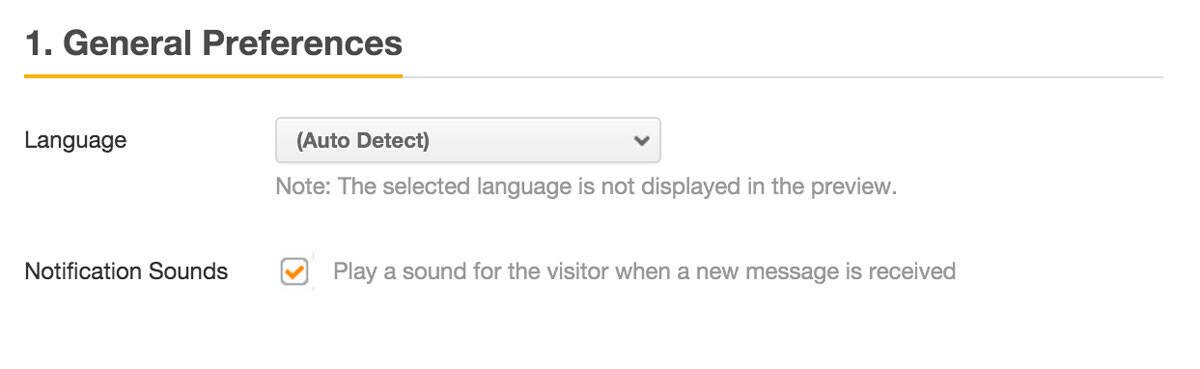
Tweak global settings
Once you save your settings, changes will take place on your site immediately. You can visit the front-end of your site to see your changes in action. You will see a small prompt to chat in the bottom right or bottom left of your site, which will open up a chat window prompting you for more information. If a user initiates a chat, then online agents logged into Zopim will be notified, and any of them can claim it and start responding to the Zopim dashboard. The Zopim chat form is responsive and will work on all mobile devices. There’s not much for you to do but set it up, and activate it on your site.
Costs, Caveats, Etc.
Though the Zopim service has a free plan, you need to sign up for a paid plan to have multiple agents responding to chats. The plugin is free to install and use, and frequently updated. If you are looking to get help with the plugin, you can post to the plugin’s support forums, or contact Zopim directly.
ResourcThe write-up