A pretty simple and useful plugin, Page Template Dashboard lets see you what templates your…
Polls are just one of those things that your site might just need but can be almost counter-intuitively difficult to set up. YOP Poll prides itself on addressing the needs of the user to make setting up polls a fairly painless experience.
What’s It Do?
YOP Poll adds a new custom post type for Polls. From there you can set up new user polls and customize each one to fit the needs of your site. Polls are displayed through the use of a shortcode and using a template which can be edited, though there are several themes to chose from out of the box.
YOP Poll also allows you to manage all of your polls in one place, with a quick view of the results all in one place.
How’s It Work?
Probably the easiest way to get started with the plugin is to create your first poll. You will find that there are lots of options for customizations, but these are meant to make your life easier, not harder, and most are simply enhancements. To create your first poll, go to Yop Poll -> Add New, and you’ll be brought to the poll editing screen.
The first thing to do is enter the title of your poll. By default, this title will be displayed alongside the poll, but you can always remove this from the template. The next step is probably the most important, but the easiest to set-up. Enter the actual question of your poll, then fill in the possible Answers. Click the “Add New Answer” to keep adding new answers to your poll, there is no limit though I’m sure users would appreciate it if it were just a few. You can also click the “Remove” button to delete an answer. Below this, you will see an “Answers Advanced Options” button, which opens up a new panel of settings. These are settings that have to do with how answers are displayed, for instance how they should be sorted, whether or not answers should be displayed horizontally or vertically, and whether or not to allow multiple answers. Leaving these options at their default will give you a standard poll layout, but there are plenty of options for customization.
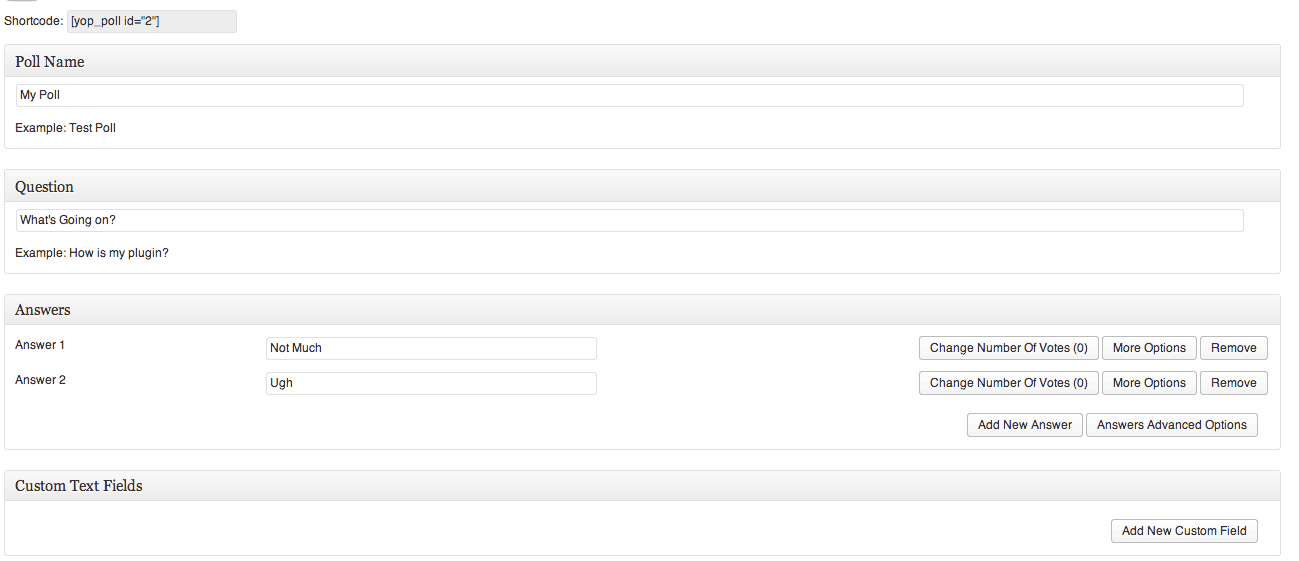
First things first, create your actual poll
The next section is “Custom Text Fields.” This is optional, but if you want to add a text field at the bottom of your poll for users to fill out (e.g. Name, Email), you can click the “Add new custom field” button and enter in the label for that text field. Under this, check the “Required” box if you want the user to have to fill in the text field before submitting their vote.
The View Results Options section gives all of the options related to just the Results. This includes choosing who can view the results (guests, registered users or both), and what text should be displayed when results are shown. You can also show/hide any links related to the results, and change the text of any of the labels shown underneath your poll. At the bottom of this section, you will see a radio button for “Auto Generate Poll Page.” If you chose the “Yes” option then a new page on your WordPress install will be added with just your poll. The URL of this page will be displayed in the “Poll Page URL” after you have saved it. I would only use this option if you want each poll to have its own unique page, otherwise, it’s best to insert the polls using a shortcode.
The Other Options section contains all of the customizations that don’t fit anywhere else. You can enable a CAPTCHA to make it more secure, chose which users are allowed to vote, block specific users from voting, and make sure that users can only vote once per poll. This is also the section where you can choose which template your poll should use. You will see from the drop-down menu that there are a variety of pre-built options in several different colors, each with a couple of options. Chances are you’ll be able to find something that fits your needs, but you can also create your own template or modify an existing one. To do this, go to Yop Poll -> Templates. Here you will see a list of templates which you can edit, or you can click “Add New.” It’s probably best to find a template that is close to the style you want and simply tweak it.
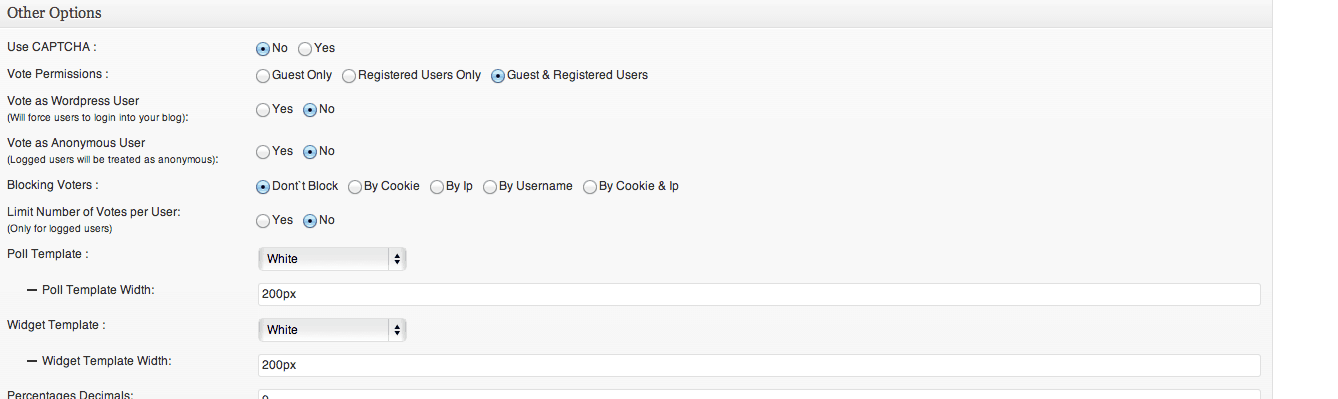
A small sampling of other options
The edit page for templates displays HTML Markup, CSS, and Javascript for the template. You will see that poll specific information is designating using template tags like %POLL-NAME% or %POLL-QUESTIONS. Use this as a guide to displaying information, it is fairly simple to follow along. Unless you want to remove any information, the HTML markup can remain pretty much the same, it is the CSS that will really help you out. There you can tweak colors, typography and other styles to make it fit better into your theme. Unless you are a front-end dev. with some coding experience, stick to the CSS section and just make tiny tweaks where you need.

The edit template page
Back on the poll edit page, you will see options to redirect after a vote, where you can specify an URL, and Archive Options, which are specific to the “View Poll Archive” link that is appended to the bottom of a poll. You can change the text of this link, direct to a page other than the automatically generated archive page, and chose whether or not the current poll should be included in the archive.
Actually inserting a poll on a post or page is fairly simple, and done through the use of a shortcode. Click on Yop Poll -> All Polls, to see a list of polls that you have created. The first column will list the IDs. Markdown that ID, then visit the page you want to add the poll and use this shortcode:
[[yop_poll id="1"]]
Simply replace the number “1” with the ID of the poll you want to display. You can display multiple polls on the same page as well. There are also a couple of IDs you can use for special functionality. If you set the Poll ID as -1 ([[yop_poll id=”-1]]) then the Current Active Poll will be displayed, meaning the newest poll that does not have an “End Date” assigned. -2 will display the latest poll that was created, and -3 will display a random poll.
Going to Yop Poll -> Options has global settings related to all of the polls on your site. This includes most of the options available on the individual poll edit pages, such as labels for fields, horizontal versus vertical layouts, Vote permissions, the use of advanced functionality like a CAPTCHA, and default sorting of results. The only difference is that these will change the default settings for all polls instead of on a post by post basis.
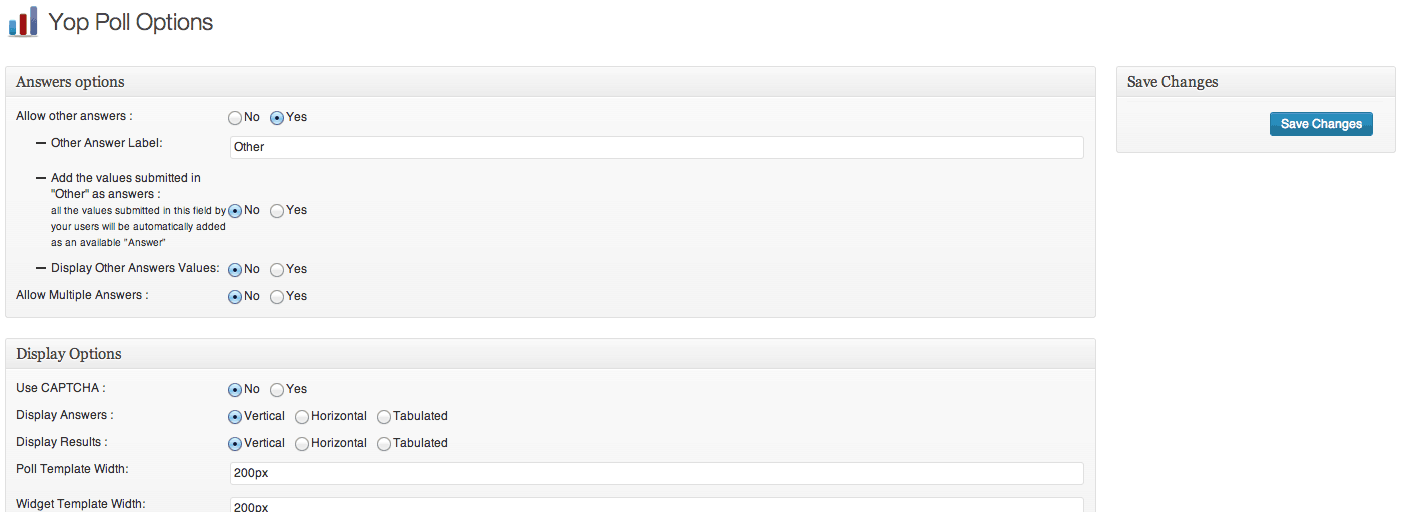
Global options parallel individual poll options
I would love to dive into the more advanced functionality of the plugin, and all the various things you can do with it, but this should be enough to get you started. The Plugin’s FAQ is loaded with more information if you want to discover all you can do with your polls, but it’s also fairly simple and low-risk to just start tweaking settings and see how they affect the landscape.
Costs, Caveats, Etc.
YOP Poll is completely free and under very active development with new features being added at users requests. If you are having problems with it, start with the FAQ, and then move support forums where the plugin developer is very active.
As with most front-end plugins, a CSS and Javascript will be added when polls are displayed for styling and functionality. A little bit too much Javascript is added to my tastes with this plugin, but I am sure this is being addressed, and displaying results client-side is no simple affair. And this extra code is only added on pages where polls are displayed, so it won’t weigh down your whole site.