One of the more annoying pain points of WordPress development is keeping local, staging and…
If you’re running a site that uses multiple third-party apps that are not natively integrated (nor have a WP plugin to connect them), you’ll need to find a way to make them work together. Any manual work like syncing data by hand quickly becomes a nightmare as you gain more data, customers, and transactions. One way of connecting WordPress to 3rd party systems is via webhooks. They are not natively supported by WP but, thankfully, there’s a solution.
A great way to implement webhooks in WP is with the WP Webhooks Pro plugin from Ironikus. Working with this solution has been a joy and it truly makes WordPress a hundred times more powerful than it already is.
What are webhooks?
You’ve already read this term three times now, but you aren’t really sure what webhooks actually are. Not to worry, that’s why we’re here – to make everything clear. In essence, webhooks are used to automatically relay information from one of your apps to another when a change occurs. Using them you don’t need to manually transfer data from one app to the other, but instead, the data is pushed on its own. Things auto-sync enabling you to connect multiple systems into one complex unit that does work for you – automatically or automagically as some like to call it.
A simple example of this is when a new member signs up for your site. First of all, with webhooks, it’s possible for new members to sign up from other sources (like other apps or sites). When the change is done that data is pushed directly to your mailing site/app where a greeting mail is automatically sent to the new member’s address welcoming him. The great thing here is that no matter the software you’re using, it doesn’t need to periodically “check” for changes.
The change itself is the trigger and if the webhook is set up properly every other “cog in the machine” lines up to send and receive data outside of your direct influence. This, in turn, means you won’t have to micromanage every app you’re using and can focus on other aspects pertaining to your site.
To learn more about webhooks and see real-world examples as well as screencasts of how to set things up, visit Ironikus’es Youtube channel.
WP Webhooks Pro features
Now that you have a basic understanding of what actually webhooks are, how they work, when to use them and why it’s time to explain how to use them specifically with this plugin.
Personal assistance bot
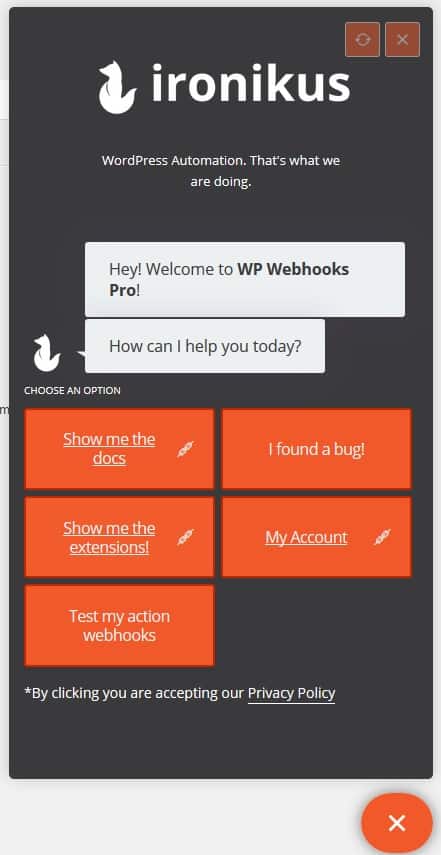
Before digging deep into all the features, however, we have to point out the most amazing thing, that’s in fact rarely seen in plugins – the personal assistance bot. Because it’s so out of the ordinary, it was also the first thing that caught our eye.
It’s funny how just a simple button on the bottom right of your screen can make life so much easier. From it, you’ll be able to check the documentation if you’re stuck, or contact the devs if you’re really stuck.
Reporting bugs and managing your account is also done through a click of a button. The thing that really underlines how useful the bot can be is the test function.
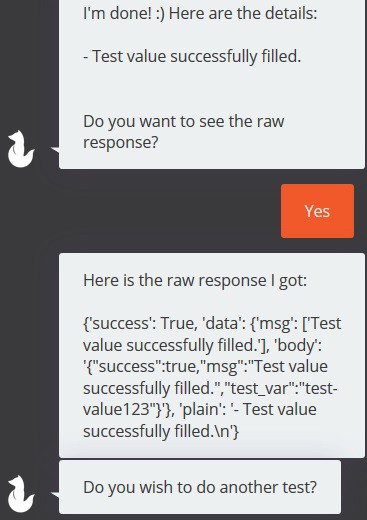
By just pasting the generated webhook URL, the system will run a test and get back a raw response based on the given parameters. Now, we do understand this is a situational tool and over time as you get accustomed to the ins and outs of the plugin, you’ll be using it less, but while you’re just starting out it may well be the single most important thing of the whole plugin.
Sending data
With the bot out of the way (which really isn’t a direct function you’ll work on anyway), it’s time to dig a little deeper into what the plugin has to offer. One of two core functions for which you would initially get software like this is to send webhook data.
The very first thing you’ll want to define here are the triggers. Triggers, as their name suggests, are specified situations where one action triggers another one automatically.
Think about the example with the new member we’ve mentioned a few rows back. There are six actions integrated into the plugin that will result in data being sent after the conditions are met.
You’ll be able to pick and choose among these which ones you want to use. Most of the time you don’t want to be constantly updated about every change that happens, but it certainly helps to have as many options as possible.
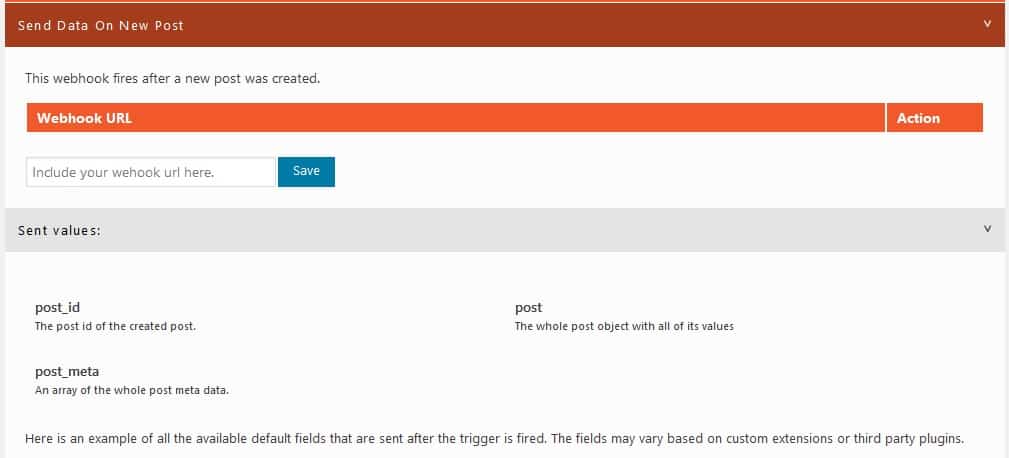
Once you’ve figured out which triggers you’ll be using, it’s time to set up where you want your data sent and which values you want. The data you’re sending originates from your primary site (where you’ve set up the plugin) and the values are then transferred to connecting sites/apps through the URL you’ve entered.
On the picture above, you get to see all the values that are present for sending data to a new post. The whole response for a post would be like the following:
(
    [post_id] => 1234
    [post] => Array
        (
            [ID] => 1
            [post_author] => 1
            [post_date] => 2018-11-06 14:19:18
            [post_date_gmt] => 2018-11-06 14:19:18
            [post_content] => Welcome to WordPress. This is your first post.
            [post_title] => Hello world!
            [post_excerpt] =>
            [post_status] => publish
            [comment_status] => open
            [ping_status] => open
            [post_password] =>
            [post_name] => hello-world
            [to_ping] =>
            [pinged] =>
            [post_modified] => 2018-11-06 14:19:18
            [post_modified_gmt] => 2018-11-06 14:19:18
            [post_content_filtered] =>
            [post_parent] => 0
            [guid] => https://mydomain.dev/?p=1
            [menu_order] => 0
            [post_type] => post
            [post_mime_type] =>
            [comment_count] => 1
            [filter] => raw
        )
The example is of a response for the default first post already made when working with WordPress for the first time.
Receiving data
The second core function aside from sending data is receiving data. Opposite from sending data to other locations, this function is used when you want data from other locations to be received by your primary site.
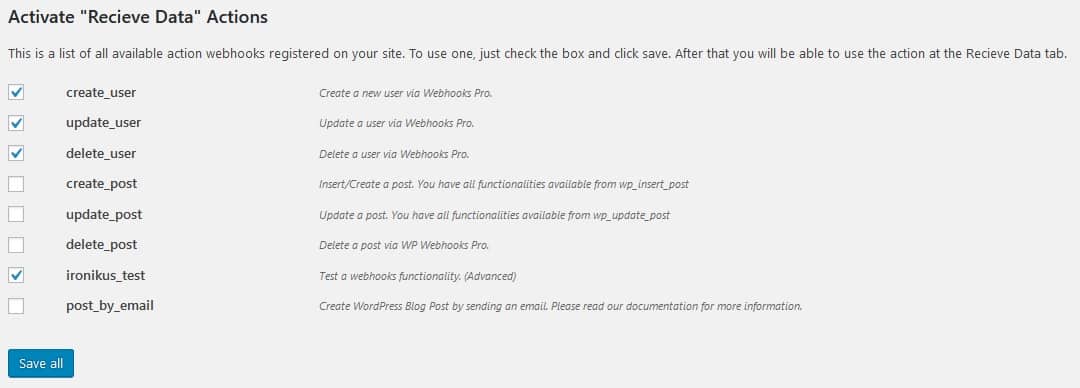
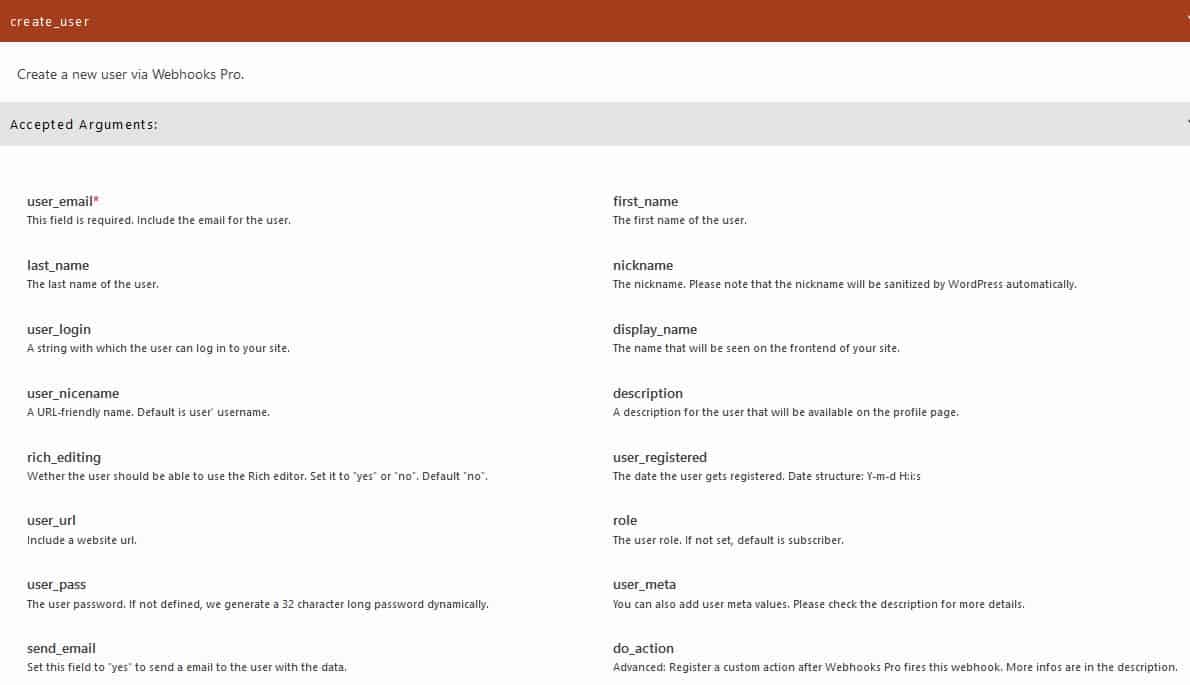
The setup is very similar to the one we’ve just covered. So first you’ll want to choose which actions will bring with them the data transfer. Again, you can see they’re concentrated around user and post management.
After you’re done choosing you’ll need to set up which arguments are required/accepted as the outside input your potential member will be filling out. By default, the only mandatory field is the email address, while all others are optional, but you can change this.
The response this time is much less detailed than while sending data:
$return_args = array(
    'success' => false,
    'data' => array(
        'user_id' => 0,
        'user_data' => array()
    )
);
The main reason for this is the fact that input is done through third-party software, so the responses will be adjusted accordingly to reflect this. The best apps to use with this particular plugin have got to be Zapier and Automate.io, both of which have excellent integration with WP Webhooks Pro, so you should really look into those first, before trying other ones.
Other features
The two core features we’ve mentioned represent the essence of why you would even look into a plugin like this. It’s highly specialized and you’re using it for the main functions. There are however secondary functions and add-ons that give it a whole new dimension.
Whitelist
If you enable the whitelist option, then only request made from preapproved sites will go through.
The plugin automatically keeps a log of the last 20 requests, so you can keep track easily – all of these will be blocked however and the only ones that will go through are the ones you’ve manually set up.
If you’re working with sensitive information and just want some extra protection this is a neat feature for you, but most of the time you’ll want to keep the gates open. The number of things you need to set up in order to get webhooks working are their own security in a way and using a whitelist on top of that just seems like overkill.
Translations
As you can see just below the whitelist option, there is also an option to enable translations. Again not applicable in every situation, but for those of you running multilingual sites, this is something you’ll be craving for.
Translations are commonly overlooked on today’s sites, where most of the time you’ll see the default language options – native language and English (if the native is English then not even that).
Going the extra mile with creating multilingual sites clearly shows your stance on diversity among your current visitors/members and surely helps in attracting new ones.
Add-ons
Before going into all the add-ons it’s important to note that all of them are free with the Pro package and, as we’ve said earlier, all of them add to a significantly better product as a whole. Some of them are, without a doubt, for expert users, but especially those offer you the freedom you probably weren’t expecting. As your knowledge grows and you use them more and more, so will your appreciation of them. There are currently five available extensions. In no particular order, they are:
Code Trigger
A feature for advanced users, Code trigger lets you create code that will supplement your existing default webhooks. This code can be made to run anytime a specific action is performed, even when your webhooks won’t trigger.
As you would guess, this kind feature requires a high degree of programming knowledge, so although it is available to everyone using the Pro version, that doesn’t mean it should be used by everyone.
Manage Media Files
A much simpler add-on to use. Here you’ll be able to insert and manage media files as attachments from URLs and local paths. This is a pretty straightforward feature for those sites that are busting with multimedia content.
Remote File Control
Just as the name suggests this add-on enables you to manage your files while not directly connected to your primary site. Actions you’ll be performing range from copying, moving, deleting or renaming files and creating or deleting folders.
Execute PHP Code
Similarly to Code Trigger, this add-on is for highly skilled users who want to use PHP code for the further customization of the plugin. With PHP your reach becomes infinite and you’re able to connect everything on your site with webhooks.
Meaning everything you can include in the code can be accessed through webhooks on other platforms – for a skilled user this will be the ultimate test of what this plugin is truly capable of. The add-on supports XML, JSON, text/HTML and Custom tags.
Create Blog Posts via Email
If you’re ever in a situation where you don’t have access to your primary site, with this add-on, you’ll be able to use your email to release posts on your site. You will need an email integration that can use webhooks to link the content, like the already mentioned Zapier, but a feature like this, even at first, glance opens up brand new possibilities.
For somebody who is always on the go and just doesn’t have the time to sit in front of a desktop often, something like this could prove to be a lifesaver.
Pricing
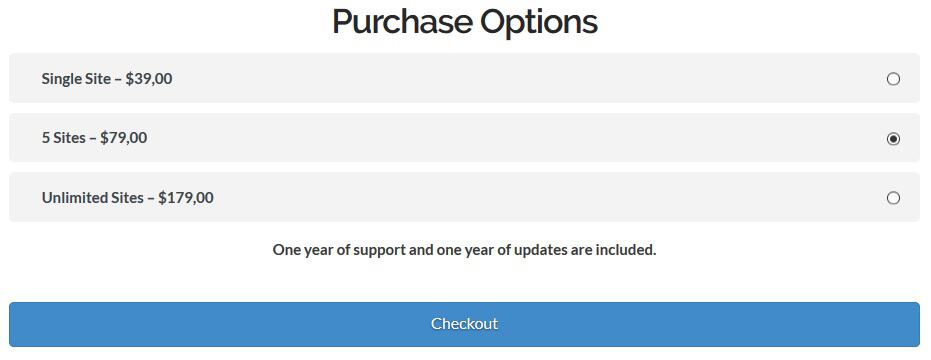
We’ve already delved into the “Pro” part of the plugin, without really giving voice to the pricing plan. As of writing, there are three payment plans. All of them last a year, the main difference being for how many sites do you get to activate the license.
It’s all pretty straightforward, with no additional fees, or big numbers of tiers. Essentially you’ll know what you’re getting and paying for.
Summary
Going in, webhooks can seem like something far out of reach for the average WordPress user. However, when used correctly, even in their limited, basic functions, they can vastly improve both your site and your ability to manage it.
Most of the things where even a little coding is involved seem immediately off-putting, but given enough time and effort, everything can be made to work for you.
With WP Webhooks Pro you’re getting a tool that will allow you to make connections between apps and sites you never actually thought about and this is precisely why it’s so good. It makes you think outside the box, outside your comfort zone and only then can real progress truly be made.
If you’re looking into stepping up your game to the next level WP Webhooks Pro could be a great first step in that direction.

