If you link to your email, or even if you just include it in text…
When you ask about WordPress security, chances are Wordfence is going to come up. It turns out there are pretty good reasons for that.
What’s It Do?
Wordfence offers security scan and extra layers of protection for your site. This includes enabling a firewall to block known malicious IP addresses, login security such as enforcing strong passwords and protection from brute force attacks, and scans which will compare your site’s files to original versions from the WP repository as well as look out for potentially harmful code like base64 encoding. Wordfence also allows you to see traffic coming in live to track IP addresses or User agents that may be trying to access your site with too much frequency (which can sometimes indicate a spam attack).
Paying customers of Wordfence also have access to scheduled scans, multi-factor authentication, and more advanced options but I’ll be focusing on the free version here.
How’s It Work?
When you install and activate Wordfence, you’ll be prompted for an email address right away to set up notifications. You can customize these notifications later, or you can leave your email off if you’d rather not receive them by clicking the “Dismiss” button.
The first place to go is Wordfence -> Options where you will see all the settings for the plugin. At the top, you can turn on or off all of the main features of the plugin (firewall, login security, live traffic view) by checking off the appropriate text boxes. There is also a drop-down menu to select preset security levels, which will change your options automatically based on your preferences. These range from “Level 1: Light protection, just the basics” to “Level 4: Lockdown.” If you want to get started quickly with the plugin, you can select one of these, hit “Save Changes,” and move on.
The next section is “Alerts,” where you can indicate which alerts you would like to receive by email, assuming you have set up an email address. You can choose to be notified only for “critical problems” and “warnings,” or every time a non-admin user logs in, or whenever someone uses the lost password feature, among others. Simply check the box next to the alerts you want to enable and click “Save Changes.”
The “Live Traffic” view can most likely be left at its default. However, if there are specific IP addresses (your own for instance) that you would like to ignore, or specific Browser user agent strings (Googlebot comes to mind) you can fill them in here.
Next up is “Scans to include.” Most of the options will be checked by default, so that scans will check for suspicious code and content, the options database table, the strength of passwords, out of date WordPress files, etc. The only thing that won’t be checked by default is plugin and theme files. I like to check these boxes to include these in the scans, just make sure you check the files the scan addresses before you change anything permanently. Everything else can most likely be left at its default.

You can specify in your options what to include in scans
The “Firewall rules” section addresses the configuration of the Firewall, which prevents spam and brute force attacks. Basically, it checks to see if a UA string or IP address is attempting to access the site at a rapid pace (30 times per minute at its default). If it finds one, it will block it. You can specify different rules for Google crawlers here, which can be accidentally blocked sometimes and change the basic settings of the firewall here. If you don’t know too much about it, don’t worry too much. Just leave the settings alone, they are helpful in preventing automated and unauthorized access to your site.
Last up is “Login Security Options” and “Other Options.” In the former section, you can choose to enforce strong passwords, meaning users will not be allowed to choose passwords that are deemed as weak or exploitable. You can also block users that have had too many login failure attempts, anywhere between 5 and 10 attempts should work here. It’s enough to give your users a chance if they forget their password, but few enough that it can be effective against brute force hacks. The latter section has some miscellaneous options such as hiding your WordPress version to make it more difficult to exploit, and to ensure that comments are scanned. You can also limit the amount of time and memory security scans can take so that you don’t eat up your WordPress installs bandwidth. The defaults here tend to work.
If you want to check your site for malicious code, go to Wordfence -> Scan. At the top of the page, click “Start Wordfence Scan.” You will immediately see the progress of your scan in the top text area, and the details of the scan in progress. Wordfence will check all of the files on your WordPress install to see if it can find any malware, suspicious code or content, or altered files in core, themes or plugins. It also attempts to locate common backdoors and phishing links. Lastly, it checks your URLs against Googles Safe Browsing content. Sometimes, when your site is hacked or there is something wrong with your code, Google will list certain URLs as unsafe for viewers to access. Wordfence will pinpoint these URLs for you so you can address the problem. It’s generally pretty good at picking up common and smaller problems, and it checks against lots of known security problems with several fail-safes in place.
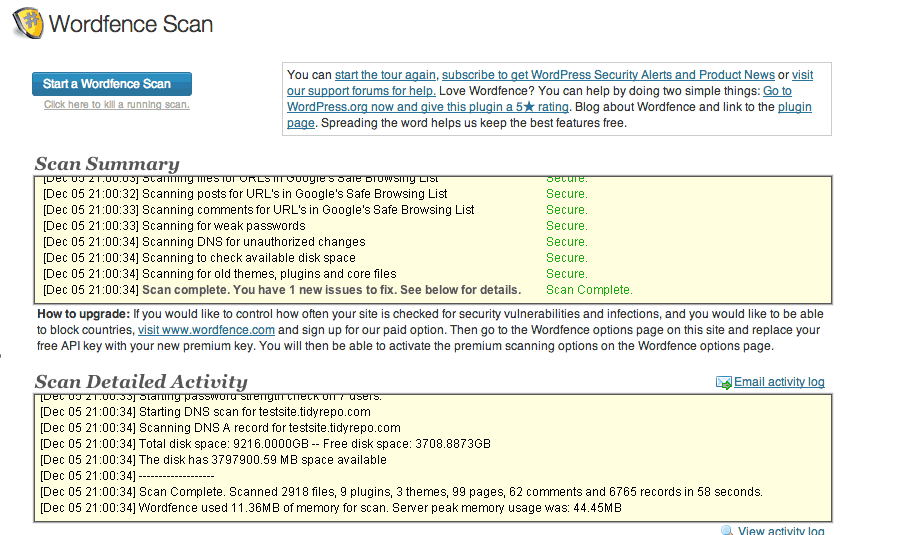
Security scan’s progress report
When the scan is done, a list of problems will be listed at the bottom. If a problem can be solved by the plugin, it will give you an option to make a quick fix, or update a plugin or theme if that is necessary. Otherwise, it will indicate where the problem is coming from so that you can check the files yourself. For instance, if it finds a base64 encode in your theme, which usually means someone has put a malicious link on your site, it will tell you exactly what file it exists on. Whatever the problem is, Wordfence will suggest a way to fix it. Underneath each problem, you will see a link to indicate that you have “Fixed this issue” and another one to “Ignore this issue.” If you have fixed a problem manually, make sure to mark it here so that it doesn’t come up every time you do a scan.
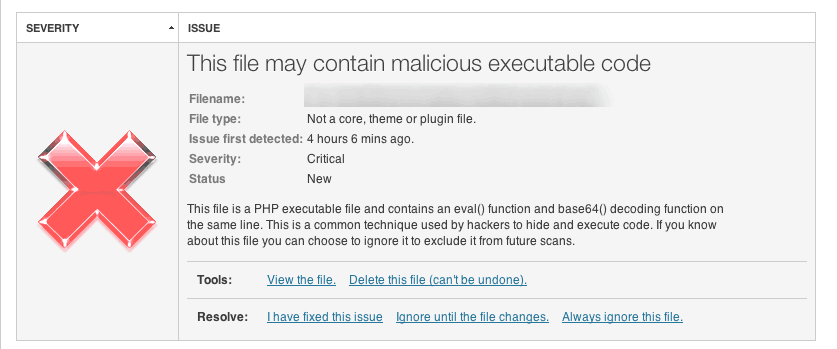
A typical error message
If you go to Wordfence -> Live Traffic you can see a scan of all of the traffic reaching your site and break them up into different categories. So you’ll be able to see IPs of human users and crawlers alike. If you’d like to monitor your traffic this is the way to do it.
You can also go to Wordfence -> Blocked IPs to manually enter in any IPs you would like to block from accessing your site. Just type in the IP address and click the “Manually block IP” button so that it is added to the list. If you would like to block User Agents or a range of IPs, you can do so in Wordfence -> Advanced Blocking.
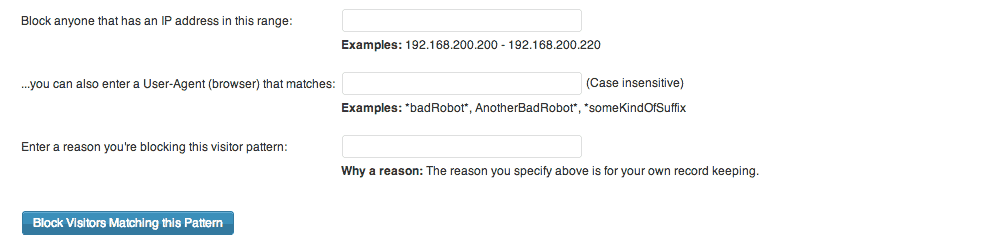
Advanced blocking
The other sections of the plugin, Cellphone Sign-in, Country Blocking, Scan Schedule, and Whois Lookup are only available to paid members.
Costs, Caveats, Etc.
Wordfence is free for its basic features. For $39 a year, you can access advanced features and premium support so it may be worth it to you. Otherwise, if you are having a problem you can visit the plugin documentation, or go to the special support forums they have set up on their site to report a problem or request a new feature.