
When building sites, you occasionally need to create small blocks of content that can be…
Testimonials Widget is not, in the strictest sense, just a widget. It’s a plugin that lets you collect testimonials, organize them, and put them anywhere on your site.
What’s It Do?
The Testimonials Widget adds a new section to your admin panel. In it, you can add posts that are specifically tailored for testimonials, with fields to include Job Title, URL, an Image and of course, a quote. You can display the testimonials anywhere on your site, using a widget, shortcode or filters, and it leaves the listed testimonials only lightly styled, so you can customize them with some CSS.
The plugin doesn’t leave too much of a footprint on your site, with only a small CSS file, and just a couple of dozen lines of Javascript that is added only when it is needed (more on that later). Other then that, it’s fairly simple to manage and add testimonials, and there is plenty of flexibility.
How’s It Work?
When you install and activate Testimonials Widget, you will see a brand new section in your admin panel labeled “Testimonials.” This is where all of the testimonials content will be collected. To add a new testimonial, simply click Testimonials -> Add New.
You will be brought to post editor screen with some custom fields. Use the title field for the name of the person that gave your testimonial and the content box for the testimonial itself. Below that, you will see a meta box titled “Testimonial Data.”
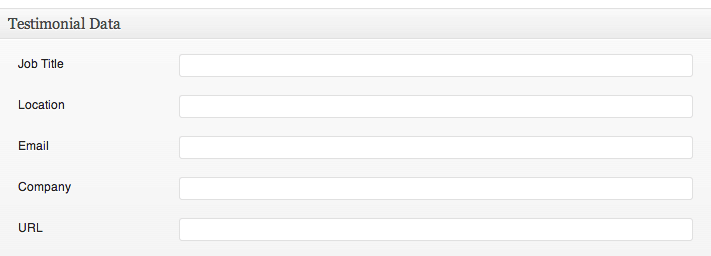
Testimonial Data Metabox
This information is optional, but you can use it to add a Job Title, Location, Email, Company, and URL. In actuality, these text fields can be used for anything, they will be displayed along with the testimonial quote, so they can be adapted to different purposes. You can use the featured image box to add an image to the testimonial as well.
If you visit Testimonials -> Settings you will see a few ways to globally change the plugin’s configuration. In the General tab, you can alter the way that data is output. Use the checkboxes to hide specific elements from every testimonial, site-wide. You can hide anything that is in your post editors, such as email, job title, or even the testimonial quote itself. Keep in mind, these settings can be overwritten with shortcodes or widget settings, but it is good if you need to make a sweeping change. You can also choose to include, or not include quotation marks around the testimonial, enable pagination and add a target to the URL’s <a> tag.
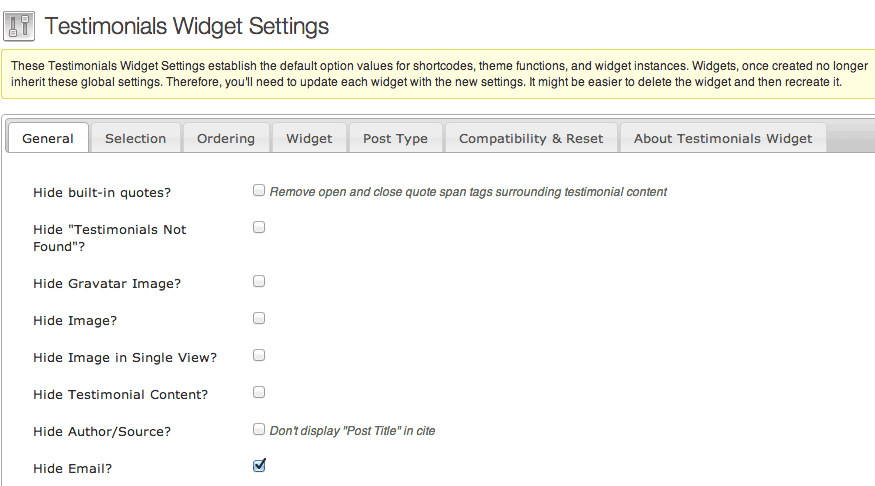
Set global settings in the General Settings tab
The Selection tab allows you to filter specific posts or taxonomy types. If you’d like to only include a certain category, for instance, you can enter the category slug in the “Category Filter” text box. The same can be done with Tags and individual posts. For posts, enter in the IDs, separated by commas. You can also select a default limit, of how many testimonials should be displayed at once, or on the same page.
The Ordering tab, very simply, allows you to change the order that testimonials are listed. You can order by content, author name, or any meta fields such as email and location. Select the field you want to order your content by from the drop-down, then select either descending or ascending from the “ORDER by order” menu. If you’d like to sort everything randomly, simply click the checkbox at the top with the label “Random Order?”
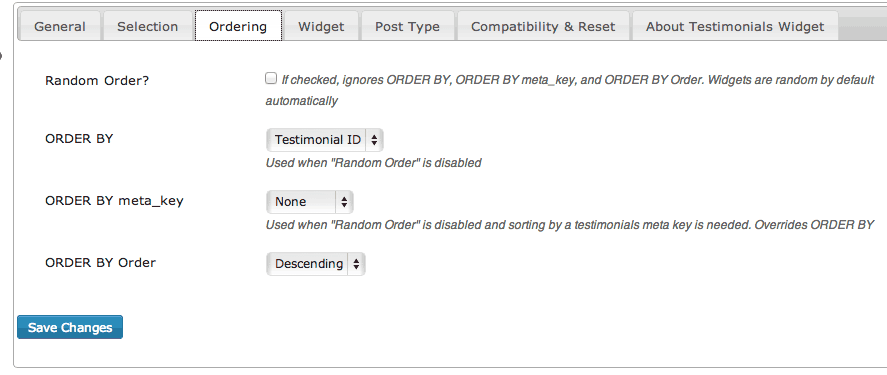
Set random or specific order
The Widget tab lets you change settings for the drag and drop widget. You can edit the widget title, character count, width, and height, remove whitespace, and other display options that will affect how the widget is viewed by your users. Note here that if you already have created a testimonials widget, you will need to delete and create a new one in order for the new settings to take effect.
The Post Type tab allows you to change the Testimonials editing screen and archive. You can choose to allow comments and change the slug of the default archive and single testimonial pages.
Compatibility & Reset has a few options for HTML compatibility and import and export options. Unless you are having problems with the plugin, or have used it before, it’s best to leave it at its default to conform to current web standards.
Once you have set up the plugin and added a few entries, there are three ways you can add them to your site.
- Use the widget. Go to Appearance -> Widgets and drag and drop the “Testimonials Widget” into a widgetized sidebar. You can change widget-specific options using the widget box.
- Use the shortcodes. The [[testimonialswidget_list]] shortcode will display widgets in a list. The [[testimonialswidget_widget]] will display one testimonial at a time, rotating through each one, just like the widget does by default.
- Use the functions. You can include the widget in your template files through the use of the testimonialswidget_list() or the testimonialswidget_widget() functions. Refer to the Plugin API Documentation for more information on these.
If you are using the widget, then it’s simply a matter of choosing what options you want to apply. If you are satisfied with your global options, then there is nothing to change. However, there is also the ability to change the default settings using the drop-down menus in the “Testimonials Widget” box. You can change any setting above, so simply scroll through them and change what you would like and then click Save. The widget will appear in your sidebar as a rotating box, displaying one testimonial at a time. Each testimonial will fade out, and the next will be faded in.

Widget Settings
If you use the shortcodes, then you can define the settings using shortcode parameters. There are two different shortcodes, but the options for both are the same. If you chose to use the [[testimonialswidget_list]] shortcode, then built in pagination will occur if you have more testimonials then the limit. If you are including the shortcode on a Post rather then on a Page, you may have some issues actually getting the pagination to work. I’d recommend putting it on a page if this is necessary for you.
The shortcode parameters can be used to customize any feature of the plugin. For instance, let’s say we wanted to list our testimonials with a character limit of 50, from a category with the slug “products,” in random order, with the location field hidden.
[[testimonialswidget_list char_limit=50 category=products random=true hide_location=true]]
Or let’s say I wanted to include a rotating testimonials widget, with only 5 entries, with the tags “fun” and “stuff,” with a height of 250 and a title of “My Widget.”
[[testimonialswidget_widget limt=5 tags=fun,stuff height=250 title=”My Widget”]]
There are plenty more shortcode combinations that can be used. A full list can be found on the plugin’s page in the WordPress Plugin Directory and on the plugin demo page.
The only thing left to do is to style the testimonials themselves. By default, the testimonial is contained within an HTML blockquote Element, and each meta field has its own class. These can be easily styled with CSS.
Costs, Caveats, Etc.
The Testimonials Widget is free, but there is a premium version as well with more options, such as adding a “read more” link to testimonials, improved caching and anti-spam measures. Still, Michael keeps the free version well updated and maintained, and is active on the support forums if you need any help.