Front-end Editor has a simple goal. Fewer trips to the backend editor, in both a…
If you are constantly playing around in the WordPress post editor, you might find yourself in a bit of a mess from time to time, especially if you have plugins that add and more and more to your editor. Sometimes it’s nice to be able to focus on your post first, and group everything else together separately. Tabify Edit Screen lets you organize different components of Post Editor pages into different tabs so that your editing experience is a bit more organized.
What’s It Do?
Basically, Tabify Edit Screen lets you group together different meta boxes in the post editor screen (Editor, Featured Image, Slug, Author, Custom Fields, Format, etc.) into different tabs. That means you can put just your editor in one screen, image data in the next, and metadata in the third. Or organize it however you want. You can also customize how the tabs are organized for each post type, including Posts, Pages, Media, and Custom Post Types. Tabs can be created in the admin, and can be turned on and off per post type.
How’s It Work?
After you install and activate the plugin, you can start managing your tabs by going to Settings -> Tabify Edit Screen. On the left side of the screen you will see a list of Post Types that exist on your WordPress install, including at least Posts, Pages and Media. Click on any of these to add tabs to their editor screen.
On the left side of the screen, you can create the tabs themselves. First, you’ll need to enable Tab Edit screens by checking the box next to “Show tabs in this post type.” Initially, everything will be grouped together in a category called “Others.” Scroll down to the bottom of the page and click “Create New Tab.” This will create a new tab for you to insert parts of the editor. You can change the title of the tab by clicking “Choose Title” and typing in what you want.
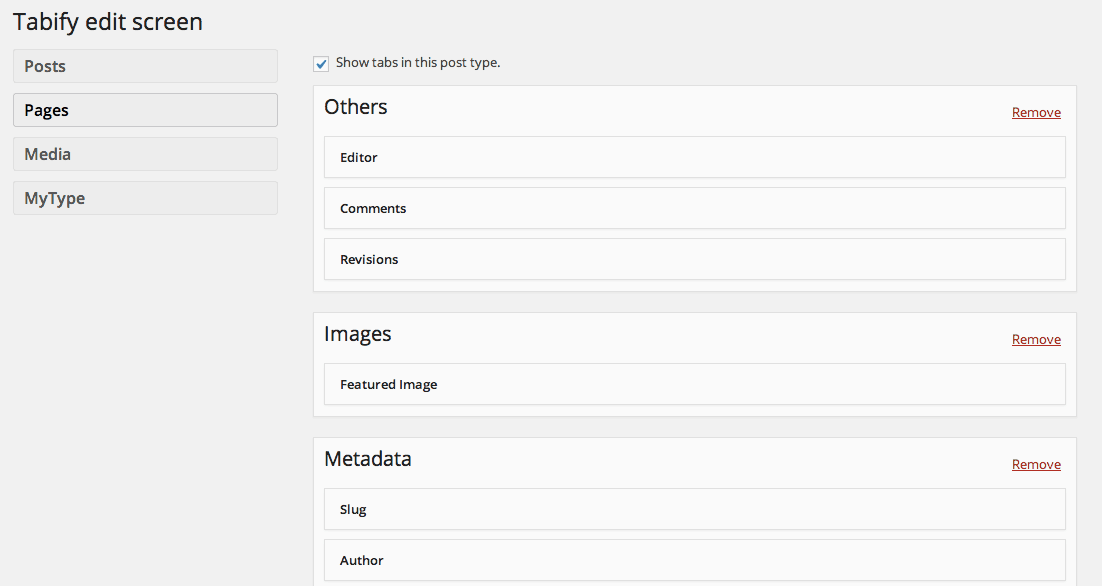
Create new tabs, then drag the pieces together
Then, you can start dragging items into this tab to add it. It probably makes sense to organize things categorically, for instance drop “Custom Fields,” “Categories,” “Format” and “Excerpt” into the same tab so that you have a Metadata category. But you can organize items however you want. When you are all finished creating your tabs just click “Save Changes” and visit the edit screen of the post type you added tabs to. You will see your created tabs across the top, with the various pieces of the editor screen grouped together.
Simply repeat this for every post type you want to add tabs too, making sure to check the box at the top of the page on each one to enable tab functionality.
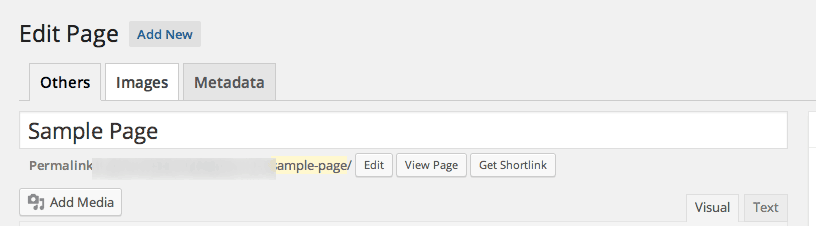
Tabs are accessed from the Post Editor
Costs, Caveats, Etc.
Tabify Edit Screen is updated fairly frequently with small bug fixes and features. If you are having problems with it you can visit the support forums where you should get your answer.