If you're a keen webmaster and find yourself constantly adding content to your WordPress website, installing…
Stripe is a payment gateway which makes it fairly simple to accept credit card payments on your site and track your transactions through their dashboard. Simple Stripe Checkout takes care of integrating this with your site.
What’s it Do?
Simple Stripe Checkout adds a shortcode for your posts and pages, which adds a simple Stripe form for collecting payments for your users. The form can be customized either by default or through the shortcode to accept different amounts, redirect to different places on success or failure, define form fields, and basically everything related to the form. All you need is a Stripe account and API credentials, and the plugin will take care of the rest of the integration for you. It’s simple to set up, and you can have multiple forms on the same page. It doesn’t offer the same level of customization as some other payment plugins out there, but it can have you up and running very quickly.
One thing I’ll just note is that in order to properly accept payments securely, you will need to have SSL set up. That’s beyond the scope of this walkthrough, but Stripe has a good introduction to how that works.
How’s it Work?
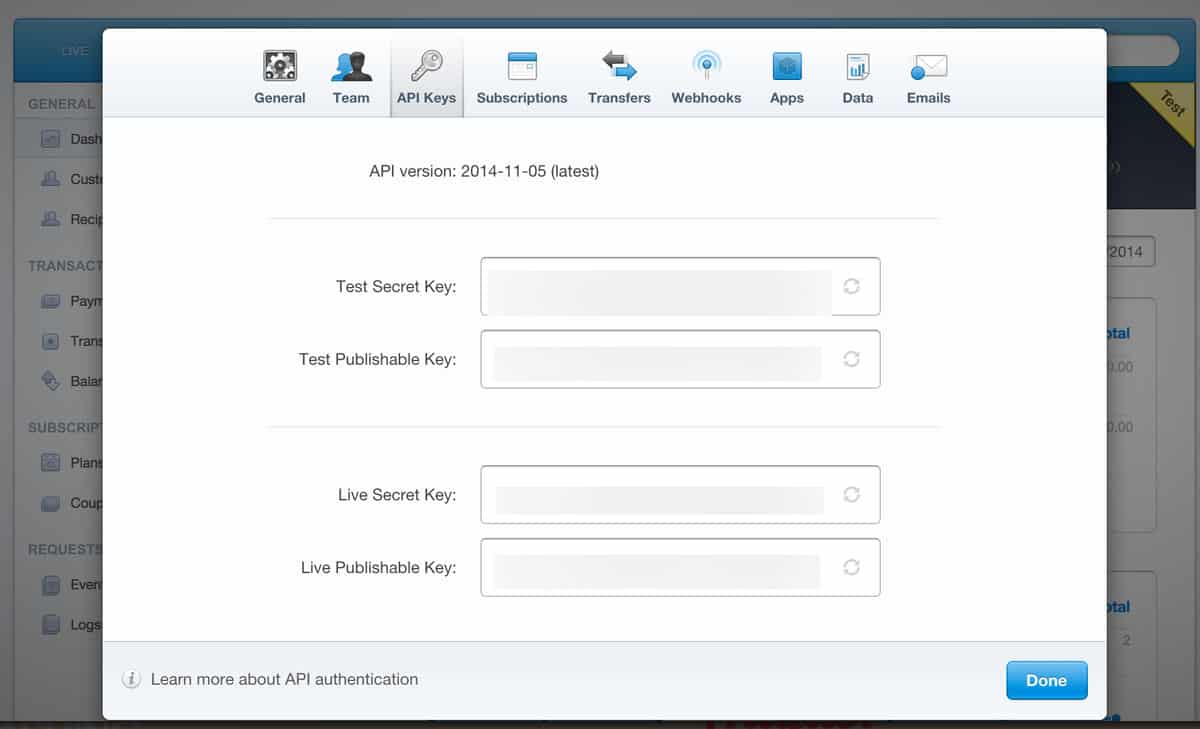
Before installing the app, you will need to set up an account over at Stripe. All you need is an email and password to get started, and your account will be created. Once you log in to your Stripe dashboard, you will see all of the things related to your transactions. There’s a lot to dive into here, but for now, just take note of the toggle in the top right corner of the dashboard with “Live” and “Test”. Live mode means you can start accepting actual payments, while “Test” mode is for testing things. That’s where we will leave it until we are done setting everything up. Next, click on “Account Settings” link in your dashboard, then click over to the “API Keys” tab. You will see a list of four API keys, two for testing, and two for live mode. You will need these keys when setting up the plugin.

Grab your API Keys from Stripe
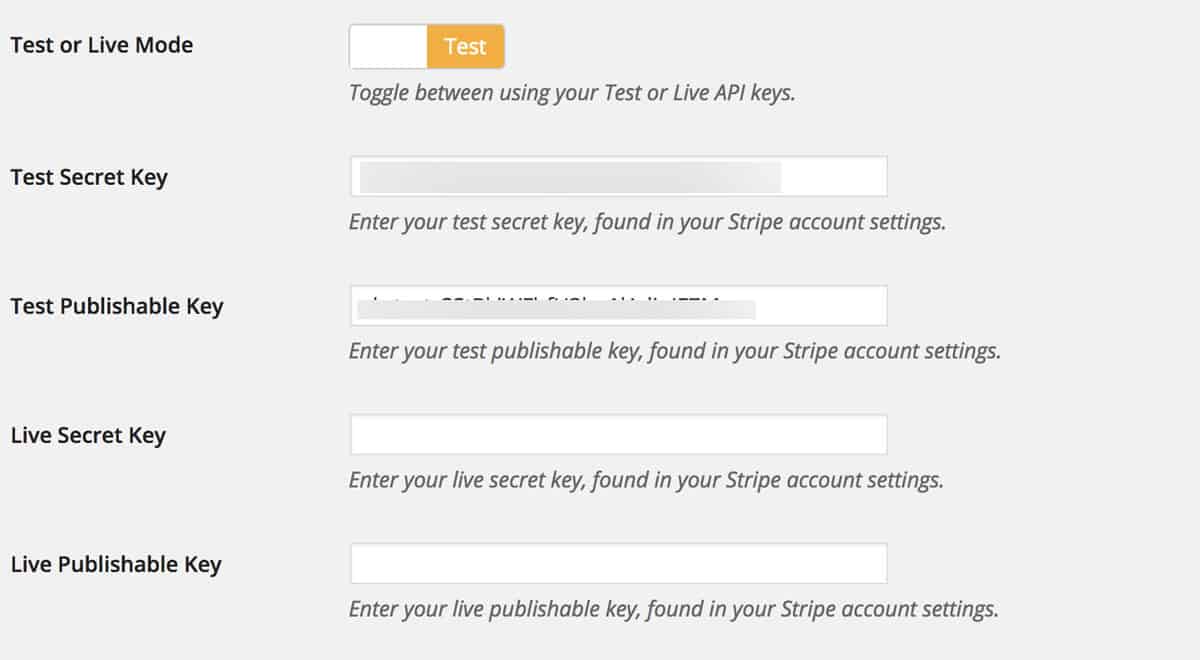
After you’ve done this, you can install and activate the plugin. You will see a new menu has been added to the admin labeled “Stripe Checkout”. Click on this to configure the plugin. At the top, you will see another toggle, which is in “Live” mode by default. But since we are testing, flip this over to “Test”. Next, enter the four keys from your Account Settings in Stripe into the appropriate text field in Simple Stripe Checkout’s settings page. This will actually link up your site with your Stripe account.

Connecting your WordPress site to Stripe
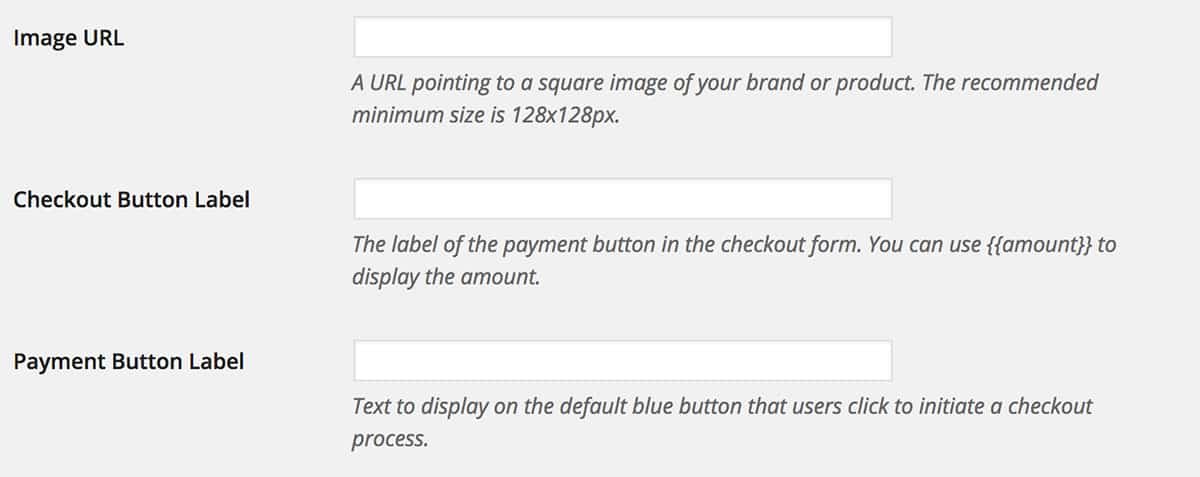
You can then go to the “Default Settings” tab in order to set up some global options for your Stripe form. All of this can be overridden with the shortcode, but it’s useful to set up default options that fit your site. You can customize a lot with the form, including currency, logo image, the button label for the pop-up form and submit button. There is also an option to define a Success Redirect URL and Failure Redirect URL. By default, the plugin will automatically show a success or failure message to the user when a payment is made, with its own text informing them of the transaction details. However, if you’d like, you can redirect the user to a special page after their transaction is complete. If you chose to take this route, you will need to make sure the message displayed on this pages pulls certain parameters from the URL so that you can show your user their transaction ID. Alternatively, you can use a built-in filter to modify the output, which I’ll go over below.

Customize some global options
Lastly, you can choose which information to verify on the form, or disable the form’s CSS altogether. When you are done setting your global options, click the “Save Changes” button.
To actually add the stripe form to your site, you can use the included shortcode. The only default parameter for the shortcode is “amount” which specifies how much the form is collecting. For instance, if I want a form that charges a user $50, then I would just use:
[stripe amount="5000"][/stripe]
When I visit the page I put this shortcode on, I will see a simple button. This button opens up a pop-up form where users can enter in their payment information, and then performs the transaction through Stripe. It will use all of your global options as defaults for this form. And just like that, you can start accepting payments on your site.
However, you can also further customize the form with shortcode parameters. For instance, if I want to change the payment button label, add a description, and include a billing address in my form I could use:
[stripe amount="5000" billing="true" payment_button_label="Pay $50 Now!" description="This is an awesome thing"][/stripe]
There are a lot of things you can customize just through the shortcode. For a full list of parameters that you can use, you can check out the plugin’s documentation. Basically, anything that was set up through the global options can be changed on a per form basis using the shortcode.
If you want even more customization, you can also use one of many filters that the plugin includes for developers. I won’t go into all of them, but here’s a simple example of how to modify the text that is output when a payment is successful.
function sc_change_details( $html, $charge_response ) {
    // This is copied from the original output so that we can just add in our own details
    $html = '<div class="sc-payment-details-wrap">';

    $html .= '<p>' . __( 'Congratulations. Your payment went through!', 'sc' ) . '</p>';

    // Let's add the last four of the card they used and the expiration date
    $html .= '<p>Card: ****-****-****-' . $charge_response->card->last4 . '<br />';
    $html .= 'Expiration: ' . $charge_response->card->exp_month . '/' . $charge_response->card->exp_year . '</p>';

    $html .= '</div>';

    return $html;

}
add_filter( 'sc_payment_details', 'sc_change_details', 10, 2 );
This uses the sc_payment_details filter in order to change the message to include the last 4 digits of the card used and the expiration month and year. Using the $charge_response variable, you can pull any relevant information submitted to Stripe. This is the best way to make changes to messages delivered to users after payment.
Costs, Caveats, Etc.
Simple Stripe Checkout is a free plugin, but there is a premium version available with a few more features, like custom fields on forms and variable, the user entered in amounts for payments. Both versions work very well and include a few external files, but keep things simple and flexible. The plugin has very thorough documentation, but if you are having problems with the plugin, you can post to the support forums or reach out to the developers directly through their contact form. The team also has a public roadmap of features that they are planning to integrate into the plugin.


