Gravatar makes universal avatars easy but what if you don’t want to use Gravatar? What…
Despite the fact that the web exists online, there is still a demand out there for users to print out web pages, or export as a PDF. We can tell the browser the style of our print page using a print CSS file which virtually everybody forgets to set up, and is rarely tested. Print Friendly & PDF takes care of that hard work for you and adds a few nice features to make the printing of your WordPress pages just a little more pleasant for users.
What’s It Do?
Print Friendly & PDF adds a “Print” button to your WordPress posts and pages. When a user clicks on this button, a lightbox preview of the page opens up. From there, users can choose to export the page as a PDF or print it. Custom styles are taken care of so that only a simple page containing the relevant content is shown, without all that extra stuff that isn’t necessary. What’s left is a simple print out with the text and images from each page.
Each step of this process can be customized, from what kind of print button to show, to what options are included in the lightbox (and for that matter, whether or not to even show a lightbox), as well as a few extra options. Printing your PDF document right is very important as you do not want any unformatted documents wasting your printer cartridge. A PDF Editor might come in handy for you to really make sure that your printed document looks fine.
How’s It Work?
After you install and activate the plugin, visit Settings -> Print Friendly & PDF to set it up.
In the first section, you’ll pick the style of the button to add to your posts and pages. This is the button that users will have to click in order to activate a print preview of the page. You can choose from a few different button styles that come bundled with the plugin, or you enter the URL to a custom image. You can also customize the text color of the pre-selected button using a color picker.
The next step is Button Positioning. Chose from the first drop-down whether the button should be aligned left, right or center, and from the second drop-down whether it should be placed above or below the content. You can also assign margin values to it. If you want to disable this extra CSS, just check the box next to “Do not use CSS for button styles” and this section will be ignored.
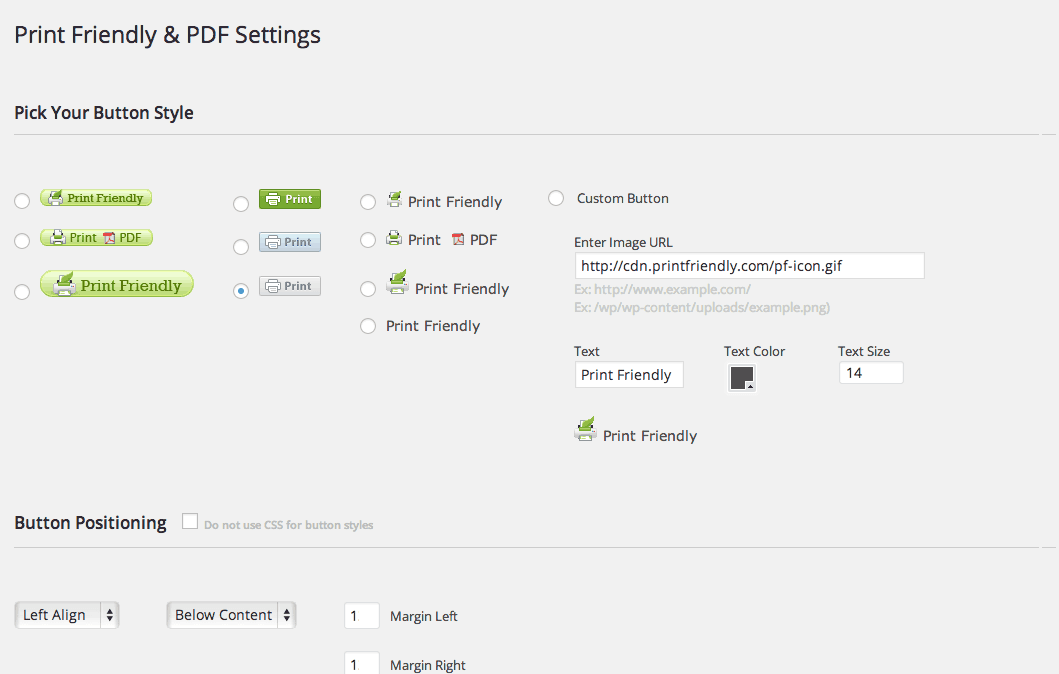
Style your button and position it
Next, you will see a list of page types on your WordPress install, including Posts, Pages, Homepage, Category Pages and Taxonomy Pages. Select the box next to each type if you want to automatically add the button to these sections with the alignment and icon that you selected. If you don’t want to automatically add the button and would prefer to do it manually, you can click the “Add Direct to template” box and the button will not be automatically added anywhere. There are two ways to add the print button to your pages manually. The first is with a function that can be used in your template’s PHP files:
<?php if(function_exists('pf_show_link')){echo pf_show_link();} ?>
The second is a very simple shortcode which can be added to any post or page:
[printfriendly]
Remember to select the “Add Direct to Template” button if you use either of these options, so you don’t have duplicate copies.
The next section is Print PDF Options, which contains some of the finer tuning settings. Most are fairly self-explanatory. The “Click To Delete” option, for instance, allows users to delete different sections of the page from their print preview, so it is not included in the print or PDF export. You may want to turn this off if you want users to only be able to print pages as is. You can also “Allow” or “Not Allow” Email, PDF and Print options. If you chose “Not Allow” then the button to perform this action will be removed from the preview buttons and users won’t be able to use this functionality.
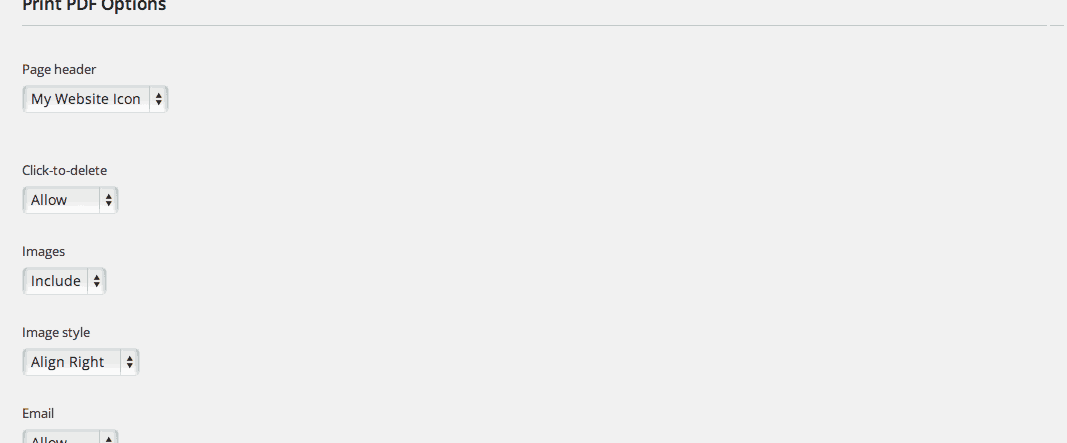
A few more options
The last section, Webmaster Settings can more or less be left alone except for advanced users. One option to pay attention to is “Use Javascript.” If you leave this option enabled, then the print preview will appear in an overlay lightbox. If you turn it off, then pages will be opened in a new window. The JavaScript is fairly lightweight, totaling about 8kb, so you can probably leave it in.
Once you are done setting it up, click the “Save Settings” button, then visit a page where the print friendly button is enabled. If you click on it, you will see a preview of your page containing the main body text and images laid out on a white background, plain and simple, and importantly usable and accessible. Users will be able to customize their content for their own printout or export by deleting unneeded sections, and the page can be either printed or saved as a PDF.
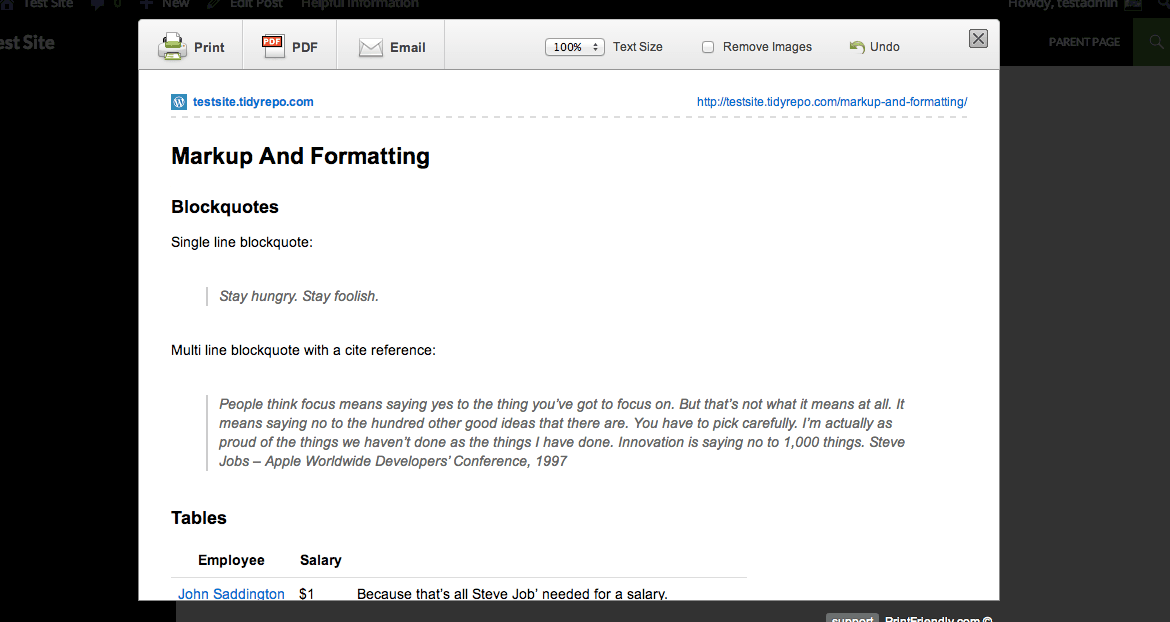
What your preview window looks like
If you find that you are having problems with the content, or the right content isn’t appearing on the preview, go back to the Webmaster Settings section and change the “My Page Content Selected By” option to “Content Algorithm” and see if this makes a difference.
Costs, Caveats, Etc.
Print Friendly is constantly being updated by the developer team with simpler and more streamlined options, and a better overall experience. If you are having any problems with the plugin, you can visit the support forums to get additional help from the plugin developers.
There is also a premium version available, which will remove all references to Print Friendly in the printed document, and with one-on-one support.

