

Out of the box, the way to sort items in WordPress is to affect the…
If you have a WordPress site with images that need protection from infringement, a watermark may just do the trick. But adding a watermark as part of your image export workflow can be cumbersome, especially if you have the same watermark for every image. Easy Watermark adds your image and/or text of choice to selected image upon upload to WordPress, so you don’t have to worry about it.
What’s It Do?
Easy Watermark allows you to customize how your watermark will look. You can upload a custom image, use a short bit of text, or add both to any image. You can also specify where in the image the watermark should be added, and how large it should be relative to the image it is attached to.
Watermarks are added upon image upload so there is no downside in performance. However, that also means that all watermarks are permanent. You can choose which post types to automatically add watermarks to, and which you want to add on an image by image basis. It also adds an action to your Media Library so that you can add watermarks to old images in a bolt.
How’s It Work?
When you install and activate the plugin, you will see a new tab under Settings -> Easy Watermark. If you click on this, you will see a list of global settings for the added watermark.
In General Settings, you can choose whether or not to automatically add watermarks, and what image types and sizes to add it to. Just check the box next to each image and size to select it. This can be useful if you want your thumbnails, for instance, to be watermark free, but if a user tries to download the full-res version, then there will be a watermark attached.
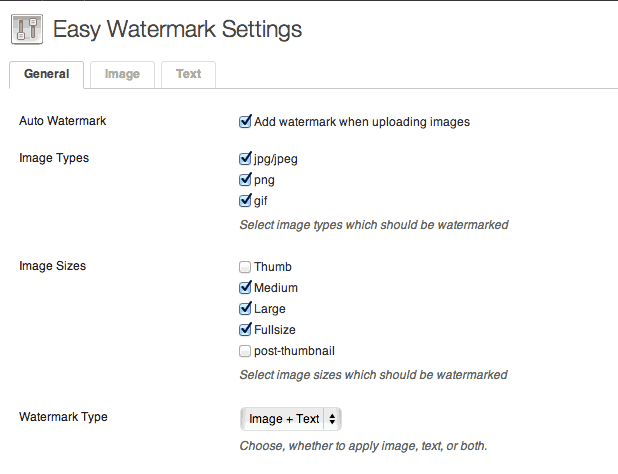
Some general watermark settings
Under this, you can select what Watermark type you want, either an image, text or an image and text. You will actually customize the look of these later. You can also choose what the quality of watermark JPGs should be, and select a date and time format, though these should probably be left at their default. Next, you can choose Watermark permissions. You can choose whether to let the Editor and Author user roles in WordPress the ability to apply watermarks to uploaded image. You can also specify whether or not these users have the ability to automatically apply watermarks by checking the box next to “Allow to Auto Watermark.” If you’d like to incorporate watermarks into every image on your site, then you should check this box.
Finally, you can choose which post types to automatically apply watermarks to images in. Posts, pages, unattached images, and any custom post types you have installed will be listed here. If you check the box next to any of these boxes then watermarks will be added automatically without user input in the selected post type.
Click the Image tab at the top if you chose the “Image” or “Image and Text” option for your watermark. The first thing you will have to do is upload an image using the native media uploader. If you upload a GIF or PNG image, then transparency will be supported, but JPG images are also allowed. Once your image is uploaded you will see a list of options for the watermark. You can click on the image itself at any time to change it.
The “Image Alignment” section lets you specify where on your image the watermark should be applied. Click the box that corresponds to the location you want your watermark placed. Then you can choose a scaling option. “Fill” or “Fit” will either stretch the image to the full width of the image or Fit it into the box that you selected. I have found the most success through with the “Fit to Width” option which will scale the watermark based on the size of the image. You can enter in a percentage of the image’s width to automatically scale the watermark too, and this will be positioned in the box you selected in the “Image Alignment.” You can also choose how much to offset the watermark along the X and Y axis. I typically will choose the lower right box, scale the image to 25% and give it an offset of somewhere between 0 and 10. This places the image in the bottom right corner. Lastly, choose the opacity of your image by entering a percentage in the provided text box.
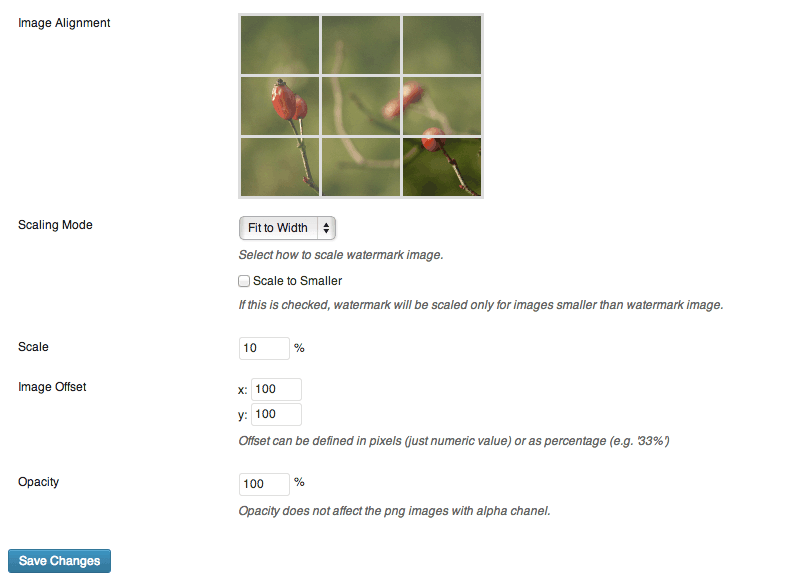
Tweak the image watermark
If you chose the “Text” or “Image and Text” option from the watermark type menu, then click on the Text tab. You can enter your desired text at the top of the settings page, and chose your alignment and offset, just as you can for the image. However, for text, you can also choose your font from a list of web-safe fonts, chose your desired color and font size, and put your text on an angle. You can also enter an opacity for your image. When you are finished, click the “Save Changes” button.
If you chose to automatically apply a watermark, then watermarks will be added to images whenever you use the media uploader for your specified image sizes, so you can continue using the uploader as usual. However, if you want to manually add watermarks, then you will have to first upload the image, then select the “Add Watermark” button in your uploader.
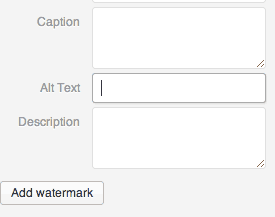
You can add a watermark manually through the media uploader
From here, you will be redirected to the media page for that image where the watermark will be automatically applied. You can navigate back to the post you were editing and add the image. This can be a bit cumbersome, so try and lean on the automation as much as possible.
Easy Watermark also provides support for legacy images. If you would like to attach your watermark to ALL the existing images on your site, go to Media -> Easy Watermark. You will see a button labeled “Add watermark to all images.” If you click on this button then all of the images in your uploads folder will be watermarked by the plugin. Remember, this action is permanent and irreversible so make sure you are positive you want to apply the watermark to all of your images.
If you would like to apply the watermark to just a few, then you can go to Media -> Library. Select the checkbox next to the images you want to add your watermark too, and then select the “Add Watermark” option from the “Bulk Actions” drop-down menu and click the “Apply” button. You can also add watermarks to individual images by clicking the “Add Watermark” button in the Easy Watermark column of the Media Library. It is possible to watermark an image more than once, resulting in some awkward results, so make sure you check the status of an image before you add a watermark.
Costs, Caveats, Etc.
Easy Watermark is completely free and updated with new features fairly frequently. If you are having a problem with the plugin, the best place to go is the support forums.


