A pretty simple and useful plugin, Page Template Dashboard lets see you what templates your…
Custom pagination in WordPress can be a bit difficult, and writing a function that accounts for all factors takes some real work. WP PageNavi does the legwork for you so all you have to do is customize it.
What’s It Do?
WP PageNavi switches out the default WordPress pagination (next and previous links) with a customizable and more functional pagination that includes page numbers, next and previous links. You can customize the text of your pagination for each component, or even set it as a drop-down menu through the settings page.
You can insert this navigation anywhere on your page, by pasting a small piece of PHP code into your template file, replacing the current pagination code.
How’s It Work?
After you install and activate the plugin the first thing to do is insert the WP PageNavi code into your template files. Open up the PHP file that you want to change the navigation of (index.php for example) and find the current pagination links. In Twenty Thirteen and Twenty Fourteen it will look like this:
<?php twentythirteen_paging_nav(); ?>
But it might also look like this for next and previous links:
<div class="nav-previous"><?php next_posts_link( __( '<span class="meta-nav">←</span> Older posts', 'twentyten' ) ); ?></div> <div class="nav-next"><?php previous_posts_link( __( 'Newer posts <span class="meta-nav">→</span>', 'twentyten' ) ); ?></div>
Now you have to swap in the WP PageNavi code, so simply replace the current pagination PHP with this:
<?php wp_pagenavi(); ?>
You can also use WP PageNavi for multipart or paginated pages (pages using the “wp_link_pages” tag) by simply using this code:
<?php wp_pagenavi( array( 'type' => 'multipart' ) ); ?>
After that, WP PageNavi will be activated. If you don’t believe me, you can visit the page to see it in action.
The next step is to customize the output of the plugin. In your admin panel, go to Settings -> PageNavi. You will see two sections, Page Navigation Text and Page Navigation Options.
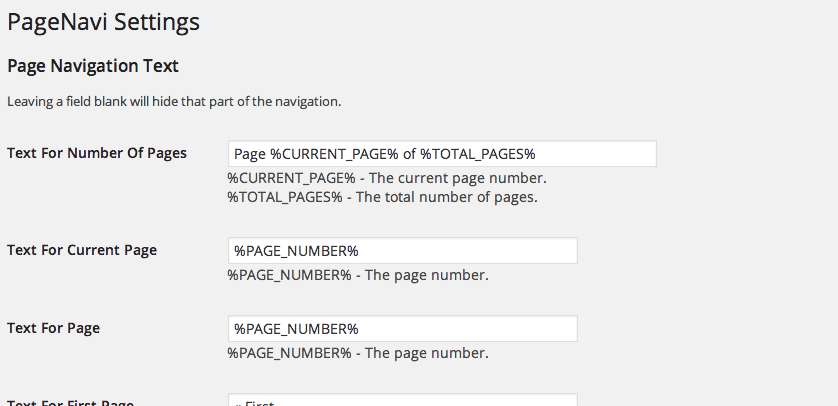
The Page Navigation Text section allows you to change the actual text that appears alongside navigation. You can change, for instance, what the “First” and “Last” links should say, as well as the “Next” and “Previous” links (by default this is “«” and “»”). A few sections have percentage syntax shortcodes you can use in order to specify a dynamic number. For instance, pagination will show the number of pages that there are before the pagination. The default text for this is “Page %CURRENT_PAGE% of %TOTAL_PAGES%” which will output something like “Page 2 of 4”, but you can replace this with whatever you want. If you choose to leave any of these text fields blank, then that link will be removed entirely from the navigation. It’s that simple.

Set the text of your pagination
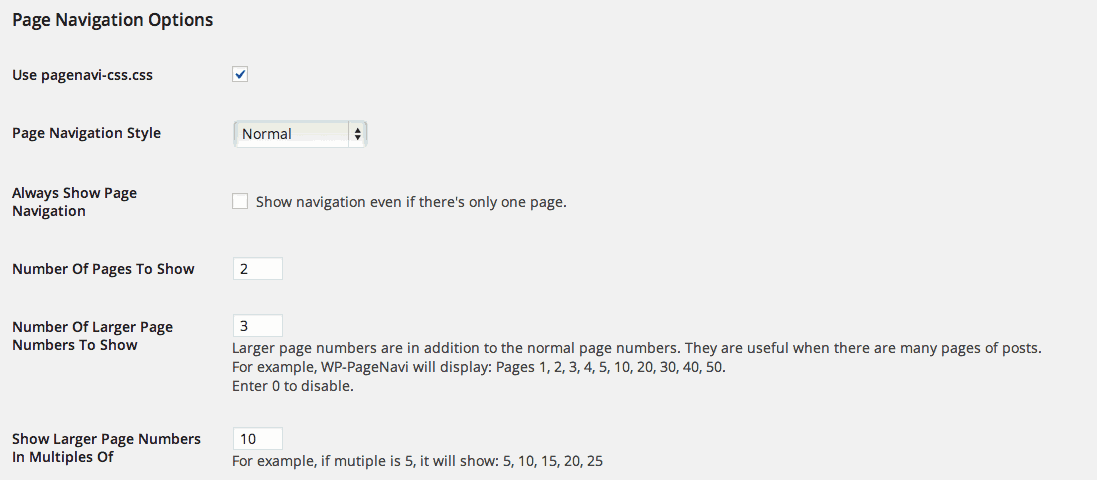
After you are done customizing your pagination’s text, you can also tweak a few options in the second setting. The first checkbox lets you chose whether or not to “Use pagenavi-css.css.” Chances are you will want to style the plugin a little bit, but I would recommend leaving this box checked unless you want to start entirely from scratch. Otherwise, you can simply build on top of the styles already created.
Next up you can choose whether to show your pagination as a normal list or as a drop-down and check a box to indicate whether you want to show pagination even if there is only one page in a series. Lastly, you can choose how many pages to show before the pagination collapses a little, and what larger numbers should be shown after that. When you are finished customizing the options click “Save Changes.”

General output options
The last step is to customize the style of the pagination, which may or may not be necessary for you. If you have some familiarity with CSS you can either copy and paste the “pagenavi-css.css” file to your theme, which will override the current CSS automatically, or simply create new CSS rules in your current stylesheet. The general markup of the pagination is fairly straightforward. It’s structured basically like this (with generic content):
<div class="wp-pagenavi">
    <span class="pages">Page 2 of 4</span>
    <a class="first" href="http://testsite.tidyrepo.com/">« First</a>
    <a class="previouspostslink" href="http://testsite.tidyrepo.com/">«</a>
      <span class="extend">...</span>
    <span class="current">2</span>
    <a class="page larger" href="http://testsite.tidyrepo.com/page/3/">3</a>
      <span class="extend">...</span>
    <a class="nextpostslink" href="http://testsite.tidyrepo.com/page/3/">»</a>
    <a class="last" href="http://testsite.tidyrepo.com/page/4/">Last »</a>
</div>
So if you want to edit how the First link looks, simply use the class “.wp-pagenavi .first”, and if you want to set global styles for the pagination use the class “.wp-pagenavi.” A basic understanding of CSS is required, but it should be fairly easy to get started. Still, if you’re doing changes on a live site and you’re not quite sure what you’re doing, you should put your site under construction. By doing so, only you will be able to see the changes; if you mess up, you will still save some dignity before getting your normal site up again.
Costs, Caveats, Etc.
WP PageNavi has been around for awhile and is updated fairly frequently. If you’re looking for support, the best place to visit is the plugin’s forums.


