


WordPress is a great platform and provides lots of functionality but one thing where users got stuck is changing the fonts. Even if they try, they hardly come up with more than 3-4 fonts they can work with. In fact, many WordPress website users are operating their blogs for years with a single font they received with the theme they’re using.
But even when those users decide to change a font to freshen things up, it’s hard to even get started. Many tutorials show how to work with the code and import fonts from 3rd party service. And that’s simply too much for someone who’s just getting started.
If you are one of those users who’s looking for a change for a change, then Google Fonts for WordPress is exactly what you need.
What is Google Fonts for WordPress?
Google Fonts for WordPress plugin allows you to access 877+ unique fonts for free. Instead of using that single font you got stuck with, you can easily use one font for headings and another for your content, for example. It’s easy to get creative when Google got your back.
You don’t need to hire a web designer to change the font of your website since you can do it by yourself with this straightforward plugin. It comes with a live preview feature that will show you all changes even before you’re ready to show the new typography to the public.
Once you find the right font, you can press the save button and make it publicly visible. Check out the complete Google Fonts library even before you get your hands on the plugin.
Features of Google Fonts for WordPress
- Live Preview Feature: Select and see the preview in real time using the WordPress Customizer
- Huge database of 870+ Google Fonts
- Compatible with any WordPress theme
- Easy One-Click updates
- Translation ready
- SSL and HTTPS compatible
- Efficient Font Loading using a single request
- SEO-Friendly
How’s it Work?
To get started you have to install Google Fonts for WordPress plugin from the WordPress plugin repository. After activation, it will redirect you the Installed Plugin Tabs where you have to click on the Google Fonts of WordPress’ Settings button.


Google Fonts for WordPress Settings
After clicking on the button you’ll be redirected to the Google Fonts settings where you’ll see two options: Basic Settings and Advanced Settings.

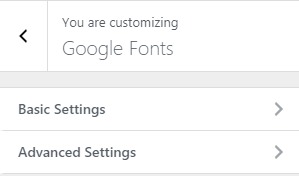
Google Fonts Settings
When you click on the Basic Settings a new tab will open with the options to change:
- Base Typography
- Headings Typography
- Button and Inputs Typography

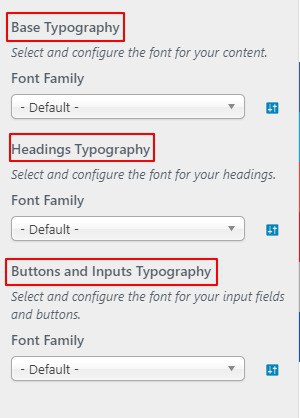
Google Fonts Basic Settings
As you can see, it is quite easy to select unique fonts for each section that you want to modify. Simply click on the font family drop-down menu and a list of fonts will appear. Once you’re done with font selection and satisfied with the live preview, click the Publish button and the changes will take effect. To test it, I changed my Heading Font from default to Aladin on one of the demo sites. It looks nice, doesn’t it?


Now, if you click on the Advanced Settings you’ll see the options to change:
- Site Title Typography
- Site Description Typography
- Navigation Typography
- Post/Page Headings Typography
- Post/Page Content Typography
- Sidebar Headings Typography
- Sidebar Content Typography
- Footer Headings Typography
- Footer Content Typography
You can change the font for every element on your website just by using Google Fonts of WordPress plugin. The plugin is compatible with almost every WordPress theme but has been specially tested with the following:
- All OlympusThemes
- All StudioPress and Genesis Themes
- TwentyFifteen
- TwentySixteen
- TwentySeventeen
Costs, Caveats, Etc.
Google Fonts of WordPress plugin is completely free, so you don’t need to spend a single dime. Right now it has 877 Google Fonts that will most likely increase in the future. It is one of the most updated font plugins available for WordPress. It has 7,000+ active installations, and the number keeps on rising.
In a nutshell, Olympus Themes has created one of the best free font plugins that gives you the opportunity to customize your WordPress website by changing the typography. This is why this plugin has received only 5 Star Ratings so far – can’t do better than that. It is lightweight and easy to use so you don’t need any expertise in coding to use it. What do you say? If you find any problems while using Google Fonts for WordPress, you can always contact the developer on Github.