A pretty simple and useful plugin, Page Template Dashboard lets see you what templates your…
Forms are just plain hard to execute well. It’s exactly the kind of thing that plugins in your WordPress install are needed for. Ninja Forms is a solid, free way to do just that.
What’s It Do?
On its backend, Ninja Forms gives you a drag and drop interface to create forms with several different kinds of fields to chose from. You create a form simply by adding whichever fields you would like to include, then setting some basic options for the form’s behavior. It also has settings for admin and user notifications for each form you create. On the front-end, you get a shortcode and a template function so that you can put the form anywhere on your WordPress site.
Ninja Forms also gives its users access to premium add-ons in case you need to add some extra functionality to your forms, like the ability to edit forms on the front-end or add conditional logic to your fields.
How’s It Work?
Ninja Forms is a powerful plugin, with lots of ways to extend and use its functionality. Presented here is a guide to get started creating and displaying your first form, but there is lots more to explore in the documentation.
When you install Ninja Forms, a new section will be added to your admin panel entitled “Forms.” The first step is to create a new form by selecting Forms -> Add New. The way Ninja Forms works, you’ll actually set up your form before you add fields to it, so the first screen you are brought to is the Form Settings tab.
First, enter a title for your form at the top of the page. The first section, Basic Settings has general options for how your form is displayed. If you select the “Display Form Title” checkbox then the title will be displayed wherever this form is. This may not be necessary if your general page will already feature a title. Most of the options in this category are relatively self-explanatory. “Save Form Submissions” means that forms that are submitted will be stored in your WordPress database, and viewable in your admin panel. You can also choose to Append your form to any page, useful for say, a Contact page.
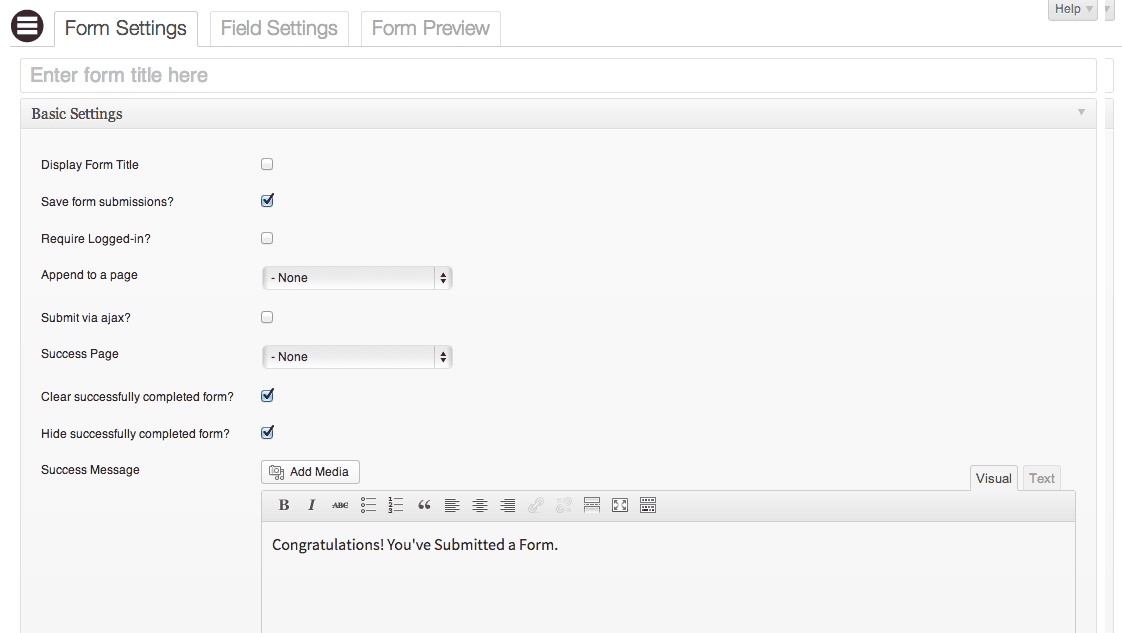
Basic Settings for your Form
The “Submit via ajax” button means that Javascript will be used to submit the form and that a Success page will be loaded without refreshing the page. If you select this option, you will have to specify whether or not to hide the form, and a text area will be displayed where you can type in whatever message you would like a user to see after their form is submitted. Otherwise, you can select a page for users to be directed to upon successful submission.
The next section, Email Settings simply asks for a reply email address for user notifications, and an option to either send HTML or Plain Text emails by default. The “Email From Address” is what users will see if they receive an email notification after a form is submitted.
The User Email section is where you can customize what this email will look like. You can enter in an Email Subject (something like “Thanks for your Submission to Tidy Repo!”) and a personalized email message. You can use the shortcode [[ninja_forms_field id=XX]] to include any of the fields on your forms as a variable in the Email if you want to, for instance, include the user’s name in the response email.
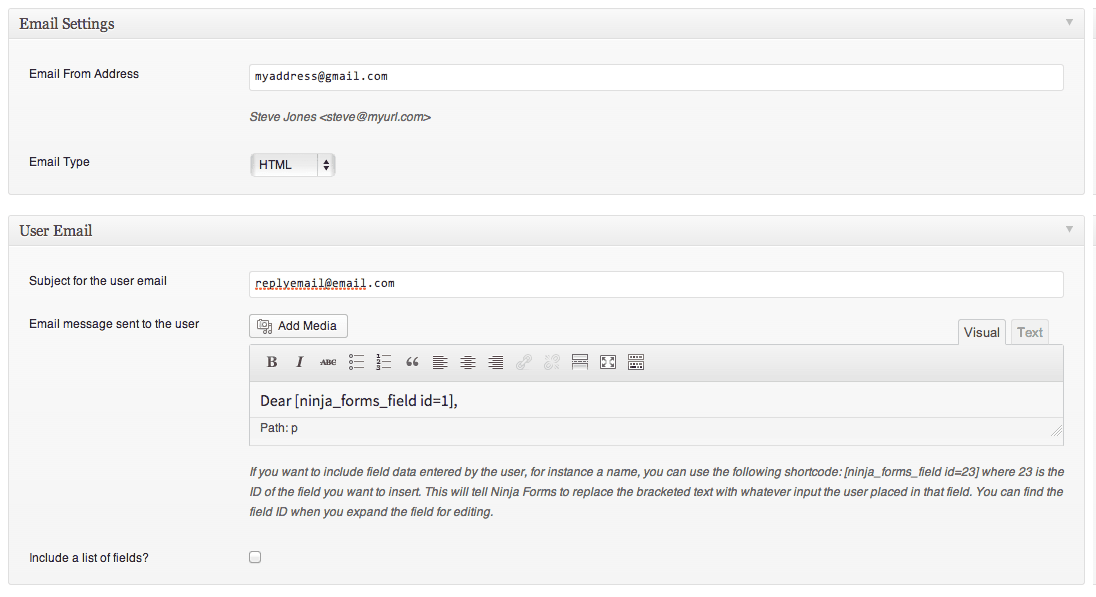
Set up your Email Notifications
The Administrator Email is the same as the User Email options, only this email will be delivered to the WordPress installs admin email by default. You can select a button to “Include a list of fields” automatically, so you don’t need to add the field IDs one by one. However, the above shortcode will still work in this section.
The next thing to do is create the form itself. This can be done in the Field Settings tab. When you visit this page, you will see a list of field types on the right and a blank section on the left. To add a field, simply click on any field and it will be added, in order, to the right. Once you have added all of your fields, you can drag and drop them to easily change the order.
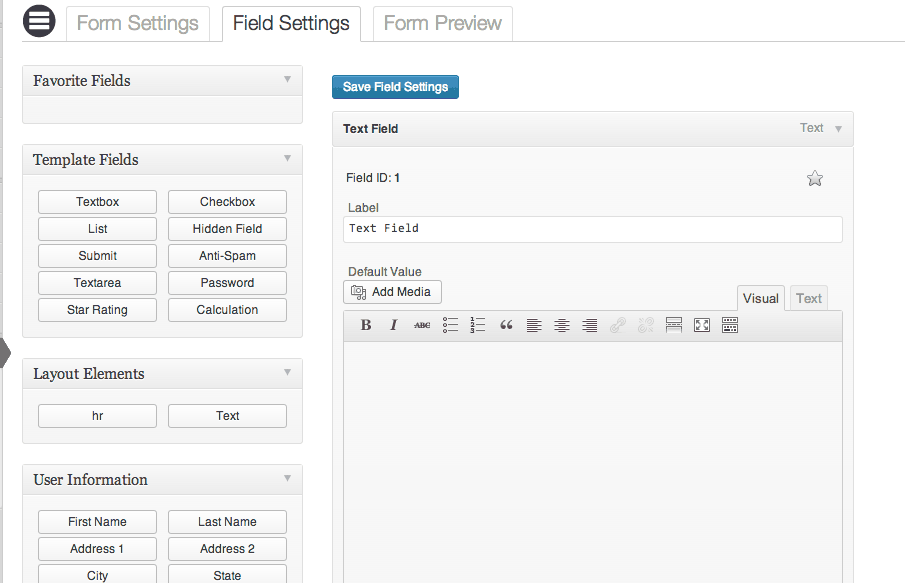
Simply drag fields to the right to add them to your form
There are several different fields to chose from, and each one comes with a specific set of options. Some fields may allow you to add an input mask, such as a 555 style phone number or basic date style. Other fields may only have options specific to that field type, such as how many stars to include in a “Star Rating” field. The only settings common to all fields is the ability to mark it as required, meaning that the form will not be sent unless this field is filled out, a text field for any custom CSS class you want to add for easy styling, and the ability to add Help Text, which will be displayed alongside the form field.
The other section common to all fields is the “Calculation Settings.” This is useful if you’d like to use your form for order collection or a survey/poll. Each field can be given a “Calc” value that can then be added to a total. If you chose the “Total” field, then this will output the total dynamically for the user as they add things. There’s a good tutorial from the Ninja Forms developers on how to use this on YouTube, so I won’t go into it too much, but think of it is a very easy way to collect customizable total amounts for basically any form field that you add.
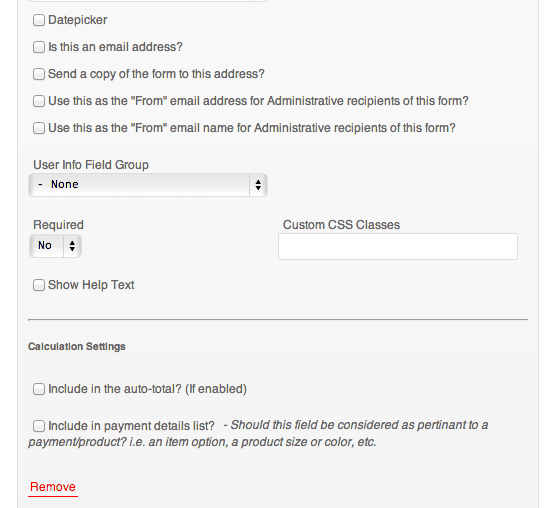
Settings for your form field
Once you are finished adding fields, and choosing your desired order, select the “Save Field Settings” button at the top of the page.
If you click the Form Preview tab you will be brought to a preview page with your form displayed. The nice thing is that it will be displayed in your default post template, so you can see how it will look like on your actual site, styles and all.
Once you have finished creating your forms, there are three basic ways to add a form to your pages. The first we have already gone over, simply select your page from the “Append To” drop-down in the Form Settings page and the form will automatically be attached to the bottom of that page. Another simple way is to use the provided shortcode. To see this shortcode go to Forms -> All Forms.
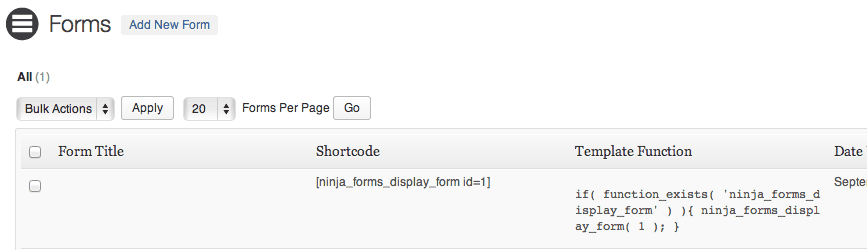
Your shortcodes and template tags are listed in All Forms
This screen gives you a list of every form that you have created. Next to the form title will be the “Shortcode” column. Include the provided shortcode in any post, page, or custom post type post to add the form to WordPress. Your syntax will look something like this:
[[ninja_forms_display_form id=1]]
Having a shortcode gives you some additional possibilities. For example, if you’re using UnderConstructionPage PRO for creating a coming soon page, you can put a custom form on the page simply by pasting the shortcode in the plugin’s editor. Easy as that.
The column next to that is for your “Template Function.” This is useful if you want to attach the form to a PHP template file, instead of on a specific page. The code is also pretty simple:
if( function_exists( 'ninja_forms_display_form' ) ){ ninja_forms_display_form( 1 ); }
Copy and paste this code into your template file to display your form, making sure to change the number 1 to the ID of your preferred form.
The Forms -> Settings section also has some global settings for you to chose from. You can choose a date format and currency symbol in the General tab and change labels associated with the form in the Labels tab. For instance, you can change how required fields are marked, and what a user sees in case of an error. The defaults may work just fine, but it doesn’t hurt to add a little personality.
The plugin also lets you Import/Export forms and view Submissions if you chose to save them to your database. But that’s how you can create and display your first form.
There is plenty more that can be done with Ninja Forms. A good place to start is Pippin Williamson’s video review, which walks you through the plugin step by step. If you are a developer interested in functions, actions, filters, methods and other ways to hook into form data, then the Developer API Documentation has all of the information you need. And make sure to report back here if you stumble on to something interesting.
Costs, Caveats, Etc.
Unlike Gravity Forms, Ninja Forms is free. However, if you want something beyond a basic form, you may have to purchase a premium add-on. This allows you to add functionality like conditional logic to forms, post to your front-end through forms, and integrate with services like MailChimp and Constant Contact. If you are looking for some help you can visit the official documentation. They also have a free support system and where you can get help, or priority support for paid customers. The code is also hosted on GitHub if you’d like to take a look or contribute.