
One of the simplest plugins out there, and only for a very specific use case,…
It’s hard to talk about WordPress plugins without mentioning Pippin Williamson. And it’s hard to mention Pippin without bringing up Easy Digital Downloads, a plugin that makes selling digital goods dead simple.
What’s It Do?
Easy Digital Downloads allows you to sell digital files to your customers in a very flexible way. The plugin will automatically set up purchase pages, a shopping cart, customizable receipts and a full stats dashboard so you can keep track of your sales. Downloads are set up in an easy to use custom post type, with its own taxonomy. By default, you can set up your account to accept Paypal and Manual payments, but it’s easy to add new payment gateways such as Stripe with free add-ons.
There are over a hundred add-ons to boost the functionality of the plugin as well, from integrating with newsletters to limiting the number of downloads per customers.
There are tons of other features as well, as basically every step of the process can be fully customized and extended. For more info on what it can do, I recommend checking out the plugin site’s features page.
How’s It Work?
I’m just going to go over the basics of the plugin here, but there is lots more that can be done. The documentation should help you if you run into a problem.
When you install and activate Easy Digital Downloads, there will be a new tab in your admin panel labeled Downloads. In there you will see several different Panels. For now, let’s click on Downloads -> Settings to get started. On the General Settings page, you can change a few default settings for the plugin. At the top, you will see the option to enable “test mode.” This allows you to turn off transactions so that you can test your plugin without having to actually purchase anything. If you turn this on, make sure you turn it off when your site goes live.
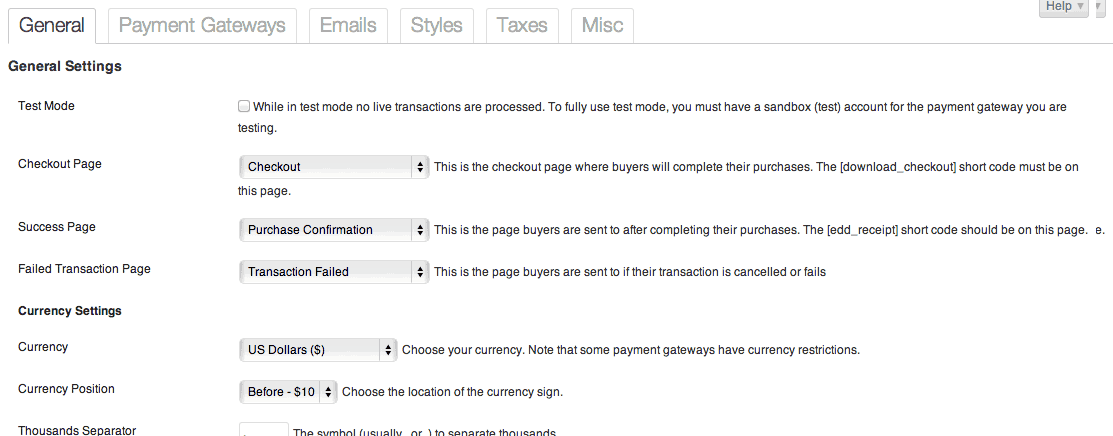
General Settings Tab
You’ll also see drop-down menus for a “Checkout Page,” a “Success Page” and a “Failed Transaction Page.” By default, the plugin will automatically create and configure these pages by adding the right shortcode to each. But if you’d like to change that page, select it from the drop-down. Just make sure to include the shortcode specified next to each. Under this are currency settings, which you should change to match your local currency.
On the top, the next tab is Payment Gateways. Before accepting payments, you need to be sure to set this up. By default, you can set one up manually or use Paypal, but you can also use a variety of other payment gateways such as Stripe or Bitcoin by installing Add-ons. For now, let’s use Paypal. Under “Payment Gateway” select Paypal. Test Payment can be used if you would like to test the checkout page and transactions without actually having to submit payment. But be sure to select the Paypal option before your site goes live. After that, leave the “Default Gateway” on Paypal Standard and select which credit cards/payment methods you want to accept by checking all of the boxes that apply. Then, just enter your Paypal email and hit “Save Changes.”
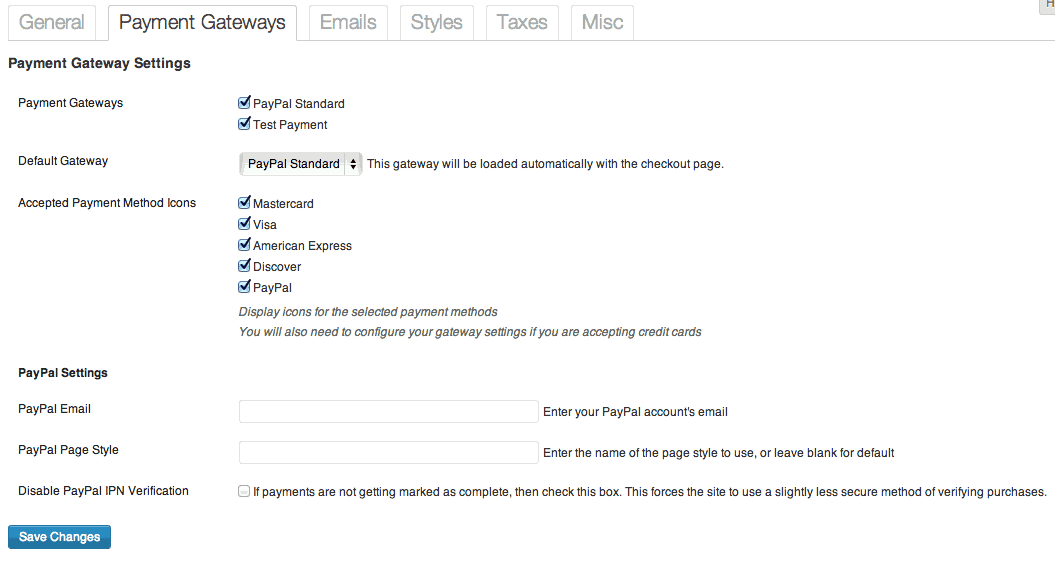
And more payment gateways can be added with add-ons
The Emails Tab lets you customize the email that is sent to customers after their purchase. The default template will include a shot thank you and a link to the downloaded file. If you want to change this, you can use the list of included template tags in the WYSIWYG editor to send an email containing whatever information you would like. The same can be done for admin notifications when a download is purchased. You can find out a lot more about email customization in the official documentation, so I’ll leave it simple for now.
The next tab, Styles lets you change button and button text color, as well as disable styles altogether so you can use your own stylesheet. The Taxes tab allows you to add the appropriate state and federal tax. I am by no means a tax expert, so make sure that you set this page appropriately before selling your digital goods.
Lastly, is the Misc. tab, which has all the options that don’t fit into a specific category. This includes disabling AJAX, requiring users to be logged in to make purchases and turning on SKU (Stock Keeping Unit) support if you need. You can leave all of these options off by default without really changing the functionality fundamentally, but definitely go through them one by one and make sure that you don’t have a need for them. There are plenty of use cases where this tab will be very important.
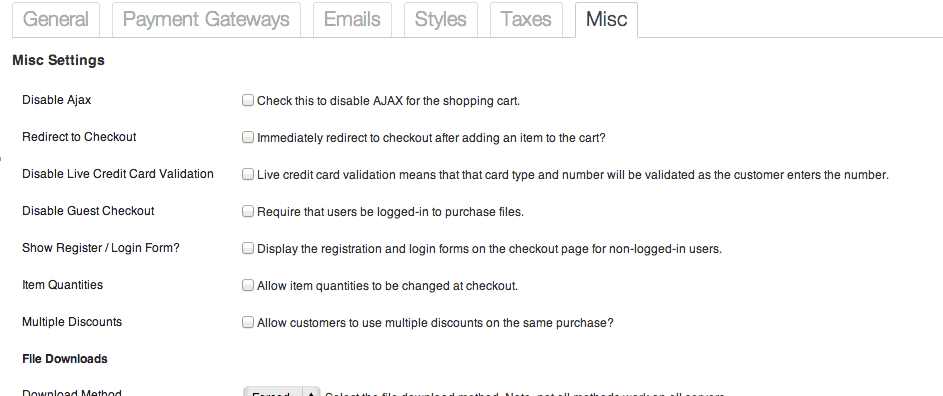
A few Misc. settings
I know that’s a very basic overview of the Settings but I wanted to get to the fun part: actually adding downloads (and there’s plenty more to read in the docs). So to add a new download for purchase, click on Downloads -> Add New Download. The download editor screen will probably look very familiar, since it is exactly the same as the default post editor, with a few additional fields.
First, enter the title of your download at the top, then a description in the WYSIWYG editor below this. Descriptions can be as long, or as short, as you would like them to be but know that by default they will be shown whenever the Download is listed so try not to make it too long.
Next, you will see the Download Configuration meta box. This holds the custom fields required for the download and purchase. The first section is Pricing Options. If you want your download to have only one price, simply enter that price in the provided text field. And yes, you can leave it at 0. But Easy Digital Downloads also has support for variable pricing. If you click the “Enable variable pricing” box you will see that instead of a single text field, you will have two columns. On the left is your option name and the right is your price. So let’s say you have two files for download, a “Lite” version and a “Pro” Version. Simply name one option Lite, and the other Pro, and place the different prices in the fields on the right.
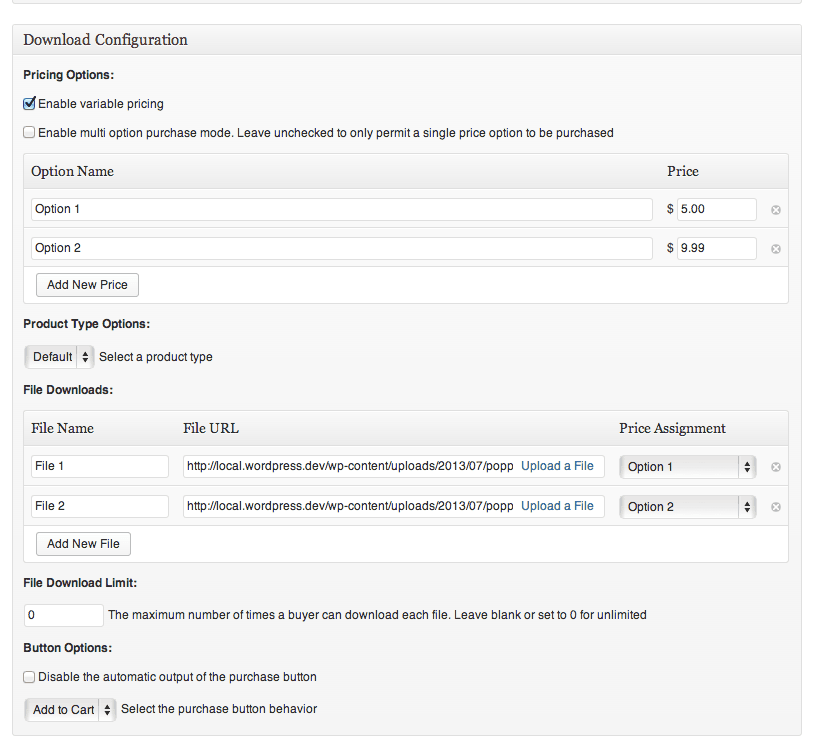
Setting up your download files
Below this is Product Type Options. I usually leave this at default, but you can also select “Bundle” to combine multiple downloads that have already been created together into one big download, without actually having to re-upload anything.
Under that is the actual File Downloads. It’s here that you select which file you want the user to download after they make a purchase. If you are using the single price option, you’ll see two text fields for “File Name” and “File URL.” In the File Name box, simply enter whatever you want your downloaded file to be called. In the File URL box, you have two options. You can either enter an external URL (for instance from Amazon AWS or other CDN), or you can click the “Upload a File” link to use the WordPress media uploader to select the file that you want to use. The file can be of any format and any size. If you enabled “variable pricing” above, then you will see a third column, “Price Assignment.” This way you can upload a few different files, and assign a different price for each. The “Lite” and the “Pro” version of a file, for instance.
The other two sections are File Download Limit and Button Options. The File Download Limit controls how many times a buyer can download the file they purchased before they are cut off, and the button options allow you to customize the purchase button. You can disable the button altogether, or chose from two button behaviors. The first is “Add to Cart,” meaning that a purchased item will be added to the users shopping cart, and they can keep browsing/shopping. The “Buy Now” option will bring a user straight to the checkout page after they click the purchase button.
The rest of the fields on the page are more or less optional. You can add Product Notes to be included in a buyer’s purchase receipt, and add categories, tags or featured images just like you would in a normal WordPress post. It’s worth mentioning that categories created in the Downloads post type, will only be relevant for Downloads. So don’t worry about your taxonomy from Easy Digital Downloads leaking into the rest of your posts. When you are all finished, just select “Publish” to publish the download.
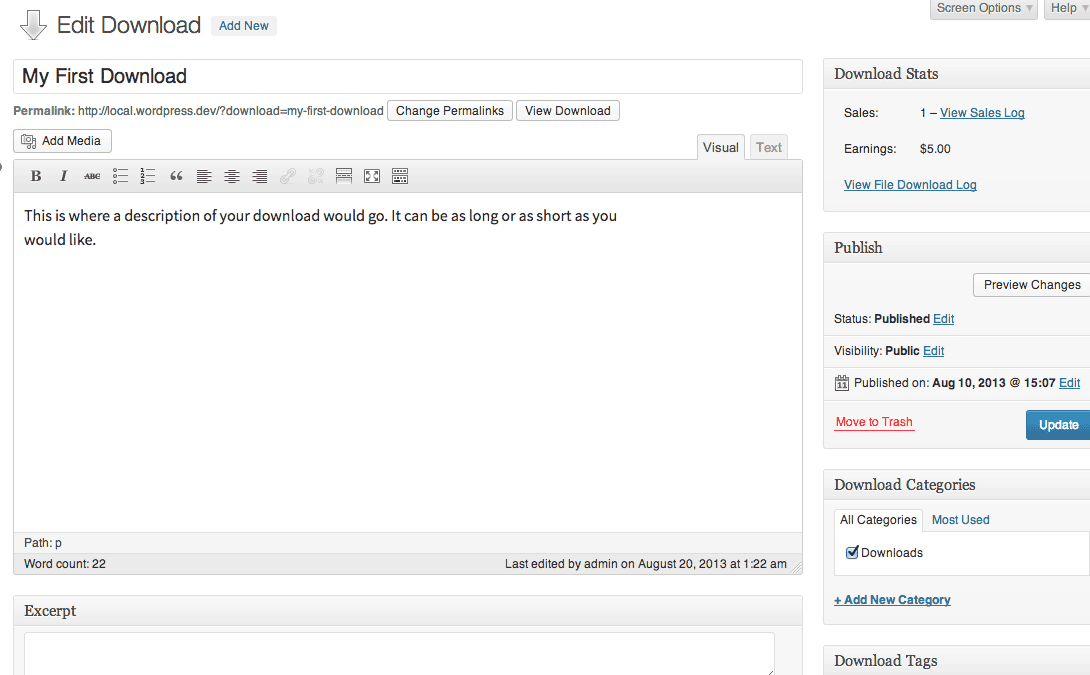
The Edit Download screen is set up like your post editor
The only other thing worth mentioning is the new Download Stats meta box located in the top right of the edit page. This includes basic stats for the download that you are currently editing. It’s a simple feature, but I quite like it.
Finally, click on Downloads -> All Downloads in order to view a list of the downloads that you have created. This page resembles your All Posts screen and has very similar functionality. You can Edit, Quick Edit, or Trash any of your posts, or select a few at a time and use Bulk Actions. But more importantly, each download will be listed with a Purchase Short Code. There are lots of ways to display downloads on your site, but the shortcode is the easiest. Simply copy and paste this into any post or page, and your download will be included on that page.
Of course, if you simply want to list all of your downloads on one page, you can use the [[downloads]] shortcode on any post or page. You can customize the outputted list with a few parameters. For instance:
[[downloads category=”red, blue” tag=”johnny, susie, charlie” columns=”3″ orderby=”title”]]
This will only output downloads from categories red or blue with tags johnny, susie, and charlie in a three column grid, and will sort all of the downloads by title. For a full list of what parameters can be used with this shortcode, check out the article in the plugin’s documentation.
The rest of the plugin is more or less for you to explore. There are lots of ways to hook into the plugin, extend it, mold it and output it any way you’d like; it’s definitely one of the more robust WordPress plugins on the market. As far as the admin panel, you can also view Reports which will give you in-depth stats on your downloads and purchase history, create Discount Codes using a few simple text fields, and edit Categories and Tags just as you would in the normal post editor.
If I can be completely honest, I’ve really only scratched the surface of what this plugin can do, but hopefully, it is enough to get you started. It has a full Developer API with custom functions, actions and filters to use, a Theming system for customizing the plugin’s look, and almost 150 extensions and add-ons that can add functionality that isn’t included in Easy Digital Downloads out of the box. If you can’t get something working with the plugin, I guarantee you there is an add-on that will help you out.
Costs, Caveats, Etc.
Easy Digital Downloads is based on a freemium model. It is free to download and use without any restrictions. Priority support, however, is available for $39/month or $129/year. This gives you access to very quick answers to your questions and helps with any and all problems. A lot of the add-ons you can purchase come at a price as well, ranging from $15 to over $50 for a single site license. Each extension can be purchased for a single site, 2-5 sites, or unlimited, with a discount off the per-price site at each level. This is a model that I completely respect, it’s proof-of-concept of a fully functional GPL based marketplace, but that’s just my two cents.
Easy Digital Downloads has it’s own support forums which is the best place to go to get the most basic form of support for free. The plugin is updated and actively maintained to add new features, patch bugs, and add new extensions.