When building sites, you occasionally need to create small blocks of content that can be…
Column layouts are something that you see everywhere but can hard to pull off for the average user. For front-end developers out there, I would recommend using custom fields to create a multi-column template. But, if you need a way to create customized and responsive columns on the fly, then Advanced WP Columns can help.
What’s It Do?
Advanced WP Columns adds a button to your post editor which can be used to create customized column layouts. When you click on the button, you’ll be presented with an easy to use GUI where you can specify how many columns you want, what the size of each column and gutter should be. Then you can add content to each column right from the modal box.
The plugin is responsive-friendly, meaning that columns are set up using percentages, so they won’t break out of your design’s container. There is also an option to set a breakpoint to collapse columns to a single row (at 1024 for iPads by default). The plugin uses a mix of external CSS, inline styles, and CSS in the HTML document’s head, which isn’t the most cohesive way to incorporate styles but honestly is probably the most efficient given the circumstances. Very little CSS is actually used, just some floats and percentage width’s, but there will be empty divs in your posts. Just a warning.
How’s It Work
After you install and activate the plugin, go to Settings -> Advanced WP Columns to configure some global options. First, you’ll have to set your container width and initial structure. Though the columns are set by percentages, the container width is used by the GUI to help users define the width of each column, so you should set it to match your design. The initial structure is set to be empty, but you can have a two-column, three-column or four-column layout be your default. This can always be changed later when you are creating columns.
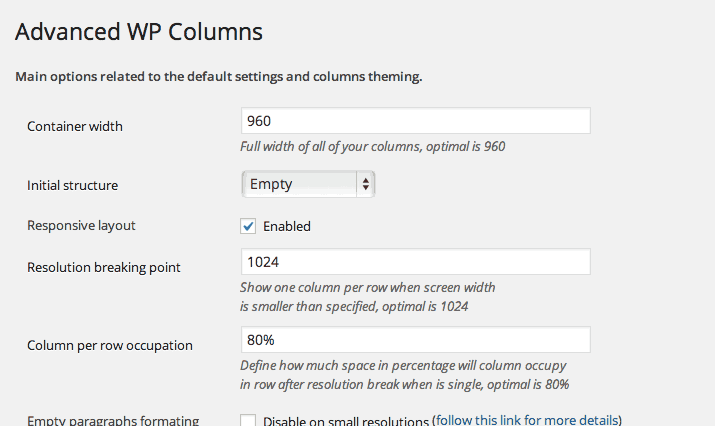
A few general settings
Next, there are some options for a responsive design. Check the “Enabled” box to turn on responsive features and can choose what breakpoint to collapse all of the columns down to a single row. You can also set the percentage of the container the single rows should fill, 80% by default, though you can go up to 90% or so to match your design’s parameters. Lastly, you can add custom CSS classes to the columns container, to individual columns, and to the gutter. This is useful if you want to add some custom styling to your columns with external CSS.
To add columns to your site, go to the editor of any post and page. You will see a new button which allows you to add columns to your page. Click this button to open up a modal window you can use to set your columns.
At the top of the window, you will see a green drop-down menu, where you can select how many columns you want to add. Select your choice and you will see them laid out in the box below. Above each column and gutter, you will see a slider which you can move to change the size of anything that is laid out. Move these around until each column is the exact size you want it.
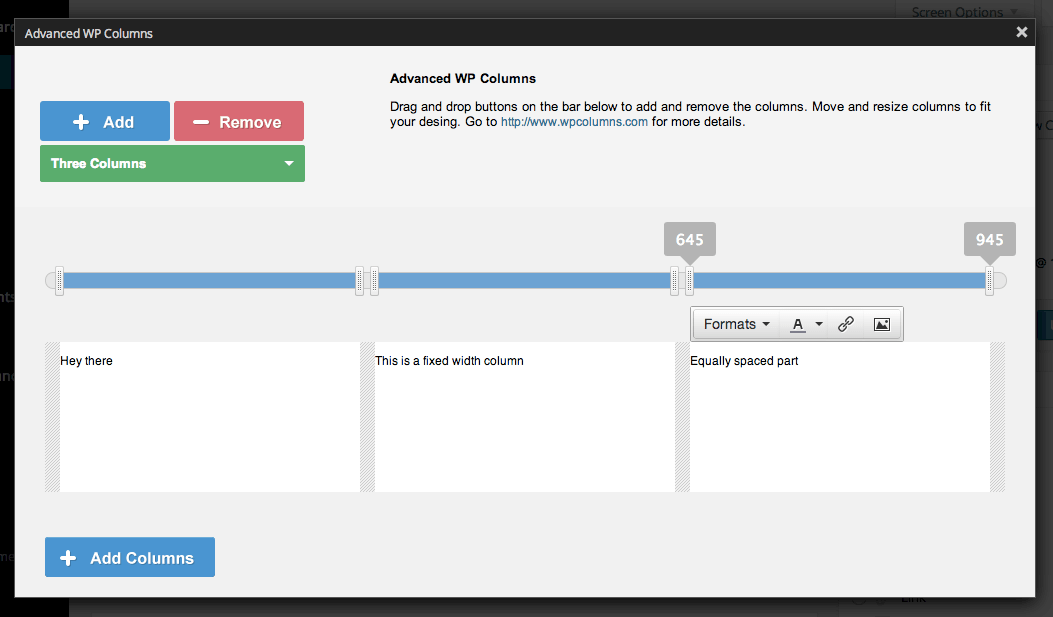
The column editor
Then, click on any column to add content. You can set basic formatting within the GUI, such as color, style options like bold and italic and header styles. You can also upload images from this window. Don’t worry about adding all of the content you might want, just add what you need to get started. You can add the rest later. Once you’ve finished adding content, click the “Add Columns” button at the bottom of the window to add them to your post. You will see that they are laid out in your post editor exactly how they will look on your site, organized into the column. You can edit them just as you would any other post, and add/delete any content you wish.
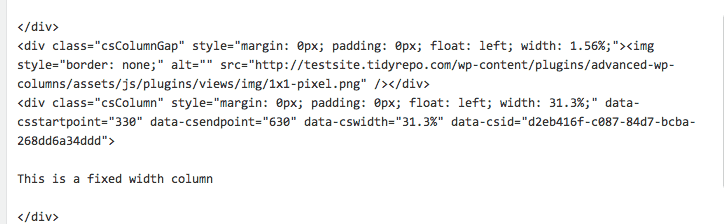
Output markup
If you want to edit the layout of the columns at any point just click on the Advanced WP Columns button again and drag the layout around again. Click “Add Columns” when you are finished to save these changes.
Costs, Caveats, Etc.
Advanced WP Columns is completely free and still getting started. It’s biggest feature addition so far has been making it responsive, and I’m sure there are more to come. If you are having any problems with the plugin, visit the support forums where the plugin developer will be more then happy to help you.